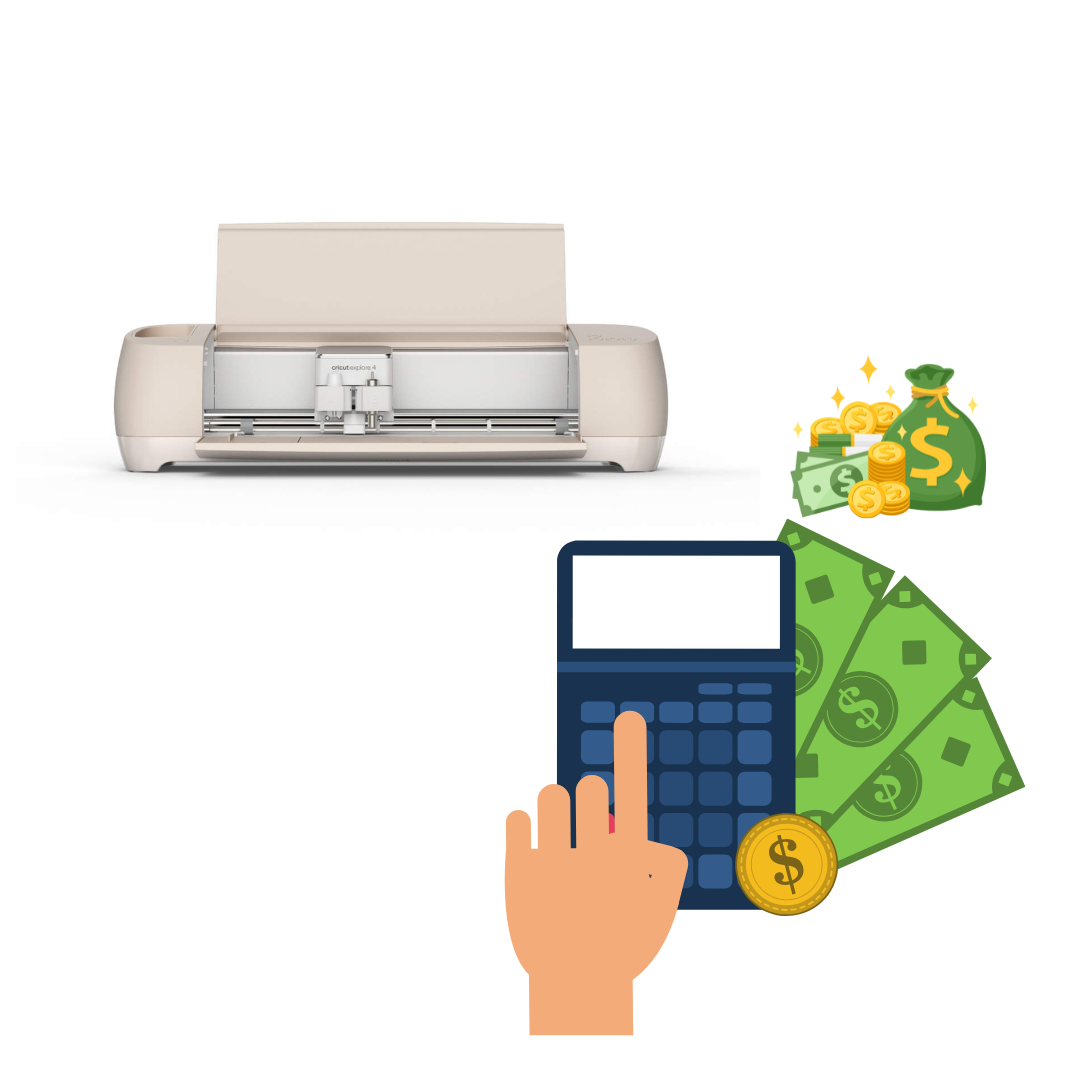
When you’re running a Cricut business, one of the most important aspects is determining the right price for your projects. Pricing too low can hurt your profits, while pricing too high may drive away customers. So, how do you find the perfect balance? The process of pricing your Cricut projects involves considering various factors such
If you love crafting with your Cricut, choosing the best adhesive vinyl for Cricut is essential for creating long-lasting and high-quality designs. Whether you're making custom tumblers, decals, or home decor, the right vinyl can make all the difference in durability and ease of application. *This article was generated partially with the assistance of ChatGPT,
If you own a Cricut machine, you might be wondering: Can you actually make money with Cricut? The short answer is yes! Many crafters have turned their Cricut skills into profitable businesses, selling handmade products online and at local events. *This article was generated partially with the assistance of ChatGPT, a large language model developed
If you’re looking to turn your Cricut hobby into a money-making business, choosing the right projects is key. With the increasing demand for personalized and handmade items, Cricut crafters have a huge opportunity to make a profit in 2025. But what are the most profitable Cricut projects to sell? *This article was generated partially with
If you’re struggling with your Cricut machine or want to improve your skills, Cricut 1-on-1 classes are the perfect solution. Whether you’re a beginner or an experienced crafter looking to refine your techniques, personalized instruction can help you master Cricut Design Space, troubleshoot common issues, and create stunning projects with confidence. Byrd, a Cricut expert,
If you're a Cricut business owner selling your handmade creations on Etsy, you know that standing out in a sea of sellers can be tough. To grow your shop and maximize profits, you need tools that help you understand what customers are searching for, what products are trending, and how to price your items competitively.
Crafting is a world filled with endless possibilities, but choosing the right materials and techniques can make or break your projects. One of the hot topics among crafters today is the comparison of UV DTF (Direct to Film) transfers and traditional adhesive vinyl. *This article was generated partially with the assistance of ChatGPT, a large
When it comes to customizing clothes, the debate between DTF (Direct-to-Film) and HTV (Heat Transfer Vinyl) often arises. While HTV has long been the go-to method for Cricut crafters and small businesses, DTF technology is rapidly gaining popularity for its efficiency and superior results. *This article was generated partially with the assistance of ChatGPT, a
A lot of people buy a Cricut machine so they can make and sell shirts. They think the process will bring in a lot of money in a short time, but there are 3 big reasons you shouldn’t use a Cricut to make and sell shirts. You must be a pro at using Cricut Design
You’ve made the decision that it’s time to set up a website for your Cricut business and you’re super anxious. Regardless if you’re setting up your own website or paying someone else to do it for you, these are the most important things you need to do before your website is even built. 1. Buy
When you’re running a Cricut business, one of the most important aspects is determining the right price for your projects. Pricing too low can hurt your profits, while pricing too high may drive away customers. So, how do you find the perfect balance? The process of pricing your Cricut projects involves considering various factors such as material costs, labor, time, and profit margins.
*This article was generated partially with the assistance of ChatGPT, a large language model developed by OpenAI.
In this article, we’ll dive into how you can effectively price your Cricut projects to ensure you’re earning what your work is worth. Whether you’re making custom t-shirts, tumblers, vinyl decals, or party decorations, this guide will help you establish a solid pricing strategy.
1. Calculate Material Costs
The first step in determining how to price your Cricut projects is calculating the cost of materials. This includes vinyl, transfer paper, cardstock, wood, or any other materials you’re using. Don’t forget to include the cost of adhesive vinyl, blank items (such as shirts or mugs), and any additional embellishments you’re adding.
To make this easier, you can use a Craft Pricing Calculator to input the cost of materials and calculate your expenses. This tool will give you an accurate idea of how much you’re spending on each project, allowing you to base your pricing strategy accordingly.
When pricing your Cricut projects, it’s essential to factor in the amount of time it takes to create them. This includes the design process, cutting, weeding, assembling, and packaging. Consider how much you want to earn per hour and multiply it by the amount of time you spend on each project.
For instance, if you want to make $20 an hour and a project takes 2 hours, your labor cost should be $40. This ensures that you’re not only covering material costs but also getting compensated for the time and effort you put into each project.
3. Consider Overhead Costs
Overhead costs are additional expenses that aren’t directly tied to your materials or labor but still affect your business. These include things like electricity, cutting machine maintenance, software subscriptions, and shipping supplies.
While these costs may seem small individually, they can add up over time. You can spread the cost of overhead across all your projects to ensure they’re factored into your overall pricing.
4. Add Your Profit Margin
After calculating material, labor, and overhead costs, you’ll want to add a profit margin. The profit margin is the amount you plan to earn after covering all your expenses. Typically, a good profit margin for Cricut projects is around 20-30%.
For example, if your total cost for a project is $50 (including materials, labor, and overhead), and you want to earn a 30% profit, you would multiply $50 by 1.3, which equals $65. So, you’d price that project at $65 to cover costs and make a profit.
If you’re fulfilling bulk orders, you’ll want to adjust your pricing. Bulk orders can reduce costs because you’re purchasing materials in larger quantities or producing multiple items at once, which can save time. Offering a discount for bulk orders can attract more customers while still maintaining profitability.
To simplify this process, use the Bulk Craft Pricing Calculator. This tool allows you to enter your bulk order details and determine the most profitable price for larger quantities.
6. Use a Pricing Spreadsheet
Once you’ve established your pricing structure, it’s important to stay organized. Tracking your material costs, labor, and pricing for each project can be a lot to handle manually. A Cricut Pricing Spreadsheet can help streamline this process.
This spreadsheet allows you to record all your project details, helping you track expenses, set prices, and adjust as needed. With everything in one place, it’s easier to see how your pricing strategy is performing and make adjustments to stay profitable.
7. Research Your Market
Another key aspect of pricing your Cricut projects is understanding your target market. Take time to research competitors, both locally and online, to see what similar products are selling for. This can give you a general idea of the market price range and help you position your pricing to remain competitive.
However, don’t undervalue your work by trying to match lower prices. If your designs are unique and of high quality, customers will be willing to pay a premium. It’s important to strike a balance between affordability and ensuring your hard work is compensated fairly.
Use Everbee to see which Cricut projects sell best.
Final Thoughts
Pricing your Cricut projects doesn’t have to be a guessing game. By calculating material costs, factoring in labor and time, considering overhead, and adding a profit margin, you can establish a pricing strategy that works for you. Don’t forget to use helpful tools like the Craft Pricing Calculator, Bulk Craft Pricing Calculator, and Cricut Pricing Spreadsheet to simplify the process and ensure your business remains profitable.
By doing your research and staying organized, you’ll have the confidence to price your Cricut projects effectively and make your business a success!
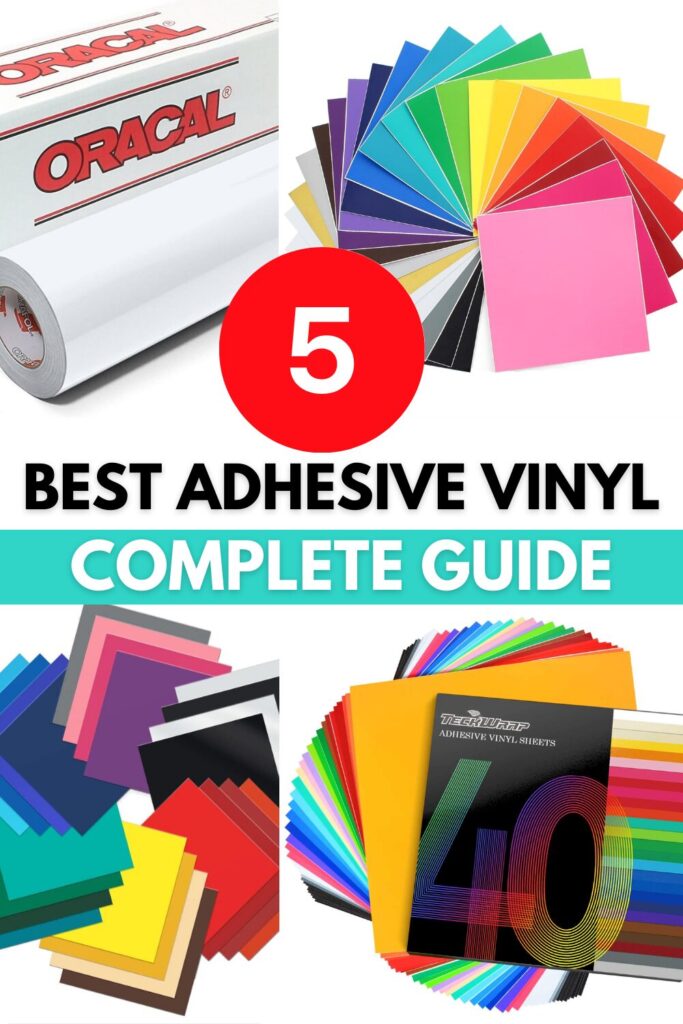
Best Adhesive Vinyl for Cricut: A Complete Guide
If you love crafting with your Cricut, choosing the best adhesive vinyl for Cricut is essential for creating long-lasting and high-quality designs. Whether you’re making custom tumblers, decals, or home decor, the right vinyl can make all the difference in durability and ease of application.
*This article was generated partially with the assistance of ChatGPT, a large language model developed by OpenAI.
In this guide, we’ll explore the best adhesive vinyl for Cricut projects, including permanent and removable options, so you can pick the right material for your crafting needs.
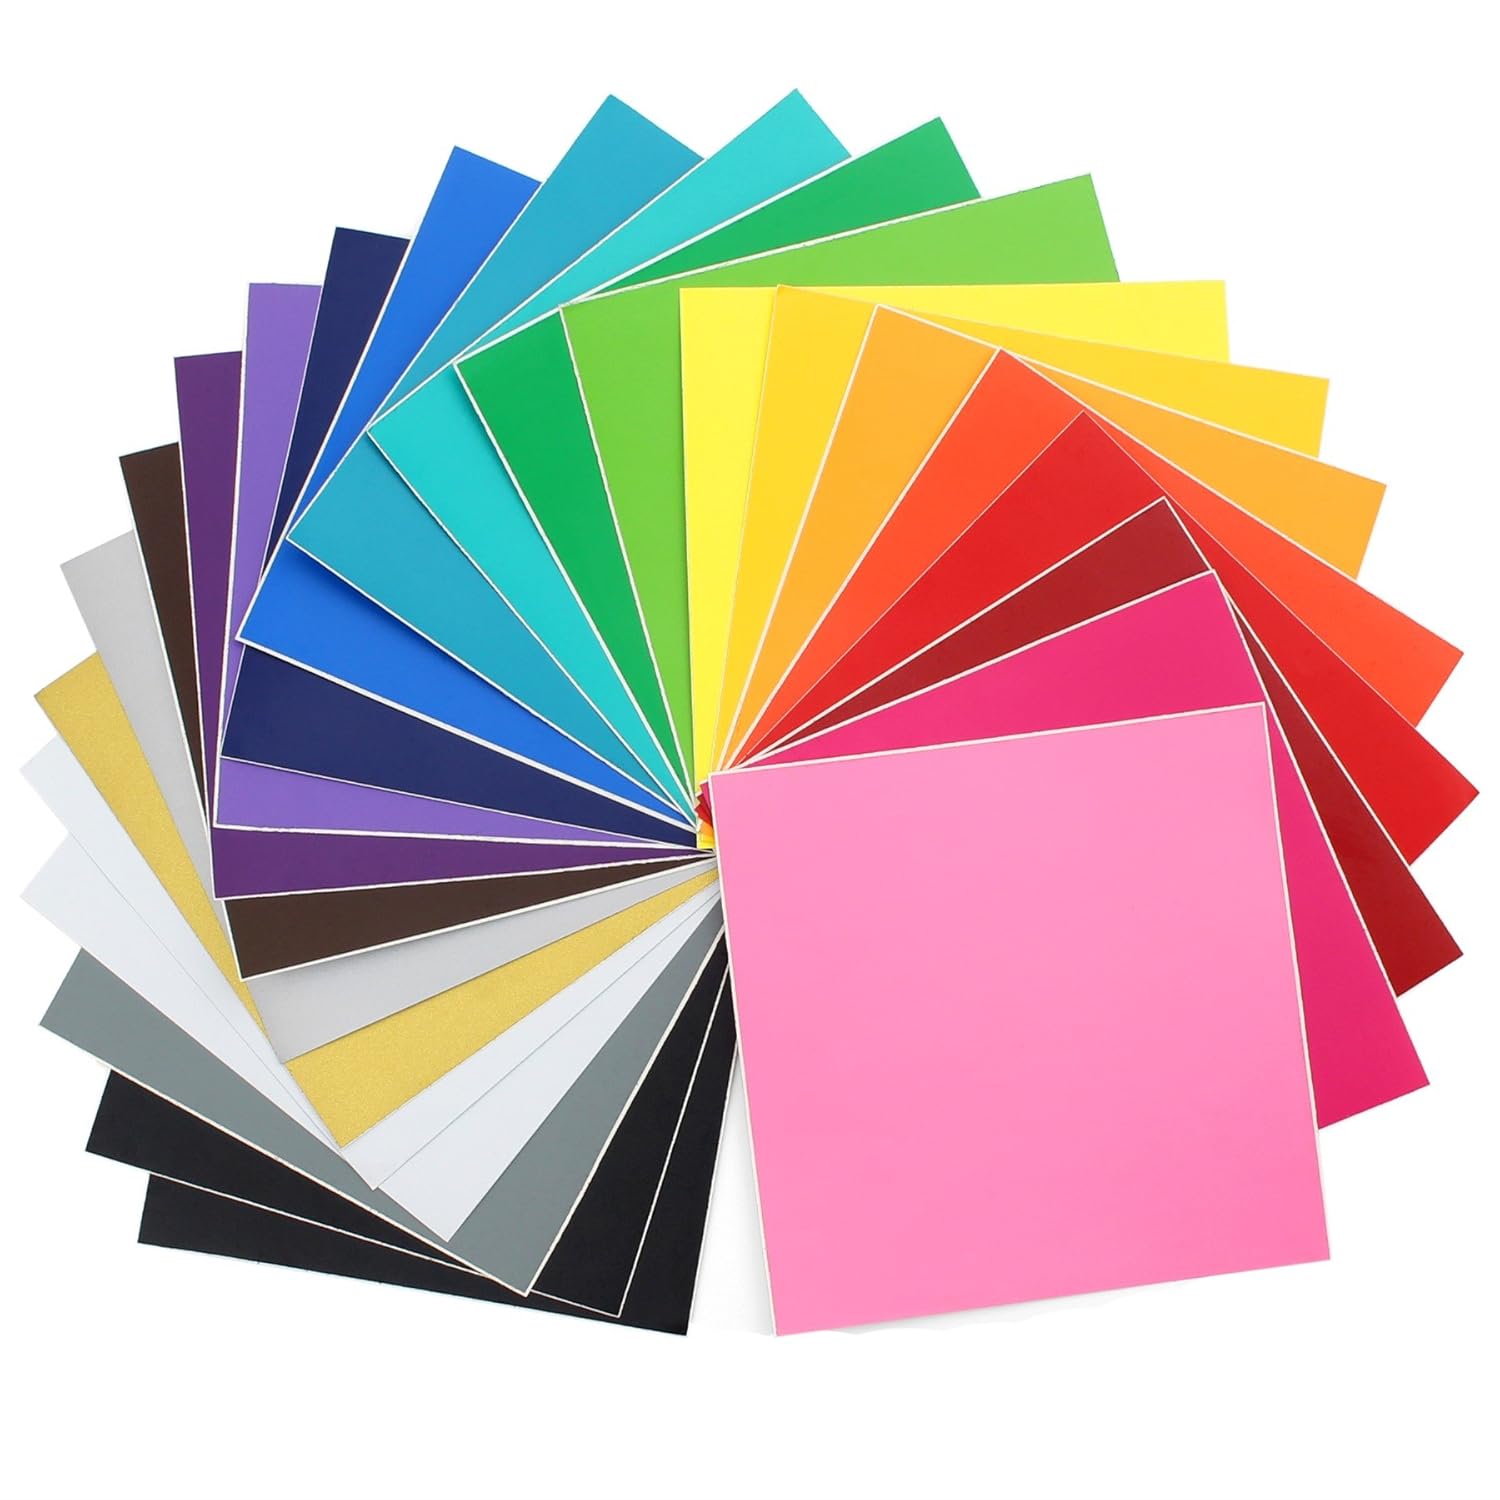
Types of Adhesive Vinyl for Cricut
Before diving into the best brands, it’s important to understand the two main types of adhesive vinyl:
Permanent Vinyl – Strong, waterproof, and long-lasting. Ideal for outdoor projects, drinkware, and car decals.
Removable Vinyl – Less sticky and easy to peel off without leaving residue. Perfect for wall decals, temporary labels, and seasonal decor.
Now, let’s look at the best adhesive vinyl for Cricut projects!
Why It’s the Best:
✔️ Extremely durable and weather-resistant
✔️ Works well on smooth and curved surfaces
✔️ Available in a variety of colors and finishes
Oracal 651 is the go-to choice for Cricut users who need strong, long-lasting vinyl. It’s great for tumblers, car decals, and outdoor signs. Once applied, it lasts up to six years, making it one of the most reliable options.
Why It’s the Best:
✔️ Designed for Cricut machines
✔️ Easy to weed and apply
✔️ Works well for indoor and outdoor use
Cricut’s permanent vinyl is perfect for beginners because it’s easy to cut, weed, and transfer. While it’s not as durable as Oracal 651, it still holds up well for everyday projects.
Why It’s the Best:
✔️ Matte finish for a professional look
✔️ Easy to remove without damage
✔️ Great for temporary projects
Oracal 631 is the best adhesive vinyl for Cricut when you need something temporary. It’s commonly used for wall decals and seasonal decorations because it peels off easily without leaving residue.
Why It’s the Best:
✔️ Smooth cutting and weeding
✔️ High-tack transfer tape included
✔️ Comes in a variety of specialty finishes
Siser EasyPSV is a top choice for crafters working with intricate designs. It’s easy to weed, making it ideal for detailed projects.
Best Uses:
Personalized gifts
Small lettering and intricate decals
DIY home decor
5. TeckWrap Vinyl – Best for Unique Colors and Specialty Finishes
Why It’s the Best: ✔️ Wide range of specialty finishes, including holographic, color-shifting, and glitter ✔️ High-quality adhesive for long-lasting application ✔️ Soft and flexible for easy cutting and weeding
TeckWrap vinyl is a favorite among Cricut users who want eye-catching designs. The brand is known for its holographic, chrome, and color-changing vinyl that adds a unique touch to projects.
Best Uses:
Custom tumblers and cups
Holographic decals for laptops and phone cases
Statement wall art
Final Thoughts: Choosing the Best Adhesive Vinyl for Cricut
The best adhesive vinyl for Cricut depends on your project. If you need something permanent, go with Oracal 651. For removable designs, Oracal 631 is your best bet. Cricut’s own vinyl is great for beginners, while Siser EasyPSV is perfect for detailed projects.
No matter what you create, choosing high-quality vinyl ensures your designs look great and last! 🚀
Can You Actually Make Money with Cricut?
If you own a Cricut machine, you might be wondering: Can you actually make money with Cricut? The short answer is yes! Many crafters have turned their Cricut skills into profitable businesses, selling handmade products online and at local events.
*This article was generated partially with the assistance of ChatGPT, a large language model developed by OpenAI.
Whether you’re looking for a side hustle or a full-time income, making money with Cricut is absolutely possible with the right approach. In this article, we’ll explore the best ways to make money with Cricut, popular products to sell, and tips for growing your Cricut business.
How to Make Money with Cricut
Your Cricut machine is a powerful tool that can cut vinyl, paper, fabric, and even leather. This versatility allows you to create a wide range of products to sell. Here’s how you can make money with Cricut:
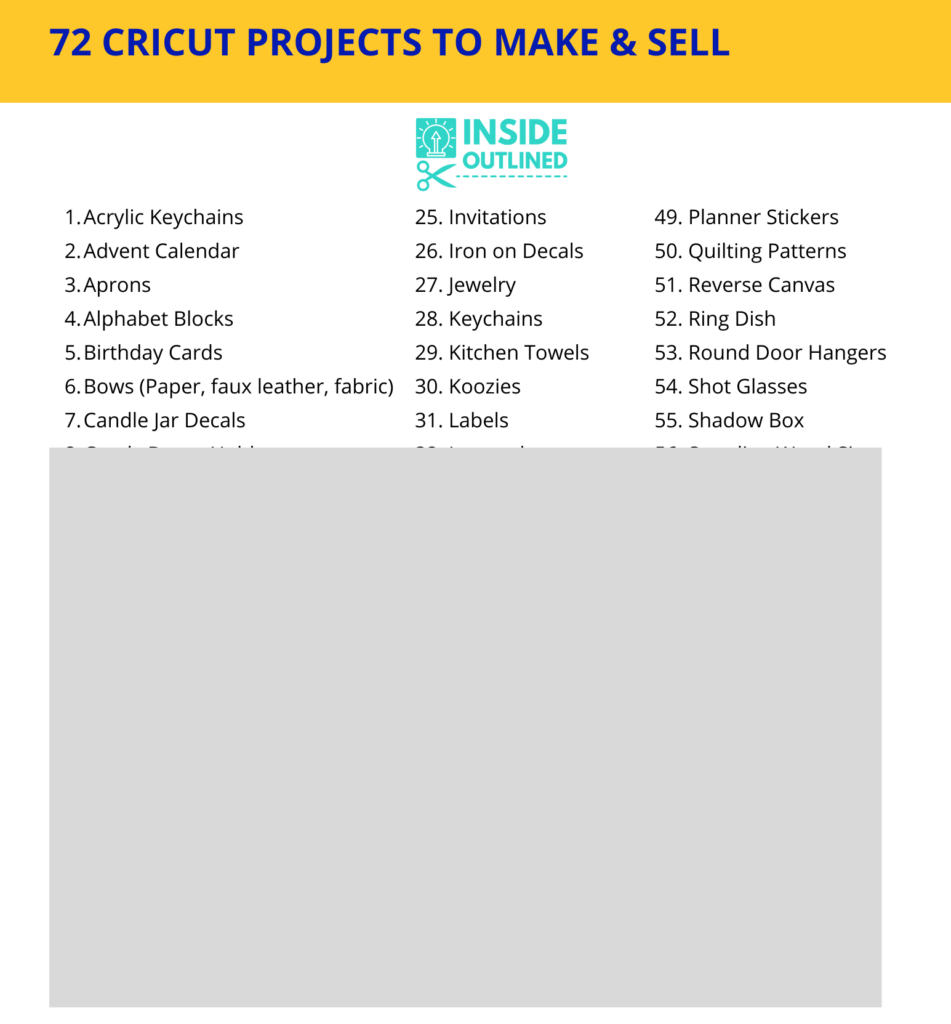
1. Sell Handmade Cricut Products
One of the easiest ways to start making money is by creating and selling custom Cricut projects. Some of the most profitable Cricut products include:
Selling on platforms like Etsy, Shopify, Facebook Marketplace, and craft fairs can help you reach a wider audience and build a loyal customer base.
2. Offer Custom Orders
Customers love personalized items, and a Cricut machine makes it easy to create custom designs. You can take orders for wedding decor, baby shower gifts, business logos on vinyl, and more. Offering custom orders allows you to charge higher prices since your products are unique and made-to-order.
3. Sell SVG Cut Files and Digital Downloads
If you’re good at designing, you can create and sell SVG cut files for other Cricut users. Many people prefer to buy pre-made designs rather than create their own from scratch. You can sell your digital downloads on platforms like Etsy, Creative Fabrica, and Design Bundles.
4. Teach Cricut Classes and Tutorials
If you’re experienced with Cricut, why not teach others? Many beginners are willing to pay for 1-on-1 Cricut classes, workshops, or online tutorials. You can offer private Cricut lessons in person or create digital courses and sell them online.
5. Start a Cricut YouTube Channel or Blog
Another way to make money with Cricut is by creating content that helps others learn. You can start a YouTube channel sharing Cricut tutorials, project ideas, and product reviews. Monetizing your channel through ads, sponsorships, and affiliate links can generate a steady income over time.
Pick a Niche – Focus on a specific type of product, like personalized gifts or event decor, to stand out in the market.
Price Your Items Correctly – Consider material costs, time, and competition when setting prices. Don’t undervalue your work!
Promote Your Business – Use Instagram, TikTok, Pinterest, and Facebook to showcase your work and attract customers.
Invest in Quality Materials – Using high-quality vinyl, transfer tape, and blanks ensures happy customers and repeat business.
Offer Fast Shipping and Great Customer Service – Providing a great customer experience will lead to positive reviews and word-of-mouth referrals.
Final Thoughts: Can You Actually Make Money with Cricut?
Yes, you can absolutely make money with Cricut if you take the right approach. Whether you sell handmade products, digital designs, or teach Cricut skills, there are many ways to turn your crafting hobby into a business.
The key to success is consistency, creativity, and marketing. If you’re passionate about crafting and willing to put in the effort, your Cricut machine can help you build a profitable side hustle or even a full-time business! 🚀
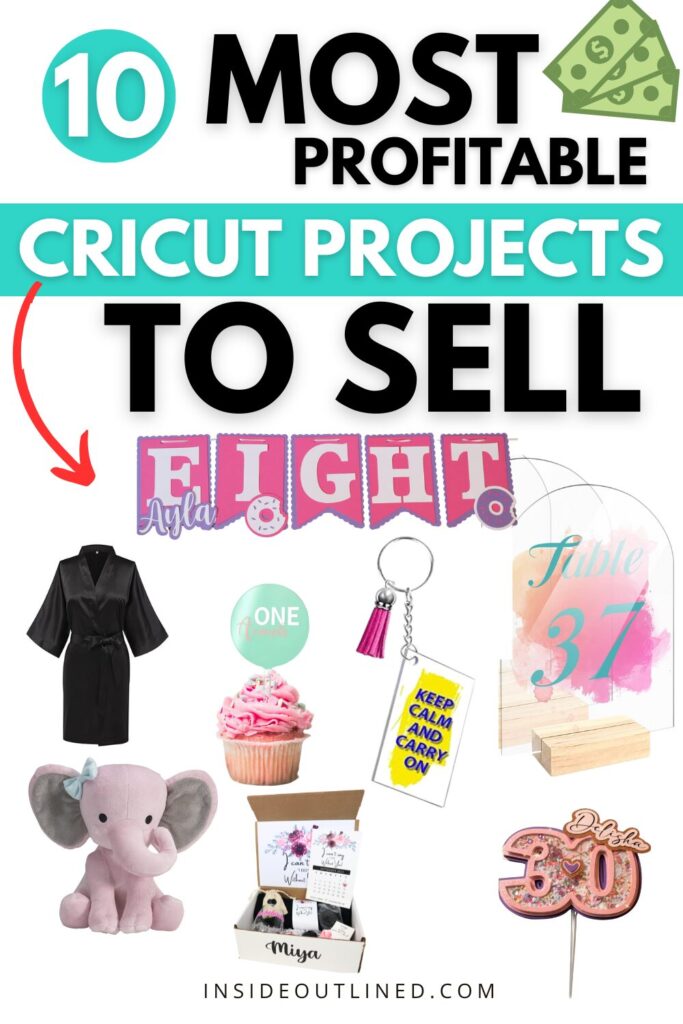
Most Profitable Cricut Projects to Sell in 2025
If you’re looking to turn your Cricut hobby into a money-making business, choosing the right projects is key. With the increasing demand for personalized and handmade items, Cricut crafters have a huge opportunity to make a profit in 2025. But what are the most profitable Cricut projects to sell?
*This article was generated partially with the assistance of ChatGPT, a large language model developed by OpenAI.
In this guide, we’ll cover the top trending Cricut projects that are in high demand, easy to make, and offer great profit margins. Whether you’re selling on Etsy, Shopify, at craft fairs, or through social media, these projects can help you build a successful Cricut business.
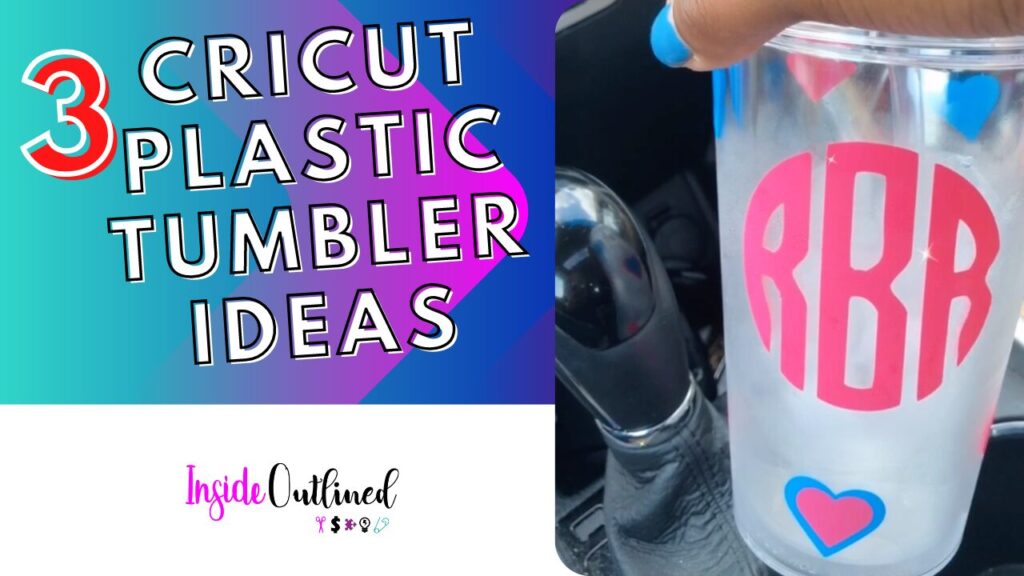
1. Customized Tumblers and Mugs
Personalized tumblers and mugs continue to be some of the most profitable Cricut projects. Customers love custom drinkware with names, funny quotes, or unique designs.
Why They’re Profitable:
✔️ Low-cost materials (blank tumblers, mugs, and vinyl)
✔️ High demand for personalized gifts
✔️ Can be sold at a high markup ($20-$40 per item)
Pro Tip:
Use high-quality permanent vinyl or sublimation for long-lasting designs.
Offer bulk discounts for weddings, birthdays, and corporate gifts.
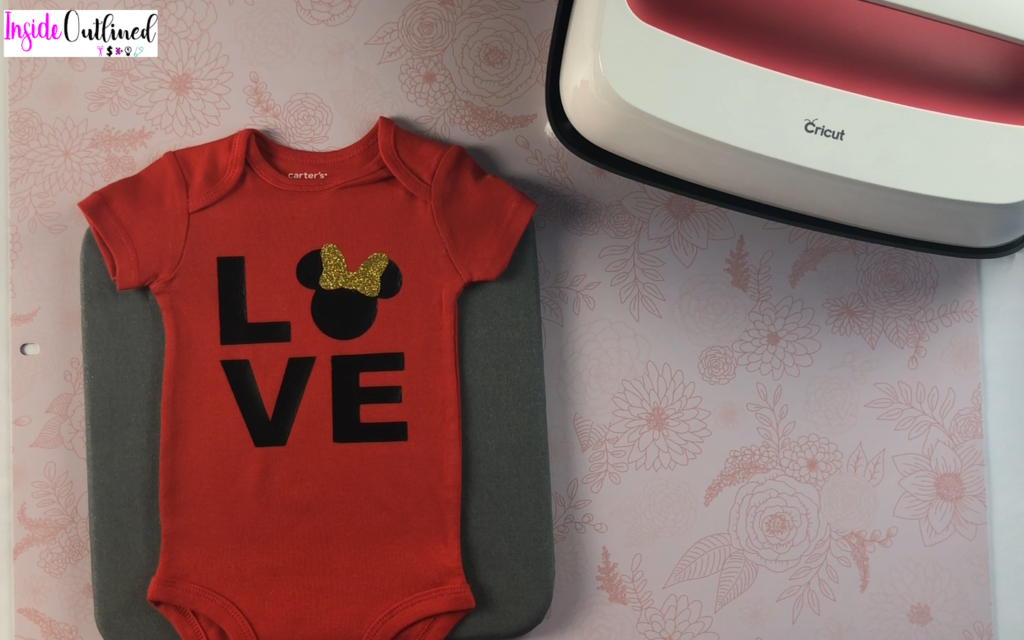
2. T-Shirts and Apparel
Custom t-shirts, hoodies, and baby onesies are always in demand. With a Cricut and heat transfer vinyl (HTV) or sublimation, you can create trendy apparel that sells well online.
Why They’re Profitable:
✔️ Apparel has a wide audience (small businesses, sports teams, events, etc.)
✔️ High markup potential (costs $5-$10, sells for $20-$50)
✔️ Endless design possibilities
Niche down! Focus on pet lovers, moms, teachers, or funny quotes to stand out.
Use a heat press for professional-quality designs.
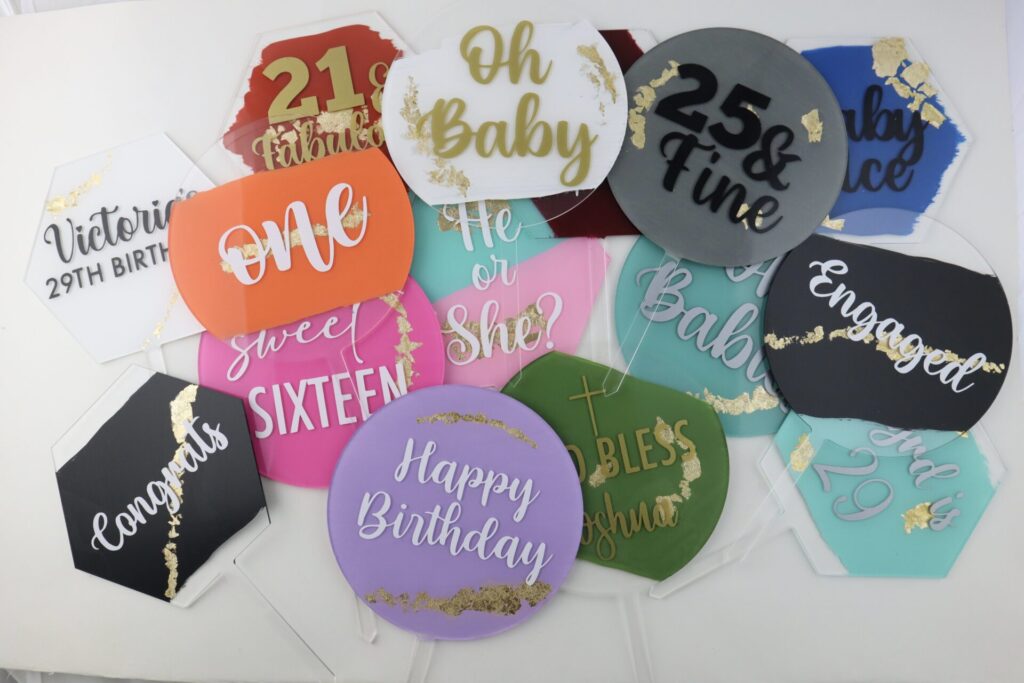
3. Custom Acrylic Signs and Keychains
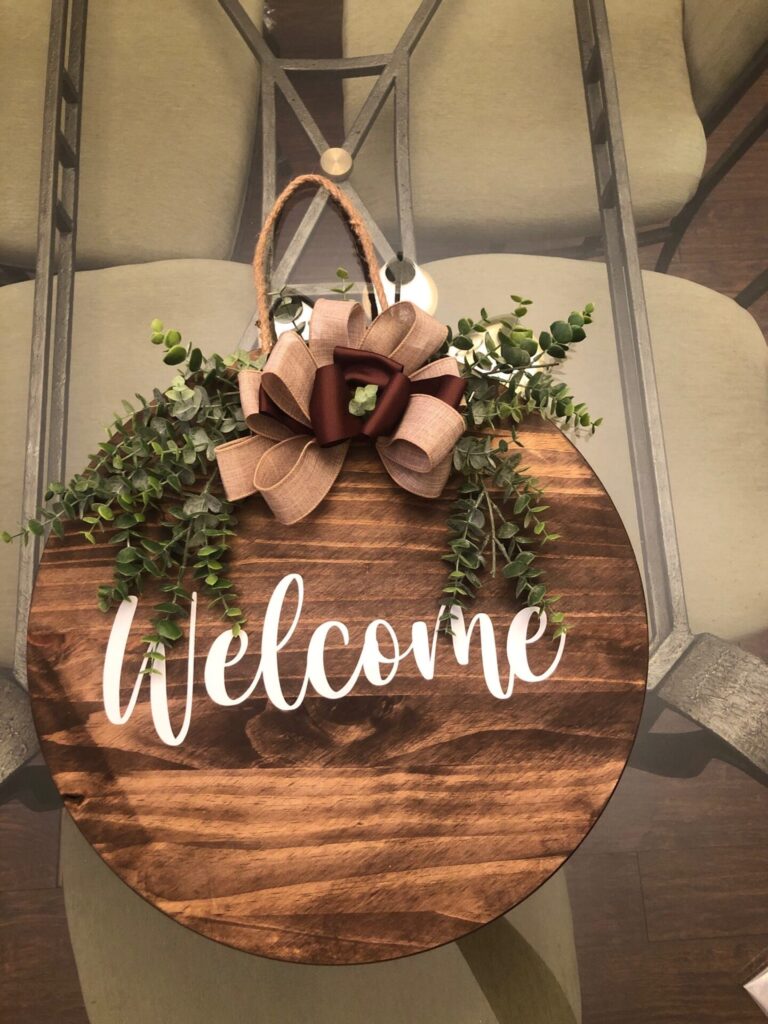
Acrylic products are trending in the Cricut crafting world. From wedding welcome signs, and cake toppers, to cute keychains, these are some of the most profitable Cricut projects for 2025.
Why They’re Profitable:
✔️ Acrylic blanks are inexpensive but look high-end
✔️ Perfect for events, businesses, and gifts
✔️ Small and easy to ship
Pro Tip:
Use UV resin to seal keychains for a professional finish.
Offer custom acrylic business signs for entrepreneurs.
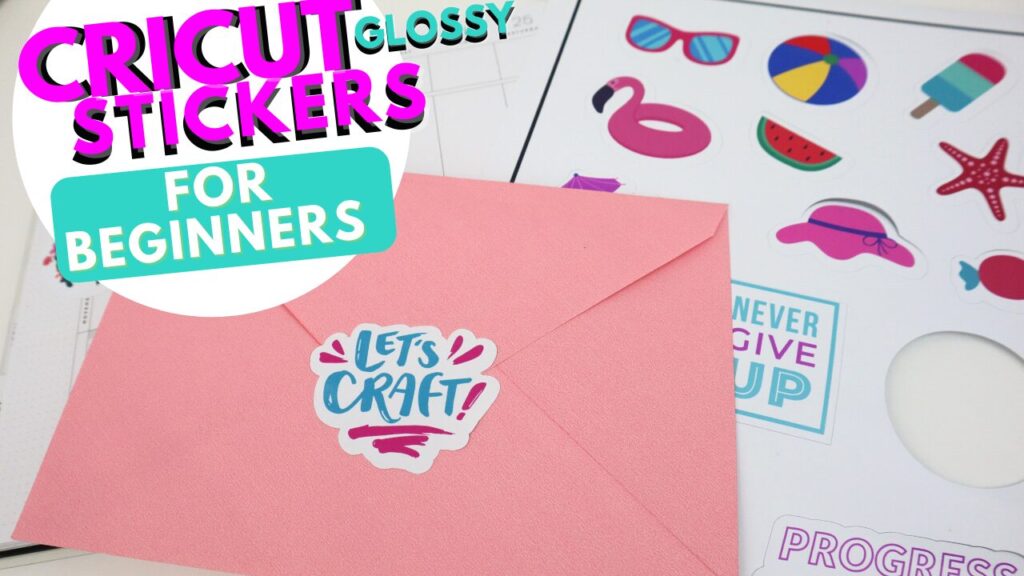
4. Sticker Sheets and Decals
Cricut users can make high-quality stickers and decals with printable vinyl or sticker paper. These items sell well on Etsy and are easy to package and ship.
Why They’re Profitable:
✔️ Low material costs
✔️ High demand for planners, laptops, water bottles, and cars
✔️ Recurring customers (especially for planner stickers)
Pro Tip:
Sell digital downloads for DIY sticker makers.
Offer sticker subscriptions for monthly sales.
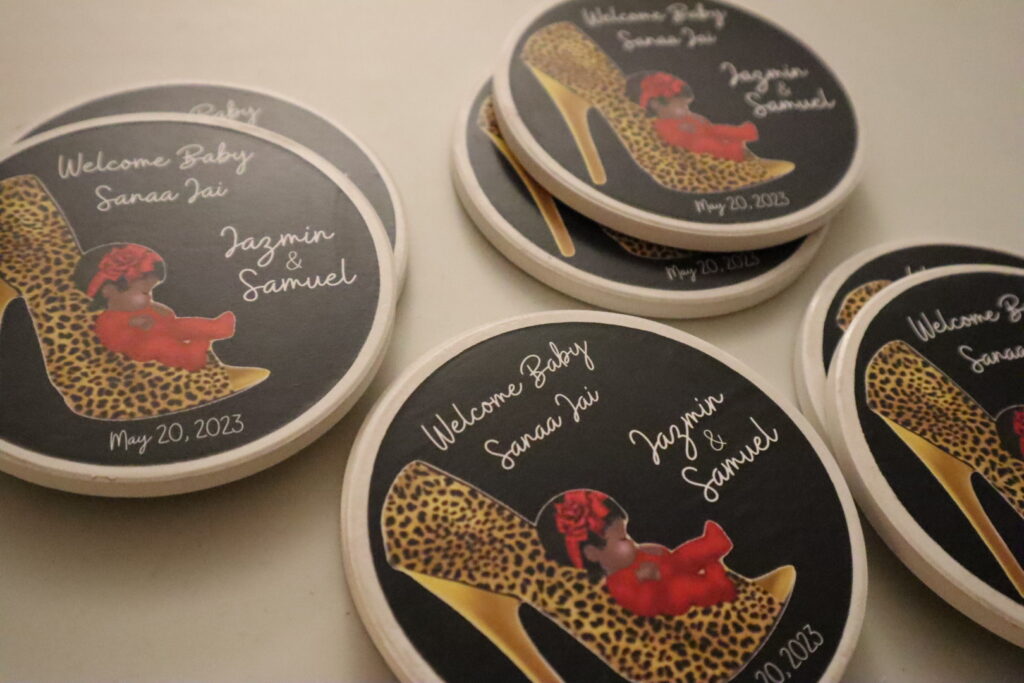
5. Personalized Party Decorations
Party decor is a booming industry, making it one of the best Cricut projects to sell. People love unique decorations for birthdays, weddings, baby showers, and more.
Why They’re Profitable:
✔️ High demand for custom banners, cake toppers, and invitations
✔️ Low-cost materials (cardstock, vinyl)
✔️ Can be sold in bundles for more profit
✔️ People are willing to pay premium prices for home decor
✔️ Easy to customize for different seasons and holidays
✔️ Works great for local markets and craft fairs
Pro Tip:
Use heat transfer vinyl for fabric decor like pillows.
Offer monogrammed designs for a premium look.
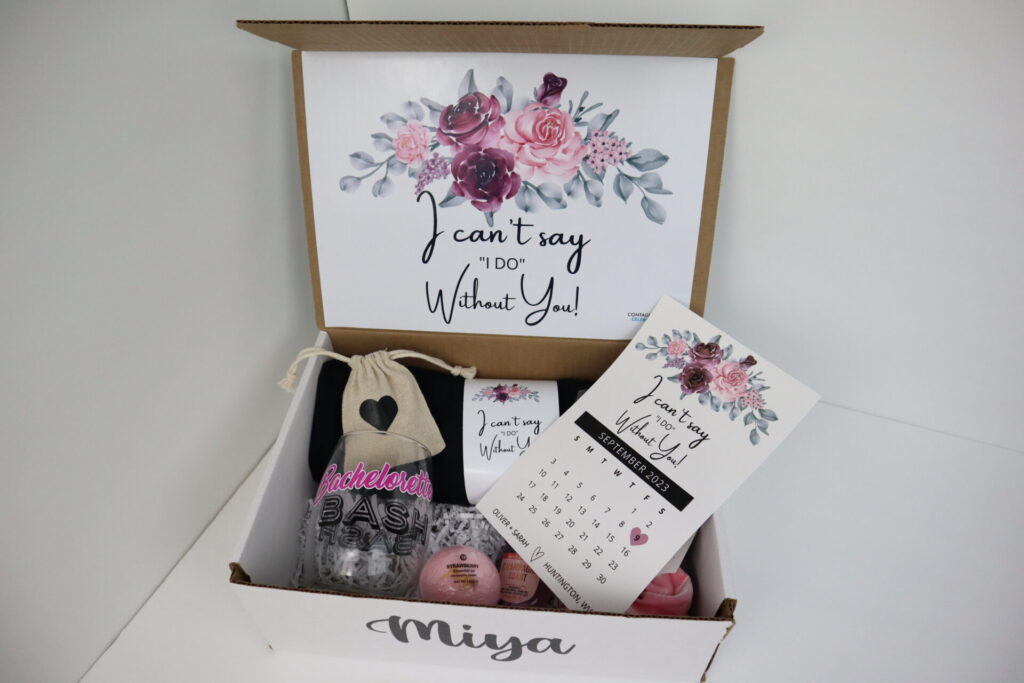
7. Wedding and Bridal Gifts
The wedding industry is HUGE, and Cricut crafters can make a lot of money selling bridesmaid proposal boxes, personalized robes, ring boxes, and cake toppers.
Why They’re Profitable:
✔️ Couples are willing to spend more on weddings
✔️ Great for bulk orders (bridesmaids, groomsmen, etc.)
✔️ Unique, custom-made items stand out
Pro Tip:
Offer matching sets (robes, tumblers, tote bags) for bridal parties.
Market on Pinterest, where brides look for inspiration.
8. Baby and Nursery Items
New parents love personalized baby items like name signs, milestone markers, and birth announcement plaques.
Why They’re Profitable:
✔️ Parents love custom baby gifts
✔️ Small items are easy to ship
✔️ Perfect for Etsy and baby boutiques
Pro Tip:
Offer personalized baby blankets with heat transfer vinyl.
Sell milestone card sets for baby photoshoots.
9. Subscription Boxes & DIY Craft Kits
Selling monthly craft kits or Cricut project boxes is a growing trend in 2025. These kits include materials and instructions, allowing customers to create projects at home.
Why They’re Profitable:
✔️ Recurring income (subscription model)
✔️ Great for beginner crafters
✔️ Can be priced higher due to included materials
Pro Tip:
Create seasonal or holiday-themed kits.
Market to Cricut beginners who need easy projects.
10. Digital Files & SVG Cut Files
If you love designing, selling SVG cut files is one of the easiest ways to make passive income with Cricut.
Why They’re Profitable:
✔️ No material or shipping costs
✔️ Customers can buy and download instantly
✔️ Unlimited sales with one design
Pro Tip:
Sell bundles of 10+ designs for better value.
Create SVGs for specific niches (teacher gifts, pet lovers, holidays).
Final Thoughts: Start Selling the Most Profitable Cricut Projects in 2025!
If you want to turn your Cricut machine into a money-making business, focus on the most profitable Cricut projects with high demand and great profit margins. Personalized tumblers, apparel, stickers, and home decor are just a few of the top-selling items for 2025.
Find your niche, price your products right, and use social media to market your creations. With the right strategy, your Cricut business can be a big success!
If you’re struggling with your Cricut machine or want to improve your skills, Cricut 1-on-1 classes are the perfect solution. Whether you’re a beginner or an experienced crafter looking to refine your techniques, personalized instruction can help you master Cricut Design Space, troubleshoot common issues, and create stunning projects with confidence.
Byrd, a Cricut expert, offers customized Cricut 1-on-1 classes to help you achieve your crafting goals. These private Cricut tutorials range from 30 minutes to 2 hours, allowing you to get the guidance you need at your own pace.
Why Take Cricut 1-on-1 Classes?
While there are plenty of free Cricut tutorials available online, nothing compares to a personalized session tailored to your specific questions and projects. With Cricut 1-on-1 classes, you get:
Customized Instruction – Focus on the features and skills you need help with.
Live Troubleshooting – Get immediate solutions to your Cricut challenges.
Hands-On Learning – Work on your own Cricut projects with expert guidance.
Time Flexibility – Choose a session length that fits your schedule and learning pace.
Every Cricut user has different needs, so these private tutorials are tailored to your specific questions. Here are some common topics covered in Cricut 1-on-1 classes:
1. Getting Started with Cricut
Setting up your Cricut machine
Understanding Cricut Design Space
Choosing the right materials and tools
2. Mastering Design Space
Uploading and editing SVG files
Working with text, images, and layers
Using Attach, Weld, and Contour functions
3. Cutting & Weeding Techniques
Selecting the correct cut settings for different materials
Avoiding tearing and misalignment issues
Best practices for weeding vinyl and iron-on designs
4. Applying Vinyl, HTV & Sublimation
How to properly apply adhesive vinyl to different surfaces
Using heat transfer vinyl (HTV) on fabric
Sublimation basics and how to use your Cricut for sublimation projects
5. Cricut Business Tips
How to price and sell your Cricut crafts
Finding trending project ideas
Using social media to market your creations
Want to focus on a specific project? Book a Cricut 1-on-1 class and get personalized help today!
How to Book a Cricut 1-on-1 Class
Signing up for Cricut 1-on-1 classes is quick and easy. Simply choose the session length that works best for you:
30-Minute Session – Quick troubleshooting and basic guidance
1-Hour Session – A deep dive into specific Cricut features
2-Hour Session – Comprehensive Cricut training from start to finish
Once you book, you’ll receive all the details to prepare for your private Cricut tutorial.
Final Thoughts
Whether you’re brand new to Cricut or want to take your crafting to the next level, Cricut 1-on-1 classes provide expert guidance tailored to your needs. With personalized lessons from Byrd, you’ll gain the skills and confidence to create beautiful, professional-quality Cricut projects.
Don’t waste time struggling with Cricut Design Space or troubleshooting cutting errors alone. Get the help you need with a private Cricut tutorial today!
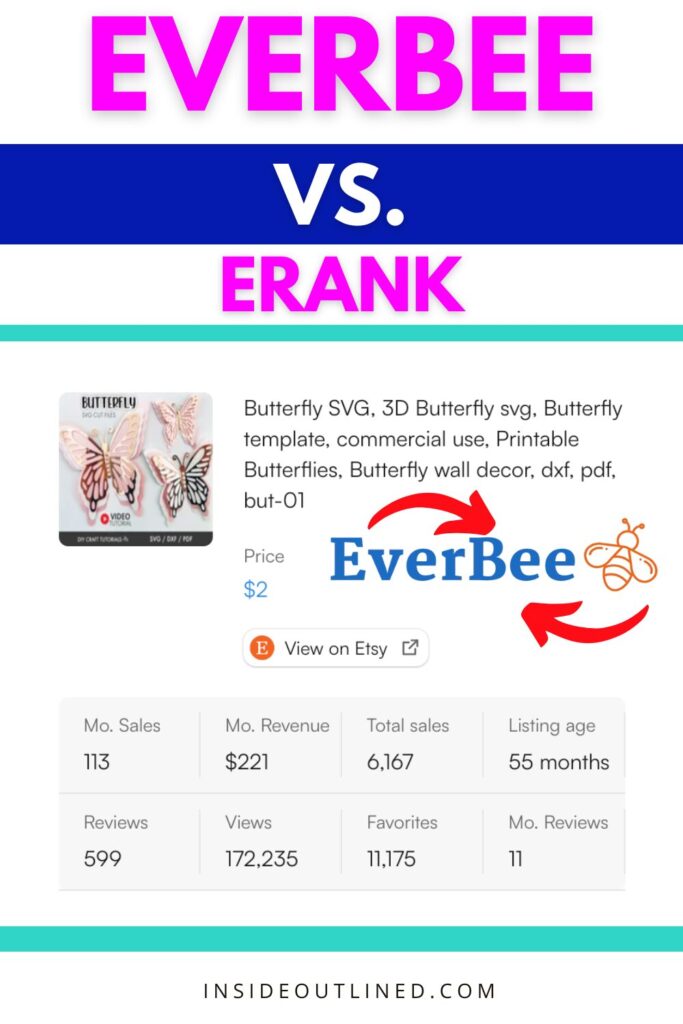
Everbee vs. eRank: Why Cricut Business Owners Should Use Everbee to Make More Money
If you’re a Cricut business owner selling your handmade creations on Etsy, you know that standing out in a sea of sellers can be tough. To grow your shop and maximize profits, you need tools that help you understand what customers are searching for, what products are trending, and how to price your items competitively.
*This article was generated partially with the assistance of ChatGPT, a large language model developed by OpenAI.
Two popular tools for Etsy SEO and analytics are Everbee and eRank, but which one is better? In this comparison of Everbee vs. eRank, we’ll break down why Everbee might just be the game-changer you need to take your Cricut business to the next level.
What Are Everbee and eRank?
Both Everbee and eRank are tools designed to help Etsy sellers research keywords, analyze competitors, and optimize their listings. They provide insights into search volume, top-performing listings, and market trends.
However, they differ in functionality, user experience, and how actionable their insights are.
eRank has been around for a while and offers keyword research, listing audits, and trend tracking. It’s a solid platform, but many users find it overwhelming due to its extensive data and less intuitive interface.
For Cricut business owners juggling multiple tasks, sifting through eRank’s detailed reports can feel time-consuming.
On the other hand, Everbee simplifies the process with a clean, easy-to-use interface and highly actionable insights. It focuses on helping you identify profitable products quickly, which is ideal for busy Cricut sellers who want results without being overwhelmed.
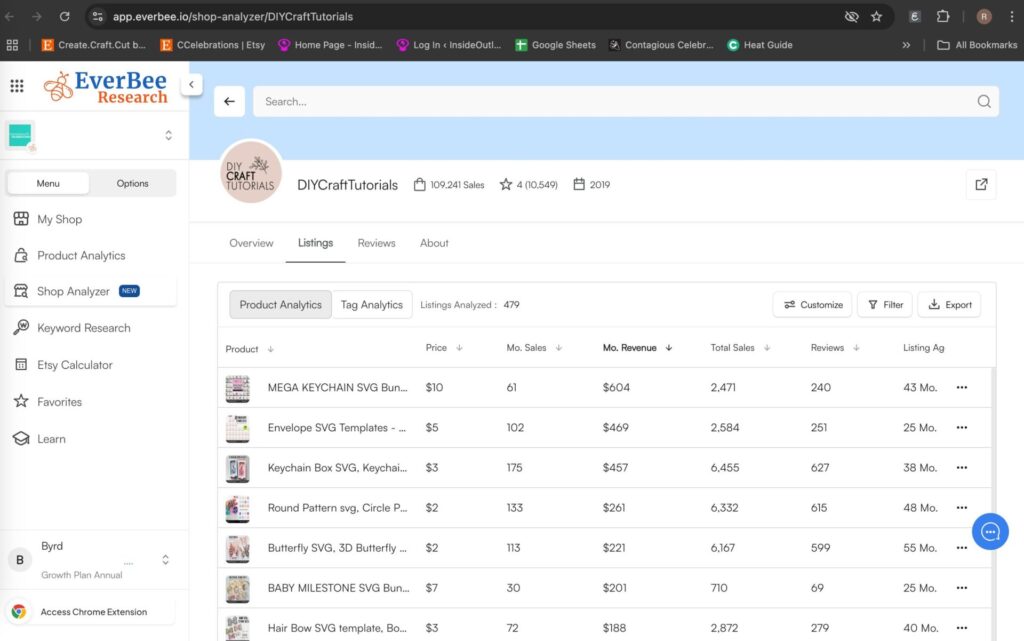
Find Winning Products Faster One of Everbee’s standout features is its Product Research tool. With just a click, you can analyze the sales performance of any listing on Etsy.
For Cricut sellers, this means you can quickly discover what types of stickers, custom shirts, mugs, or party favors are selling well. Instead of guessing what to make next, Everbee helps you focus on creating products that customers are already buying.For example, if you’re unsure whether wedding-themed tumblers or teacher gifts will perform better, Everbee’s data shows you which items have higher demand, helping you make informed decisions.
User-Friendly and Time-Saving Unlike eRank, which can feel like information overload, Everbee is designed for simplicity. Its intuitive layout provides insights in a way that’s easy to understand, even if you’re new to Etsy SEO.
You don’t have to spend hours studying complex reports—Everbee puts the most important data front and center so you can act on it immediately.Time is money, especially for Cricut entrepreneurs managing production, orders, and customer service. Everbee saves you valuable hours that you can reinvest into growing your business.
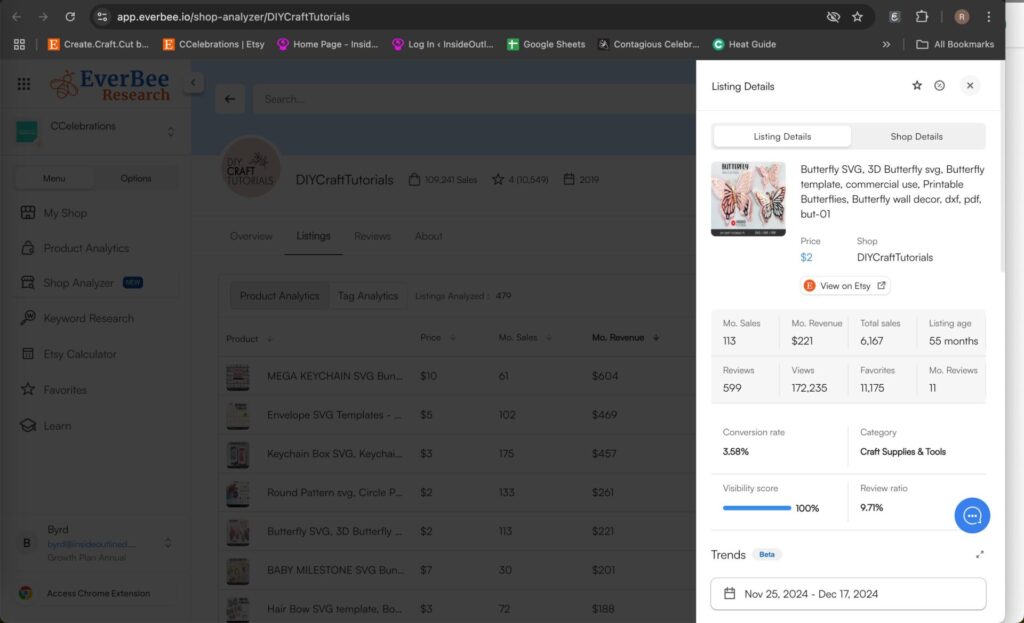
Accurate and Actionable InsightsEverbee’s keyword analysis and revenue estimation tools are highly accurate, helping you uncover profitable keywords and identify top-selling products in your niche.
Whether you’re selling custom decals, tote bags, or cake toppers, Everbee shows you the keywords customers use to find these items, allowing you to optimize your listings for maximum visibility.
Affordable and Scalable For Cricut business owners just starting out, Everbee offers a free plan that includes essential features like product research and keyword analysis. As your business grows, you can upgrade to one of their affordable premium plans for even more insights and tools.
I also recommend that sellers subscribe to the Everbee Growth Plan for a few months, to get their Etsy shops up and running, and then they can unsubscribe.
To learn more and get started for free, click here.
Final Thoughts: Everbee vs. eRank
While both Everbee and eRank are powerful tools, Everbee stands out for its ease of use, actionable insights, and ability to help Cricut business owners find winning products quickly.
If you want to make more money on Etsy without the stress of analyzing overwhelming data, Everbee is the better choice.
By focusing on trends and products that are already in demand, you can streamline your workflow, attract more customers, and boost your profits. Don’t waste time guessing what to create—let Everbee show you the way.
Start growing your Cricut business today with Everbee.
UV DTF vs Vinyl: Why UV DTF Transfers Are the Better Choice for Your Crafting Needs
Crafting is a world filled with endless possibilities, but choosing the right materials and techniques can make or break your projects. One of the hot topics among crafters today is the comparison of UV DTF (Direct to Film) transfers and traditional adhesive vinyl.
*This article was generated partially with the assistance of ChatGPT, a large language model developed by OpenAI.
Both have their uses, but UV DTF transfers are rapidly gaining popularity due to their ease of use, superior quality, and versatility.
In this article, we’ll explore why UV DTF transfers are much easier and better than adhesive vinyl for most crafting applications.
What Is UV DTF?
UV DTF is a relatively new technology that allows full-color designs to be printed onto a clear film and then transferred onto various surfaces using adhesive.
The process involves UV printing, which uses ultraviolet light to cure ink instantly, creating vibrant, durable designs. This method bypasses the need for cutting, weeding, and layering, making it an excellent alternative to adhesive vinyl.
Why UV DTF Is Easier to Use
1. No Weeding Required
One of the most time-consuming and frustrating aspects of working with adhesive vinyl is weeding. This process involves removing excess vinyl around your design, which can be tedious, especially for intricate patterns.
UV DTF transfers eliminate this step entirely. Once printed, the design is ready to transfer without any additional preparation, saving you hours of work.
Applying adhesive vinyl often requires meticulous alignment, transfer tape, and a steady hand to avoid bubbles and wrinkles. With UV DTF, the transfer process is much simpler. The adhesive backing ensures the design sticks securely to the surface, and the clear film allows for precise placement. There’s no need for transfer tape or advanced skills, making it beginner-friendly.
3. Fewer Tools Required
Using adhesive vinyl typically requires a cutting machine such as a Cricut, weeding tools, and transfer tape.
In contrast, UV DTF transfers don’t require specialized equipment. Designs are printed and cured, and you can transfer them using nothing more than pressure and sometimes heat. This accessibility makes UV DTF an excellent choice for crafters without a Cricut or Silhouette machine.
Why UV DTF Is Better Than Vinyl
1. Full-Color and Intricate Designs
Adhesive vinyl is often limited to solid colors or requires layering for multi-color designs, which can be time-intensive and prone to errors. UV DTF allows for full-color, high-resolution printing in a single layer. You can create intricate designs, gradients, and photo-quality images effortlessly.
2. Works on a Wider Range of Surfaces
While adhesive vinyl adheres well to smooth, flat surfaces like glass, plastic, and metal, its performance can vary on curved or textured surfaces. UV DTF transfers are more versatile, adhering to a broader range of materials, including wood, ceramics, and even fabric. This flexibility opens up endless possibilities for customization projects.
3. Durability and Longevity
Adhesive vinyl is prone to peeling, fading, and cracking over time, especially when exposed to outdoor elements. UV DTF transfers, on the other hand, are incredibly durable. The UV-curing process creates a waterproof, scratch-resistant finish that holds up against weather, washing, and wear. This makes UV DTF ideal for long-lasting projects like outdoor signs or frequently used items.
4. Professional-Quality Results
UV DTF delivers a polished, professional look that’s difficult to achieve with vinyl. The vibrant colors and seamless application elevate the quality of your projects, making them more appealing to customers or gift recipients.
UV DTFs can be cheaper than buying rolls of adhesive vinyl. You simply upload your design online and order the quantity you want. Adhesive vinyl may seem cheaper initially, but when you factor in the cost of tools, transfer tape, and the time spent on weeding and layering, UV DTF becomes a cost-effective solution in the long run.
When to Choose UV DTF Over Vinyl
Intricate or Multi-Color Designs:UV DTF simplifies the process of creating detailed, colorful designs.
Durable Projects: For items exposed to wear and tear, UV DTF provides a longer-lasting finish.
Unusual Surfaces: UV DTF adheres well to surfaces that vinyl struggles with, such as curved or textured materials.
Quick Turnaround: If you’re short on time, UV DTF eliminates several steps, speeding up production.
Final Thoughts
When comparing UV DTF vs vinyl, UV DTF clearly comes out ahead in terms of ease of use, versatility, and quality. It eliminates the hassle of weeding, simplifies the application process, and delivers stunning, professional results that last.
Whether you’re a seasoned crafter or just starting out, UV DTF transfers can revolutionize your crafting experience and help you create projects with ease and confidence.
So, next time you’re planning a crafting project, consider giving UV DTF a try. It might just become your new favorite technique!
DTF vs. HTV: Why Direct-to-Film is Easier and Better for Customizing Clothes
When it comes to customizing clothes, the debate between DTF (Direct-to-Film) and HTV (Heat Transfer Vinyl) often arises. While HTV has long been the go-to method for Cricut crafters and small businesses, DTF technology is rapidly gaining popularity for its efficiency and superior results.
*This article was generated partially with the assistance of ChatGPT, a large language model developed by OpenAI.
In this article, we’ll explore why DTF is easier and better than HTV, highlighting the key differences, benefits, and scenarios where each method works best.
What Is DTF (Direct-to-Film)?
DTF is a printing method where designs are printed onto a special film using a DTF printer. The design is then coated with an adhesive powder and cured.
Once ready, the film is transferred onto fabric using a heat press. DTF works on a variety of materials, including cotton, polyester, and blends, making it a versatile option for clothes customization.
What Is HTV (Heat Transfer Vinyl)?
HTV involves cutting designs from sheets of heat transfer vinyl using a Cricut or other vinyl cutter. These designs are then weeded to remove excess material and pressed onto fabric using heat and pressure.
HTV is available in a range of colors, finishes, and patterns, but the process can be time-consuming and require a lot of your labor.
DTF: With DTF, there’s no need to weed intricate designs. The printing and adhesive application process creates a ready-to-use transfer. This eliminates the tedious and time-consuming step of manually weeding HTV.
HTV: The weeding process for HTV can be challenging, especially for complex or small designs. It often requires a weeder and can significantly slow down how fast you make your shirts or other HTV projects.
If you’re creating bulk orders or detailed designs, DTF is the clear winner in terms of working smarter, not harder.
2. Versatility Across Fabrics
DTF: Works seamlessly on a wide range of materials, including cotton, polyester, nylon, and even leather. This versatility allows crafters and businesses to expand their product offerings without needing different materials or techniques.
HTV: While HTV works well on cotton and polyester, it struggles with fabrics like nylon or blends, limiting its usability.
DTF opens the door to creating custom designs on items like backpacks, shoes, and jackets, where HTV might fall short.
3. Durability and Washability
DTF: Produces vibrant, long-lasting prints that can withstand multiple washes without cracking, peeling, or fading. The adhesive layer bonds well with fabric, ensuring the design remains intact over time.
HTV: While durable, HTV can sometimes peel or crack after repeated washes, particularly if not applied correctly. The vinyl’s surface can also lose its finish over time.
For customers who prioritize longevity, DTF provides a more professional and reliable result.
DTF: Allows for full-color printing with gradients, intricate patterns, and photographic-quality images. The ability to print fine details makes DTF ideal for designs with small text or complex elements.
HTV: Limited to solid colors and requires layering for multicolor designs, which can create a bulky feel and increase production time.
If your projects demand high-resolution or multicolor designs, DTF’s print capabilities offer a superior aesthetic.
5. Cost-Effectiveness for Bulk Orders
DTF: Ordering custom DTFs online makes it so much easier to complete bulk projects you’re working on.
HTV:HTV sheets and rolls can become expensive, particularly for multicolor designs that require multiple layers of vinyl.
For scaling production and maximizing profit margins, DTF is the smarter financial choice.
When HTV Might Still Be a Better Option
While DTF has many advantages, HTV may still be preferable in certain situations:
Small Projects: If you’re working on a few simple designs, HTV can be a cost-effective and accessible option.
Specialty Finishes: HTV offers unique finishes like glitter, holographic, and metallic that may not be available with DTF.
Beginner-Friendly:HTV requires less upfront investment, making it a good starting point for hobbyists.
DTF vs. HTV: Final Verdict
When it comes to DTF vs. HTV, the choice depends on your needs. For business owners, DTF offers a faster, more versatile, and cost-effective solution that produces professional-quality results.
It’s particularly ideal for bulk orders and intricate designs.
HTV, on the other hand, remains a solid option for simple projects and specialty finishes.
By understanding the strengths and limitations of both methods, you can choose the right approach for your crafting or business needs.
Looking to upgrade your workflow? Consider investing in DTF to take your custom clothing game to the next level!
3 Big Reasons You Shouldn’t Use A Cricut To Make And Sell Shirts
A lot of people buy a Cricut machine so they can make and sell shirts. They think the process will bring in a lot of money in a short time, but there are 3 big reasons you shouldn’t use a Cricut to make and sell shirts.
You must be a pro at using Cricut Design Space
If you buy a Cricut machine and know nothing about it, you will first have to learn how to use Cricut Design Space. This software is what you’ll use to connect your computer, tablet or smartphone to your actual Cricut machine.
A lot of people get frustrated with learning how to use Cricut Design Space because it takes time, patience, and practice to become an expert at using it. You have to learn new terminology, remember what each button does, and make plenty of mistakes along the way.
You will have to watch and rewatch a lot of YouTube videos to become a pro. You will also likely have to purchase a Cricut Design Space tutorial guide as a reference guide so you won’t forget what to do every time you use your machine.
Weeding Heat Transfer Vinyl (HTV) takes a lot of time
Let’s say you’re making 50 shirts for a family reunion. You will need to buy a lot of HTV, cut the HTV with your Cricut machine, and then weed the HTV. The final step is to apply the design to your shirts. This whole process can take up to 8 hours if you’re doing it all in one sitting and depending on how many Cricut machines you have.
If you only have 1 Cricut machine, it could take you a lot longer to do all of this.
You can make your own designs in Canva, Adobe Illustrator, Inkscape, etc. or you can buy designs online and upload them to a DTF website so your designs can be printed and shipped to you.
Most DTF companies also sell premade DTFs that you can also buy.
How to choose a DTF company
Price for size
One of the major reasons for using DTFs is that they are easy to use and inexpensive. You want to be sure to compare different DTF companies to make sure you’re getting the most bang for your buck.
Colors
One of the amazing things about DTFs is that you can use graphics that have lots of colors, unlike when you use HTV. One thing to consider when using DTFs is if the colors will still be vibrant once you’ve pressed them onto your shirt.
Longevity
We know that HTV lasts pretty long on shirts (if using high-quality HTV and applied correctly), but you also want to be sure that your DTFs will last a long time on your shirts. Check the FAQs on the company’s website to see what they say and also read the customer reviews.
Customer Reviews
What are customers saying about the DTFs? Don’t just look at the reviews on the company’s website, also check out YouTube and other social media platforms to get real and honest reviews. Please keep in mind that sometimes people that are doing a sponsored video won’t give an unbiased review.
The DTF companies I recommend
MyCraftSource – This company is located less than 30 miles from where I live and they sell adhesive vinyl, HTV, DTFs, Cricut machines, heat press machines, blanks for crafting and so much more. Their DTFs are the cheapest that I have seen and the quality is amazing!
NinjaTransfers – This company has a large online presence and they make some amazing and vibrant DTFs. They actually sent me some free DTFs to test out and I recorded and shared a video on my YouTube channel.
I hope you enjoyed this article on the 3 Big Reasons you shouldn’t use a Cricut to make and sell shirts. Send me an email if you’re ready to start using DTFs instead of HTV.
15 Things To Do Before Setting Up Your Cricut Business Website
You’ve made the decision that it’s time to set up a website for your Cricut business and you’re super anxious.
Regardless if you’re setting up your own website or paying someone else to do it for you, these are the most important things you need to do before your website is even built.
1. Buy a domain name
Before you begin setting up your website, you need to buy a domain name. My domain name for my website is insideoutlined.com. I buy all of my domain names on GoDaddy and I typically get them for about $20 each.
If the domain name you want is already taken, you can buy it from the owner, which will typically cost thousands of dollars, or you can decide on a different name or a different extension (.com or .co). There are thousands of domain name extensions to choose from.
You can also buy your domain name from Shopify and Squarespace. If you go this route, you need to be ready to start designing your website ASAP to take advantage of any trial offers Shopify or Squarespace may be offering.
If you’re not ready to start designing your website yet, I recommend buying your domain name in advance from GoDaddy so that no one else takes it before you do. You may think you’re the only person on the planet with that business name, but I can assure you that you’re not.
When you buy your domain name from GoDaddy, you can transfer it to Shopify, Squarespace, or any other e-commerce platform.
Just as I told you before about buying your domain name so no one takes it before you get to it, you need to do the same thing with any social media platforms you will be using.
You want to do this so you can have a consistent name across all of your platforms (Facebook, Instagram, Pinterest, TikTok, YouTube, etc.).
Even though you won’t start adding content to these platforms yet, you’ll already have the account set up when you are ready.
3. Determine your brand colors – HEX and RGB codes
Your brand colors need to be determined before setting up your Cricut business website because you will incorporate those colors into your website, marketing materials, social media, and packaging.
When deciding on your brand colors make sure you know the exact colors by getting a HEX or RGB code. These are numbers or a combination of numbers and letters that give you an exact color match.
Once you have the HEX or RGB color codes, write them down in your business operations manual. I’ll talk more about the business operations manual in number 15.
Please don’t choose too many colors for your brand.
4. Get your logo and favicon made
Your logo is what people will see most often and be able to identify and associate with. Your logo will obviously go on your website, but also on your flyers, business cards, packaging, etc.
Please choose a logo that’s clean and can easily be cut with your Cricut machine and will look good on the packaging.
A favicon is that small icon that you see for different tabs that you have open in your web browser.
If a customer has 5 tabs open on their computer and they switch to a different tab, because you have a favicon that they recognize and remember, they can easily switch back to your website.
If you want to create your own logo and favicon, I recommend using Canva, but you can also pay someone else to do it on Fiverr, and I also create logos as well.
5. Write your policies
Writing the policies for your Cricut business in advance will make the website setup flow much smoother.
You will need to write the following policies to inform customers in advance: return, refund, exchange, shipping, personalized products, etc.
You will also need to write a privacy policy that informs customers of how your website uses their data. You can find templates online to create privacy policies, just Google it.
For all the policies you need, you can copy and edit them from other websites that are similar to yours or you can use tools like ChatGPT to write them for you.
Be sure to add all of your policies to your business operations manual (number 15 below).
You also need to write and answer Frequently Asked Questions on your website.
This is important because it will limit the number of repetitive emails you get from customers asking about shipping, how long it takes orders to process, and whether they can make changes to their orders after the order has been submitted.
7. Get a Google Voice number
If you don’t want customers to contact your personal phone, you can set up a Google Voice number and include it on your website, business cards, and other marketing materials and business documents.
Setting up a Google Voice number is very easy to do and there is an app you can download to make calls and send texts from your Google Voice number.
You can only set up a free Google Voice number with a personal Gmail account, not a business Gmail account.
Because you will likely be shipping your Cricut items you definitely want to consider getting a virtual mailbox.
When you ship your Cricut items, you will need to include a sender address on the shipping label and if you don’t want to include the address to your home or apartment, you should get a virtual mailbox.
I use Anytime Mailbox and I only pay about $9 per month for this mailbox. Anytime Mailbox partners with local businesses in medium to large cities where you will be assigned a suite number. The Anytime Mailbox partner business will have a physical presence so whenever you receive packages, you can go to their location to pick them up.
You can also use a P.O. Box if Anytime Mailbox isn’t available in your community.
One easy way to legitimize the look of your Cricut business is by having a professional email address that includes your domain name (For example: byrd@insideoutlined.com instead of insideoutlined@gmail.com).
I use Google Workspace and it costs about $6 per month and with that I’m able to set up a professional email address and also have access to Google Docs, Google Calendar, Google Sheets, and so much more.
Your product descriptions are very important in informing potential customers about the items they will be buying from you. You want to be sure to add as much detail as possible in the description.
If you’re selling shirts, include the brand of shirts you use, the material, and how to care for the shirt. Most of this information can be found online from wherever you bought the shirt.
If you’re selling personalized items, include details about what you need from the customer.
For personalized items, you can also include instructions on how to place an order as seen in this screenshot from my online store:
You should have plenty of photos of the items you’ll be selling. If not, get some foam core boards from Dollar Tree, grab some props and a ring light/softbox lights, and take some high-quality photos of your Cricut items.
You can use Canva to edit your photos and even to make mockups of items.
The hardest part of building a website is determining its design and the best way to simplify this process is by finding 3-5 websites that you like.
These can be websites of people who sell products similar to yours or they can be websites that sell products that you don’t sell.
To find websites I suggest searching on Google for different products. You want to look for websites that are run by small businesses, not global companies.
The goal is to find websites that have a layout that you like. You can then go and design your website in a similar way.
As mentioned above, if one of your competitors happens to have a website you like and sell products similar to yours, you need to take a deep dive into how their website functions.
For example, if they’re selling personalized cupcake toppers and they allow customers to upload a photo, how do they want the photo submitted? Do they have customers email them the photo or can customers directly upload the photo on the screen?
This is important because it lets you know what functionality your website needs to have. In the example above, you want customers to be able to do everything on one screen and not have to email you pictures, etc.
If your competitors are offering products you hadn’t thought of, you can consider doing that as well.
Find 3-5 competitors and take note of what they are doing, good and bad, and use that information to grow your business.
14. Create a Cricut business spreadsheet
Because you will have a lot of data that you’re looking at for your business, it’s very important to keep all that information in a central place, AKA, a Cricut business spreadsheet.
The main type of data you want to include in your Cricut business spreadsheet is the price of all of your items so you can quickly see your numbers.
Let’s say you want to go to a pop-up shop and you want to create a price list of all the items you take with you. If the only place where your prices are stored is on your website, you’re going to have to manually go through your website and make a list of the prices of all the items.
If you had a spreadsheet that has all of this information in it, you can easily print it without having to do a lot of work.
Another reason you need a Cricut business spreadsheet is to keep up with all the vendors you use for the items you sell.
If you buy shirts from Jiffy.com, put that in your spreadsheet. If you buy leopard print heat transfer vinyl from HTVRONT, put that in your spreadsheet.
This helps you stay organized so when it’s time to reorder products, you don’t have to remember where you bought certain items from, you can open your Cricut business spreadsheet and get to work.
I also suggest tracking the cost of the supplies and how much you were able to get for the price.
To create a Cricut business spreadsheet, I recommend Google Sheets because you can work with it on a computer/laptop and they have an app you can download.
The most important thing to do before you set up your Cricut business website is to make sure you organize your files.
You’re going to be working with a lot of files. You will have SVG files, photos, logos, and so many more documents that you’ll be working with and it can be overwhelming if you’re not organized.
I recommend using Google Workspace (mentioned above in number 9) because you can write your store policies in Google Docs. You can create your Cricut business spreadsheet in Google Sheets.
You can save all of your photos including your logos to Google Drive. Also, be sure to save your photos, SVG files, and documents with names that are descriptive so you can search for and easily find them later.
Finally, with all of the information that you create in all the steps above, create a business operations manual so everything can be in 1 place. Use Google Docs to create a business operations manual.
Include the following things in your Cricut business operations manual:
Hex and RGB codes for all colors used in your brand
All policies including return, refund, exchange, shipping, privacy, etc.
FAQs – Questions and answers
Google Voice phone number
Virtual mailbox address
Competitor research
Links to your social media accounts
Passwords to all of your accounts
I hope you enjoyed this article on 15 Things to do before setting up your Cricut business website.
If there are tips you would like me to add, leave them in the comments below or email me at byrd@insideoutlined.com.
Scroll Up
This website uses cookies to improve your experience. By clicking "Continue" or continuing to use this site, you acknowledge that you accept our Privacy Policy. AcceptRead More
Privacy & Cookies Policy
Privacy Overview
This website uses cookies to improve your experience while you navigate through the website. Out of these, the cookies that are categorized as necessary are stored on your browser as they are essential for the working of basic functionalities of the website. We also use third-party cookies that help us analyze and understand how you use this website. These cookies will be stored in your browser only with your consent. You also have the option to opt-out of these cookies. But opting out of some of these cookies may affect your browsing experience.
Necessary cookies are absolutely essential for the website to function properly. This category only includes cookies that ensures basic functionalities and security features of the website. These cookies do not store any personal information.
Any cookies that may not be particularly necessary for the website to function and is used specifically to collect user personal data via analytics, ads, other embedded contents are termed as non-necessary cookies. It is mandatory to procure user consent prior to running these cookies on your website.