This post may contain affiliate links. This means if you click a link and purchase an item that I recommend, I will receive an affiliate commission at no extra cost to you. All opinions are my own.
The Cricut machine can do just about anything and that includes writing.
Want to add a handwritten touch to a letter you’re mailing or to a gift tag? Well automate the process with your Cricut machine. If you’re a beginner, writing with your Cricut is a great way to get familiar with your machine.
In this tutorial I will show you how to address an envelope with your Cricut. I used my Cricut Explore Air 2 for this project, but I’m sure the concept is the same for other machines.
With some Cricut fonts, the machine will trace the outline of the letters, creating “bubble letters” leaving you to have to fill in the letters. With the font that I used there is no filling in required. Keep reading to see what font I used.
Jump to Sections in this Post
Supplies you’ll need:
- Cricut machine
- Cricut writing pens
- Font to write on your envelope (I used the light font)
- Envelope
Type out your words
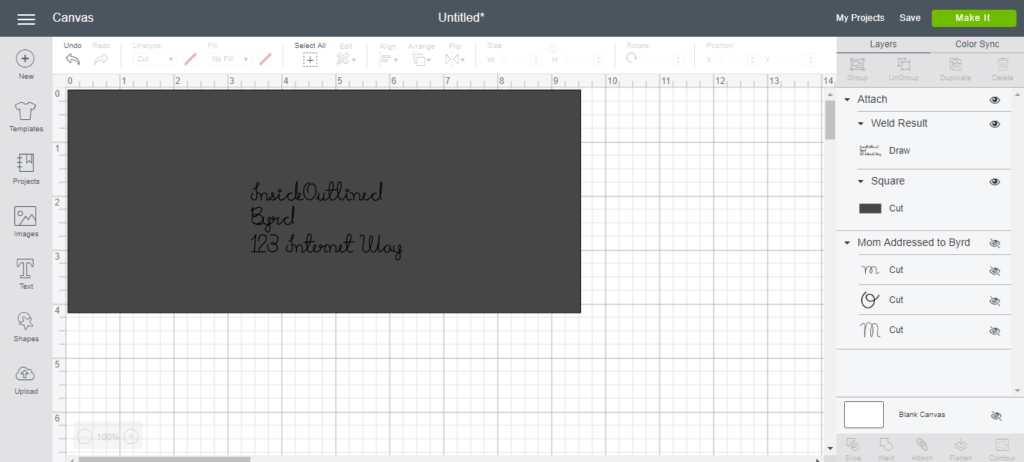
To begin writing with your Cricut, type out the words that you want on your envelope using your desired font. The font I used was Mikelis Light from Dafont.com.
Make sure that your linetype for your font is set to “Draw.”
Create a rectangle the same size as your envelope and position your text where you want it to be on your envelope. Make sure your words are on top of the rectangle.
Select both the text and the rectangle and attach.
Make it
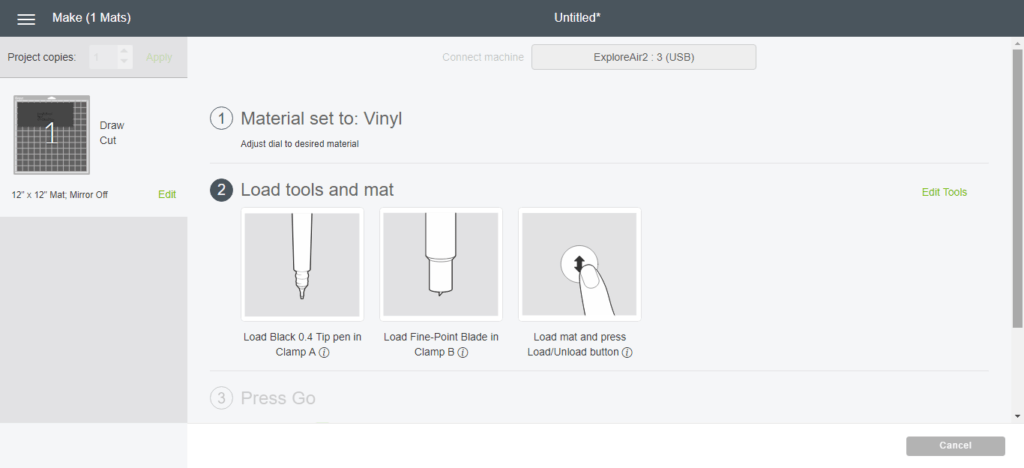
Once you’re okay with your font and the position of your text on the rectangle click “Make it” in the upper right corner and follow the screen prompts. Be sure to insert your Cricut pen into slot A.
I used the black Cricut pen that came with my machine, but you can get a variety of colors with this ultimate bundle of Cricut pens.
IMPORTANT: Pay close attention to your machine as it is writing. Once all of your words are written, cancel the cut or the Cricut will begin to cut out the rectangle.
When I first tried writing with my Cricut it took 3 tries before I mastered this.
Finished product
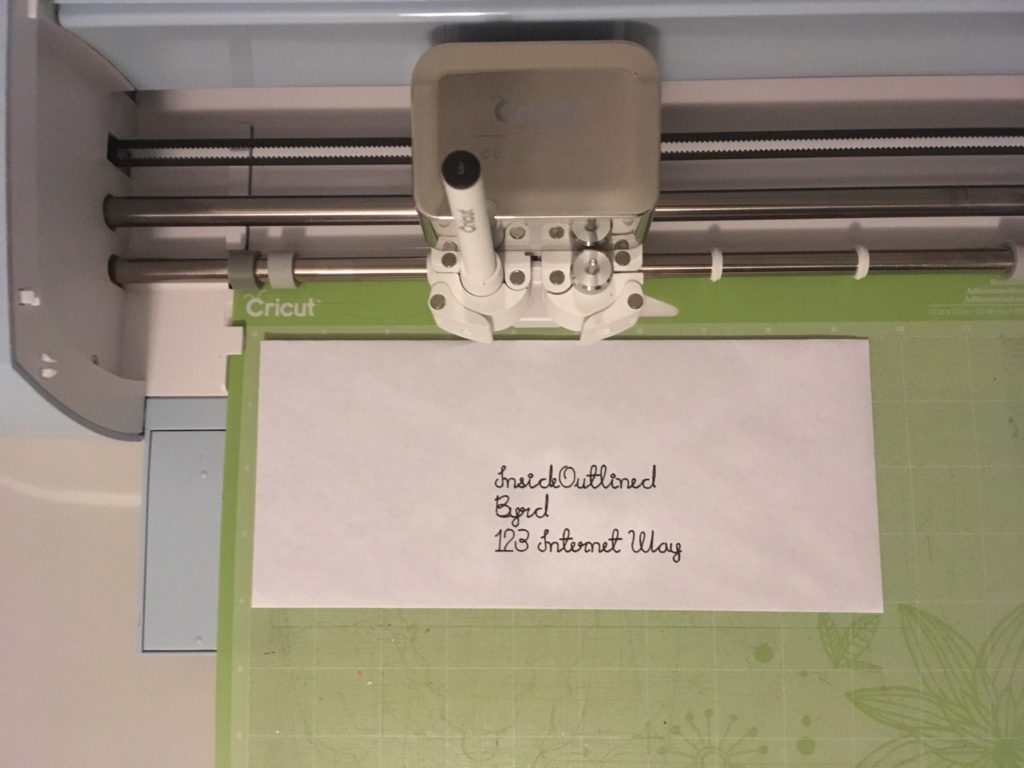
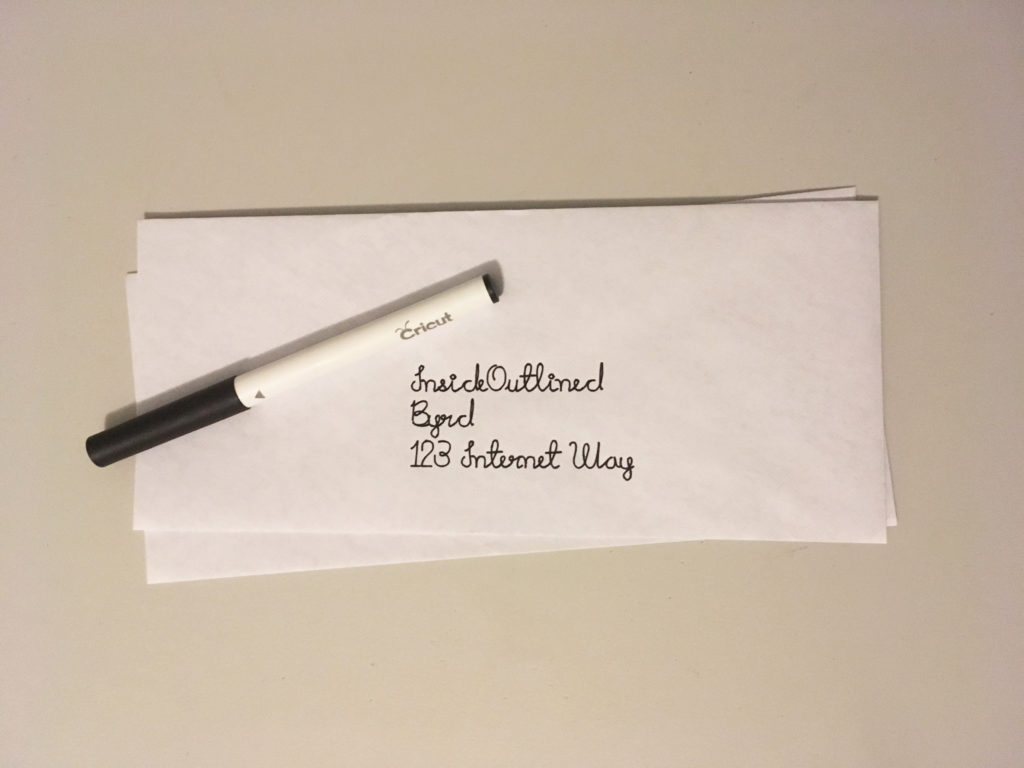
My handwriting isn’t the neatest and who has time to write when your Cricut can do it for you. This Cricut project is very simple and perfect for beginners.
Don’t limit writing with your Cricut to envelopes only. You can also use your Cricut to write birthday cards, party invitations, gift tags and so much more!
It’s always fun to switch it up from just cutting vinyl with your Cricut machine.
Check out my latest post on 66 Cricut projects to make or sell. Also check out the best places to buy Cricut blanks.




Thanks so much. This looks like a lot of fun to try.
when I do this the cricut draws an outline of the font doesnt fill it in?
Hi Nicole,
Did you try using the font that I used in the tutorial? The font I used was Mikelis Light from Dafont.com.
I just tried it with that font and, no, it wants to draw it as an outline.
That’s strange. I tried it again and it works fine. Are you using the Mikelis light font?