This post may contain affiliate links. This means if you click a link and purchase an item that I recommend, I will receive an affiliate commission at no extra cost to you. All opinions are my own.
If you have a Cricut machine or are thinking about getting one, you will become familiar with the term SVG files. SVG files are scalable vector graphics and are essential for using your Cricut machine.
While there are many SVG files that you can buy on Etsy, my online shop, and many other places, there may come a time when you want to make your own SVG files and are tired of paying for SVG files, and that’s why this post will show you how to make SVG files.
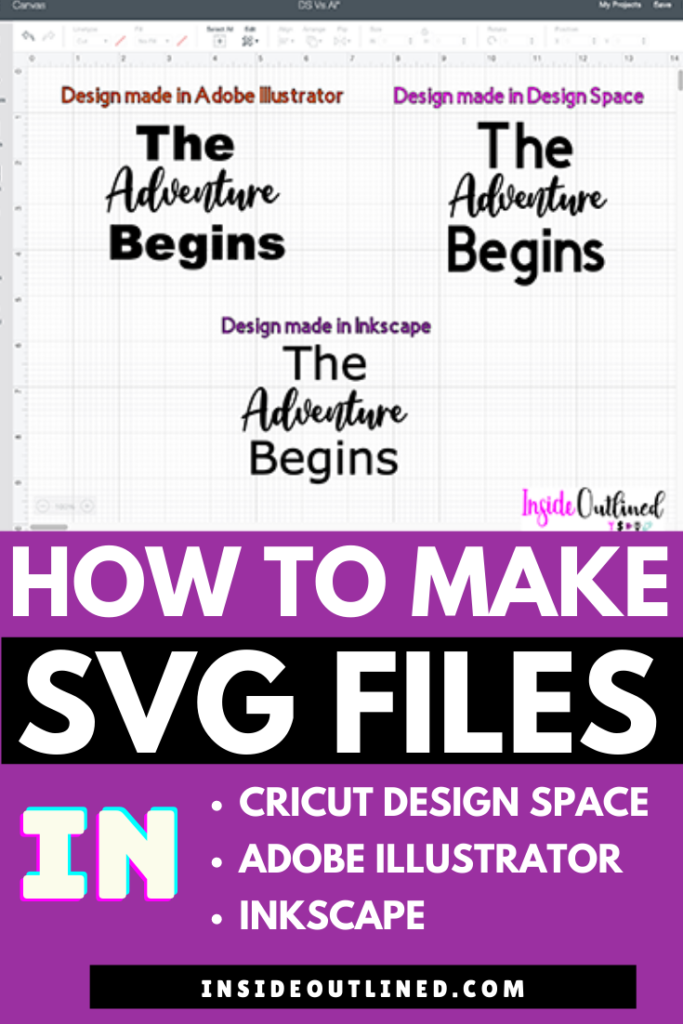
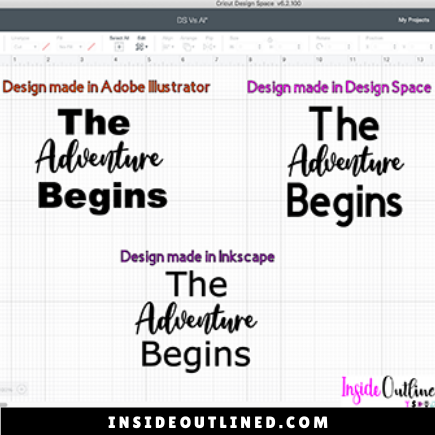
Before we jump into the tutorial, I want to go over the pros and cons of the different illustration/design software. The 3 software types that I will discuss include Cricut Design Space, Adobe Illustrator, and Inkscape.
Jump to Sections in this Post
Using Cricut Design Space to Make Svg Files – Pros and Cons
Pros
- Your designs will already be in Design Space and ready to cut
- There are templates in Design Space that you can use to size your designs
- You can use free SVG files in Design Space to add to your finished designs
Cons
- There’s not an easy way to save your SVG files to share with others
- You’re limited when it comes to editing the actual SVG file
Using Adobe Illustrator to Make Svg Files – Pros and Cons
Pros
- You can design SVG files from scratch
- You can export your designs to various formats including SVG, AI., EPS, PNG, and JPG
- Your designs will be high quality and you can package them to sell on Etsy, your own website, or other places
Cons
- There’s a learning curve to using the software
- Adobe Illustrator costs about $29 per month plus tax to use the software
Using Inkscape to Make Svg Files – Pros and Cons
Pros
- You can design SVG files from scratch
- You can export your designs to various formats including SVG, AI., EPS, PNG, and JPG
- Your designs will be high quality and you can package them to sell on Etsy, your own website or other places
- This software is free to use
Cons
- There’s a learning curve to using the software
Overall, if you’re looking for a free option to create SVG files that don’t require a lot of learning, then you should stick with Design Space. If you’re looking for a free option that requires some learning, but gives you more options for designing, then you should use Inkscape.
If you’re wondering which software, I use to create my SVG files, I use Adobe Illustrator. I initially started out using Inkscape, but because I needed Adobe Photoshop and Adobe Premiere Pro, I decided to get Adobe Creative Cloud which includes all the Adobe apps I need to create my SVG files and edit videos and photos.
Making SVG files in Cricut Design Space
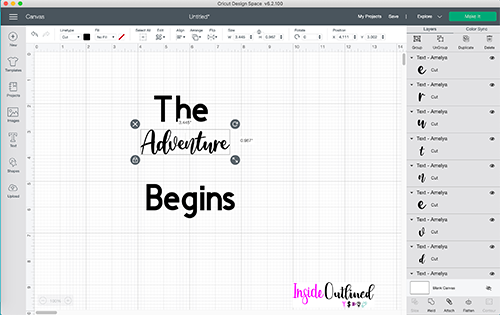
Creating SVG files in Cricut Design Space is super easy; all you need to do is find the image and/or font you want, type up a quote or saying and weld your text together.
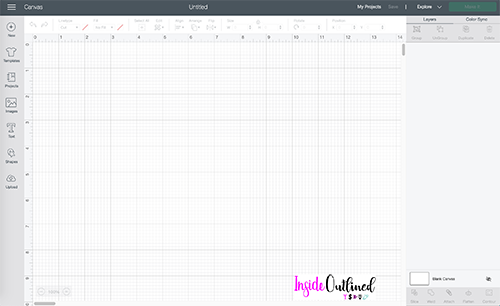
Step 1 Open Design Space and Start a New Project
Add text
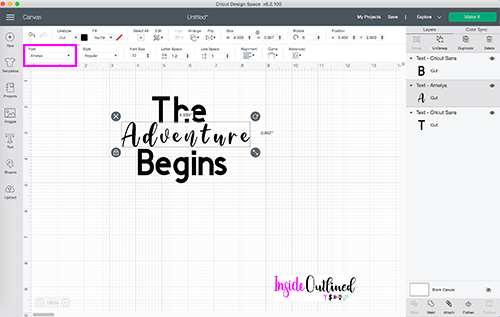
Step 2 Click the “Text” button and type the quote or saying you want.
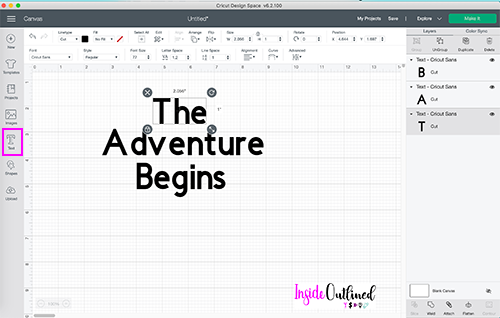
You can change the font of your text and if you don’t already have the font you want, check out this tutorial on Uploading Free Fonts to Cricut Design Space. The cursive font I used is Amelya from Dafont.com and the regular font is Cricut Sans.
Step 3 Change the line spacing using the line spacing tool or click “Ungroup” and use the arrows on your keyboard to overlap your letters.
Weld your text
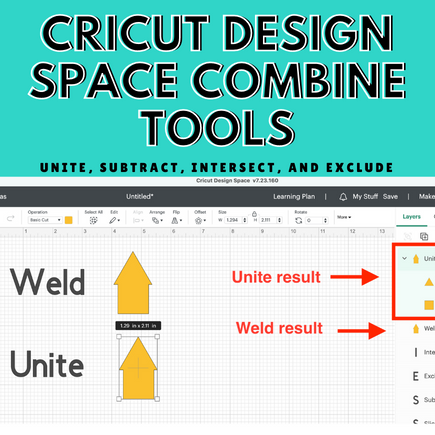
Step 4 Next you will need to select all of your text and then click “Combine” in the bottom right corner and then click the “Weld” button. If you want to add any images or icons, you can do that now as well.
Step 5 Finally, you will select all of your text and click the “Attach” button in the bottom right corner, and then make your project. Don’t forget to save your project.

Making SVG files in Adobe Illustrator
Creating files in Adobe Illustrator is easy once you get the hang of it but does have a learning curve.
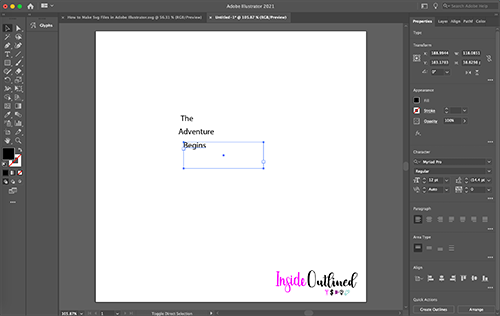
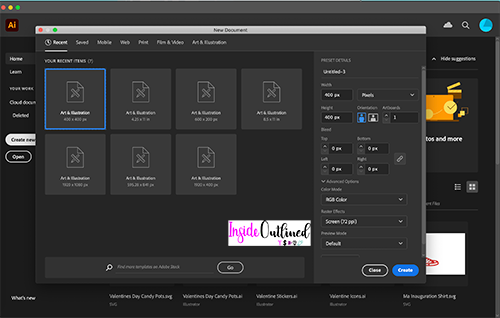
Step 1 Open Illustrator and Start a New Document
Add text
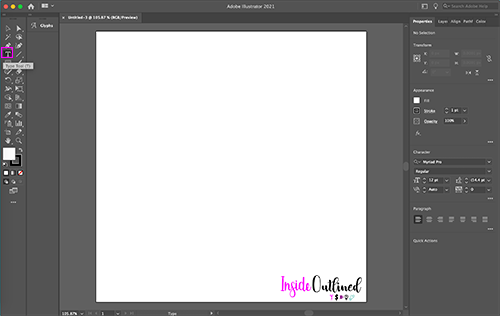
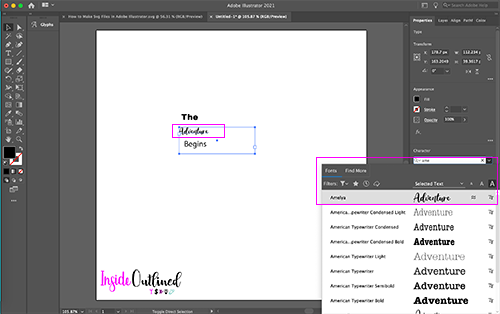
Step 2 Click the “Text” button and type the quote or saying you want.
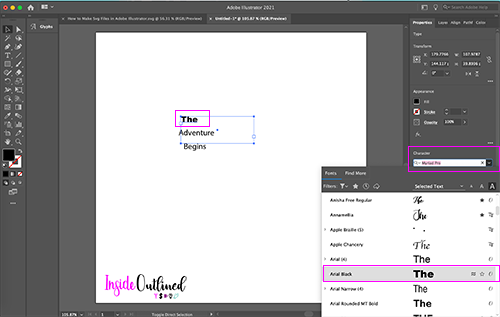
You can change the font of your text and if you don’t already have the font you want, check out this tutorial on Uploading Free Fonts to Cricut Design Space.
The regular font I used is Arial Black.
The cursive font I used is Amelya from Dafont.com.
Create outlines
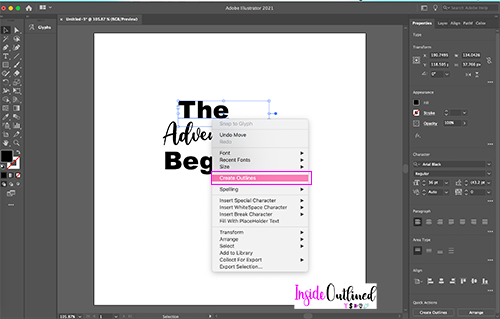
Step 3 For each of your text boxes, right-click and click “Create Outlines“.
Unite text
For your cursive text, there is one more step you need to take. As you can see in the image below, the letters are overlapping and if you were to bring this SVG file into Design Space, it would cut each letter individually.
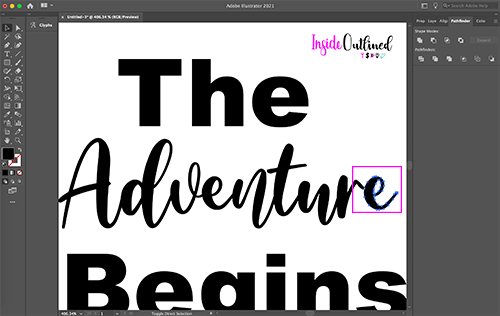
As you can also see in the image below, the last “e” is not touching the “r” and if you were to cut this design now, the last “e” would not cut as part of the other letters.

Here’s a closer look.
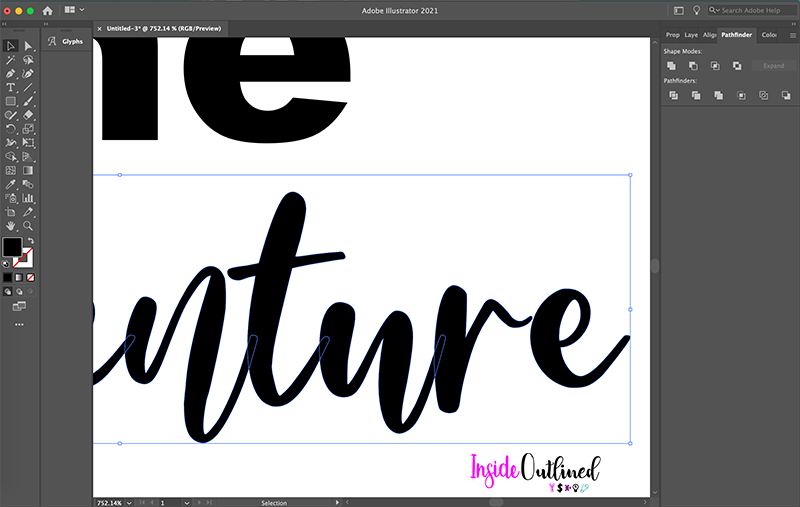
Step 4 So right-click on the word “Adventure” and click the “Ungroup” button.
Now you can select the last “e”, click it, and then use the left arrow key on your keyboard to move it to the left, so that it overlaps the “r”.
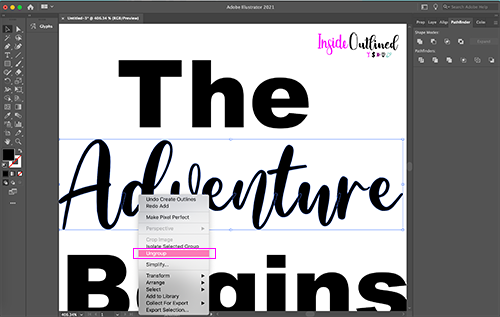
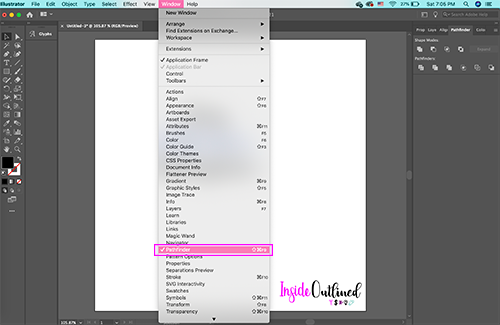
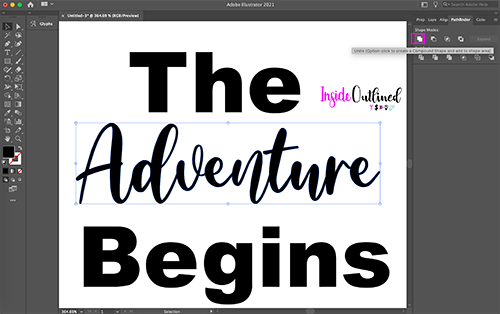
Step 5 Next you will need to use the Pathfinder tool to unite your text. If your Pathfinder window is not in the right panel, click “Window” at the top and then click “Pathfinder”.
Select all the letters in the word “Adventure” and then click the “Unite” button.
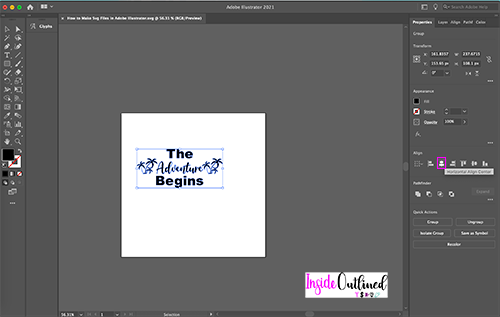
Step 6 To align your design horizontally, select your entire design and then click the Horizontal Align Center button in the right panel.
If the Align window isn’t in your right panel, Click the Window button at the top and then click Align. To make this window stay in your right panel, drag it into your right panel where you want it.
Save your SVG file
Step 6 Save your file wherever you want it on your computer and be sure to save it as a svg file. I always save an “AI” (Adobe Illustrator) file also so I can edit it later.
To save your file, click the “File” button, then click “Save As“. Select the folder where you want to save your SVG file and then click “Save“.
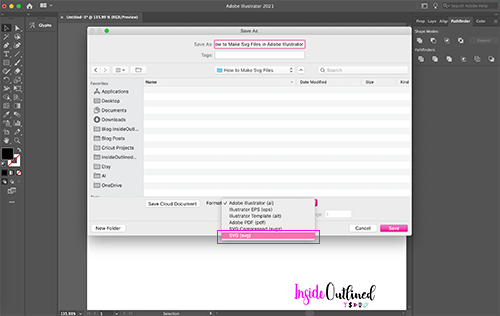
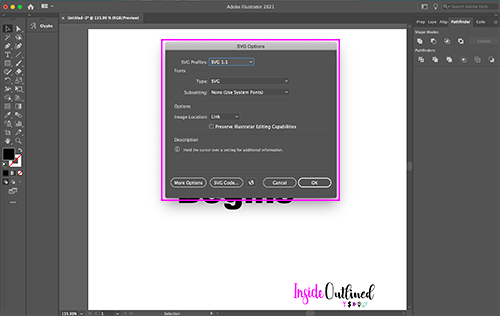
Step 7 Make sure your settings look like mine on the next screen, and then click “Ok“.
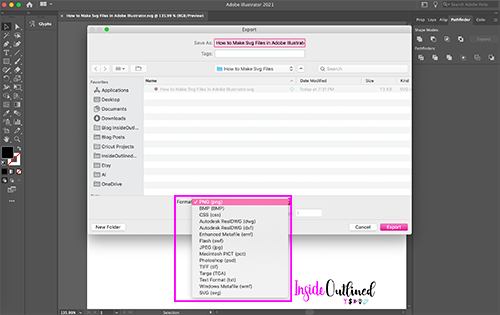
Step 8 To save your SVG file as a PNG, JPG, or other image files, click the “File” button, then click “Export“, “Export As“, then underneath format, choose the format you want to export your SVG file as, and then click “Export“.
When saving your file as a PNG file, you can choose for the background to be black, transparent or white and I always choose my resolution to be 300 dpi, which is a higher resolution.
Upload SVG file to Cricut Design Space
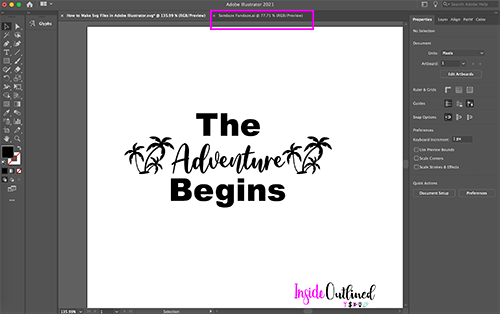
Step 9 Now you can see what that SVG file looks like by going to Cricut Design Space and uploading the SVG file. In the image below you can see the first SVG file vs the second SVG file.
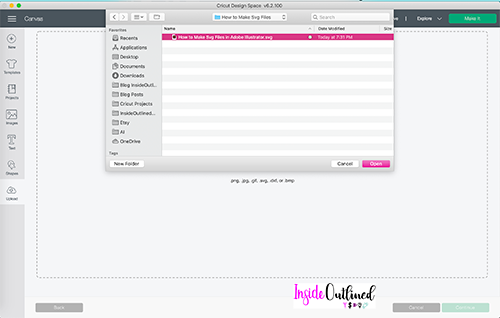
If you want to spruce up your SVG file, you can include other SVG files that you have downloaded from my Free Resource Library. Like the palm tree that’s included in the Sundaze Fundaze SVG file in my Free Resource Library.
Making SVG files in Inkscape
Creating SVG files in Inkscape is easy, but just like making SVG files in Adobe Illustrator, Inkscape does have a learning curve.
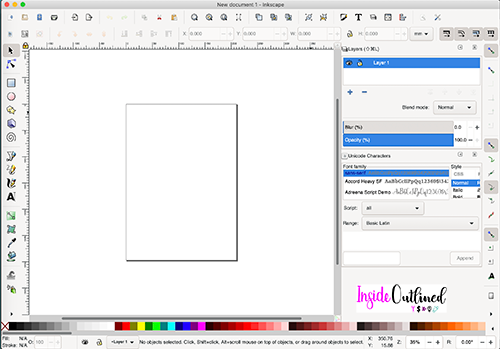
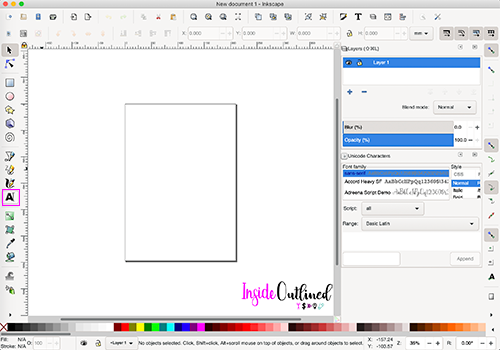
Step 1 Open Inkscape and Start a New Document
You can change the font of your text and if you don’t already have the font you want, check out this tutorial on Uploading Free Fonts to Cricut Design Space.
Click the “Text” object button on the left side.
The regular font is Sans Serif.
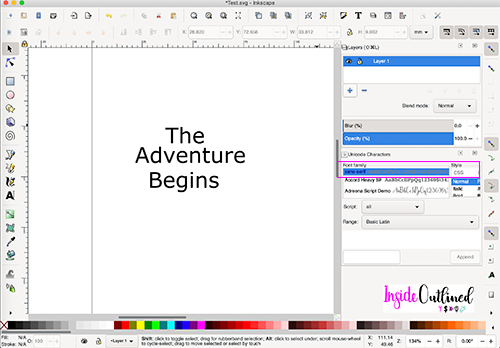
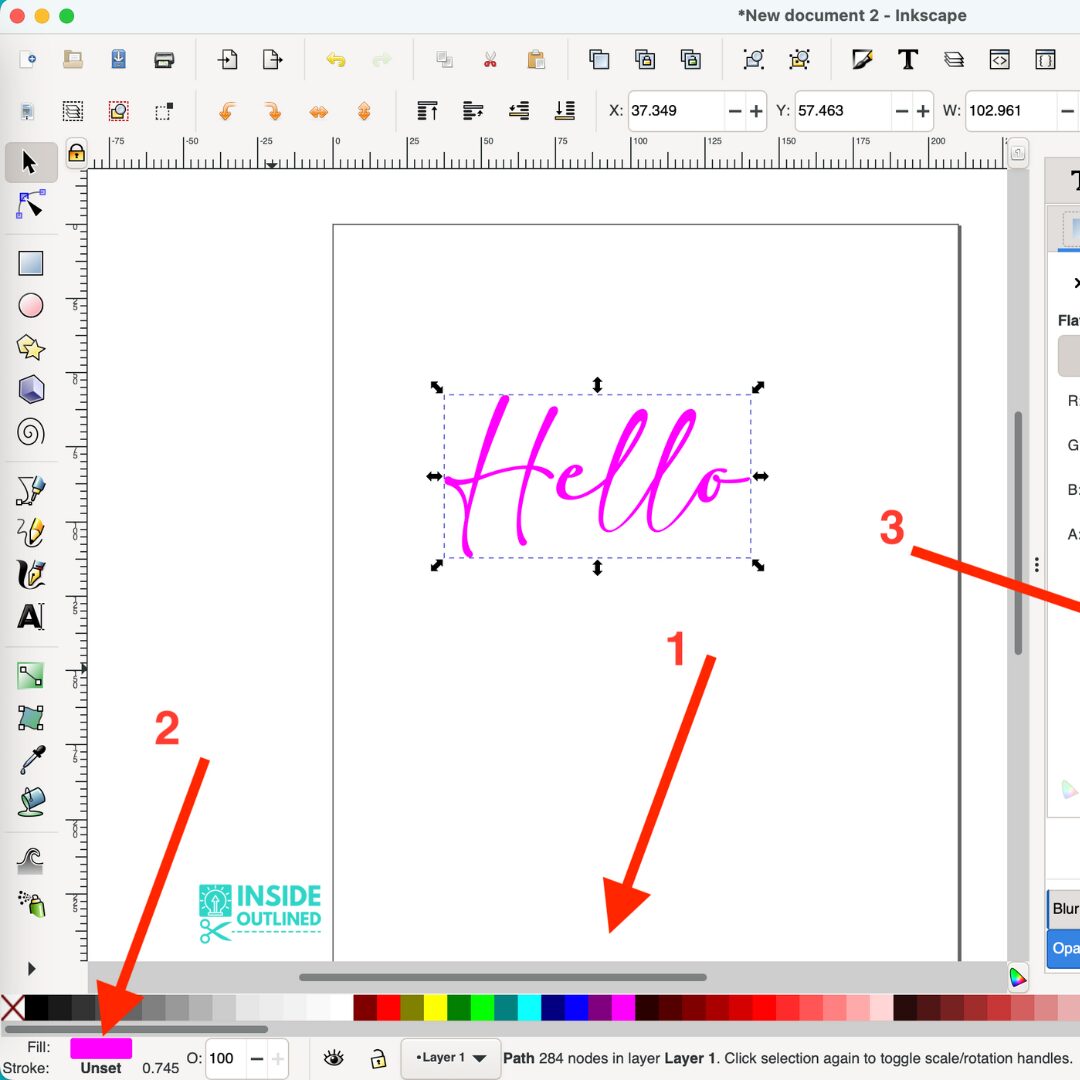
Step 3 The cursive font I used is Amelya from Dafont.com. To change the font of your text, triple-click in the text box and then change the font in the top left corner, then click the Black selection arrow in the top left corner.
Change the font to Amelya.

Convert text to paths
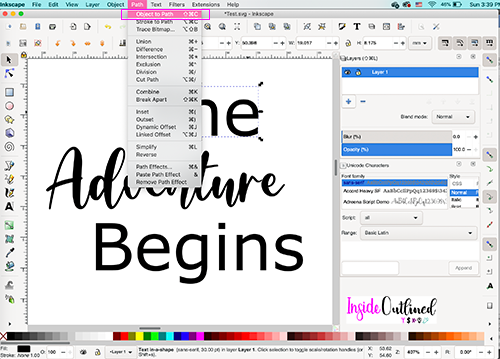
Step 4 For the regular text, click each of your text boxes and then go up top click the “Path” button and then click “Object to Path“.
Unite text
Step 5 For your cursive text, there is one more step you need to take. For the cursive text, click the “Path” button and click “Break Apart“.
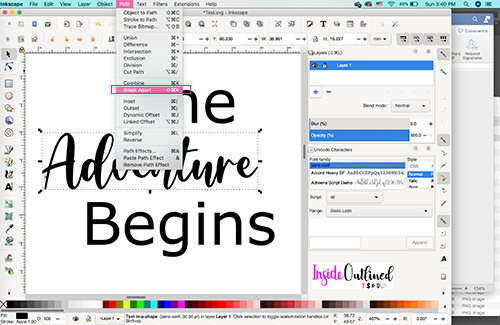
Now you can select each of your letters individually and they are overlapping and if you were to bring this SVG file into Design Space, it would cut each letter individually.
You can also see in the image below, that the last “e” is not touching the “r” and if you were to cut this design now, the last “e” would not cut as part of the other letters.
So, select the last “e”, and then use the left arrow key on your keyboard to move it to the left, so that it overlaps the “r”.
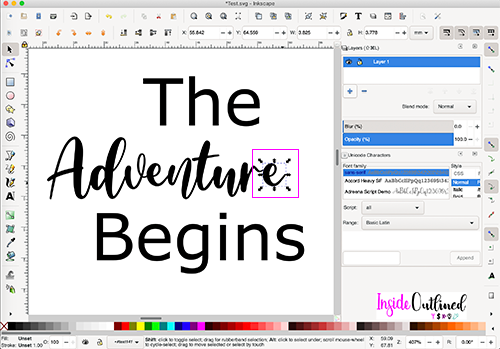

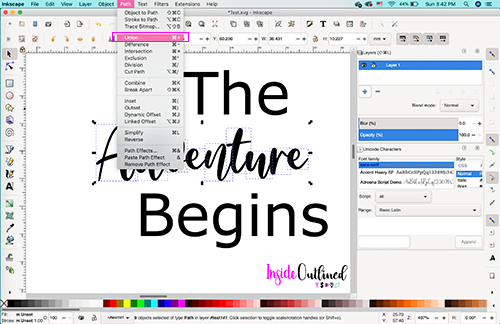
Step 6 Next you will need to use the Path tool to unite your text. Select all the letters in the word “Adventure” by holding down the Shift button and dragging your mouse across all letters in “Adventure” and then click the “Path” button at the top and then click the “Union” button.
Align text
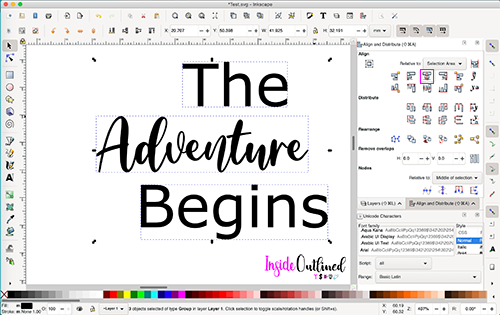
Step 7 To align your design horizontally, select your entire design by clicking one piece of your design, holding down the shift key and clicking the rest of your design. Next, click the “Object” button and then click the “Align and Distribute” button.
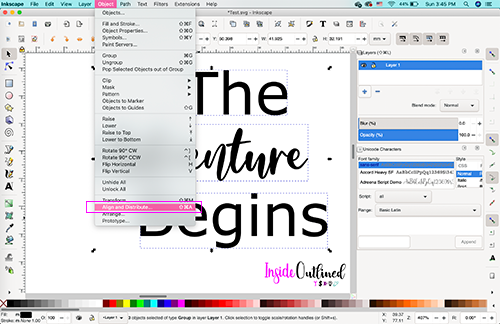
Align and Distribute panel on the right.
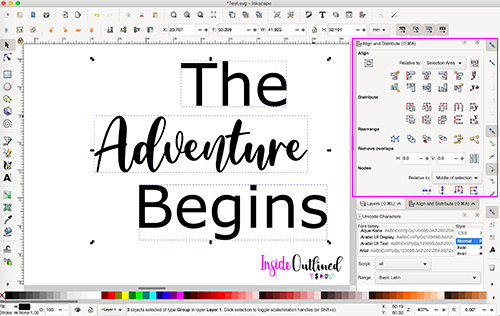
Step 8 In the panel on the right side, click the “Center on Vertical Axis” button.
Save your SVG file
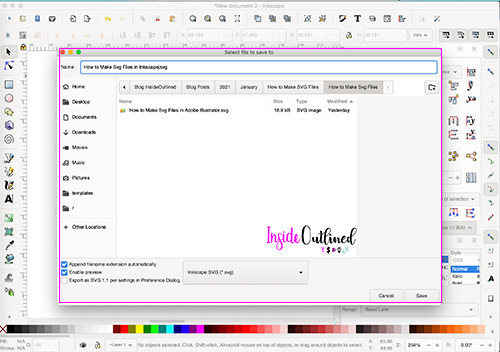
Step 9 Now click the “File” button and then click “Save“, save your file wherever you want it on your computer. The default file type will automatically be Inkscape SVG file.

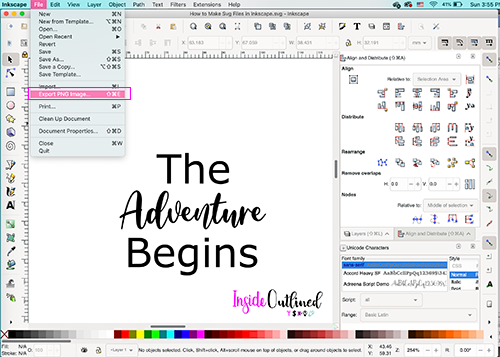
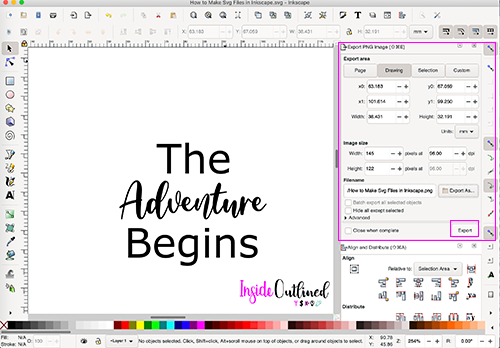
Step 10 To save your SVG file as a PNG image file, click the “File” button, then click “Export PNG Image“, and in the right panel, click the “Export” button. Inkscape can only export to a PNG image file.
In the right panel, you can also change the units to be inches, millimeters, centimeters, pixels, etc. You can also enter the dpi that you want your image to be. The dpi is the resolution quality of your image.
Upload SVG file to Cricut Design Space
Step 11 Now you can see what that SVG file looks like by going to Cricut Design Space and uploading the SVG file. In the image below you can see the first SVG file vs the second SVG file.
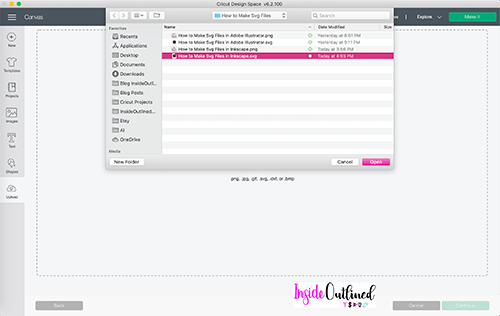
Again, if you want to spruce up your SVG file, you can include other SVG files that you have downloaded from my Free Resource Library.
For example, you can use the palm tree that’s included in the Sundaze Fundaze SVG file in my Free Resource Library.
If you want to make SVG files to sell you should use Adobe Illustrator or Inkscape and use the instructions above to package or export your SVG files appropriately. For the SVG files that I sell, I always include an AI file, SVG file, PNG, and JPG file.
I hope you enjoyed this tutorial on how to make SVG files from scratch. I will have an ecourse coming out soon to show you all the ins and outs of Adobe Illustrator and Inkscape when it comes to making SVG files. Until then, if you have any questions about how to make SVG files, leave them down below and I’ll get back to you.
