This post may contain affiliate links. This means if you click a link and purchase an item that I recommend, I will receive an affiliate commission at no extra cost to you. All opinions are my own.
Building a predictable, recurring income stream is the ultimate goal for digital creators, educators, and artists. While many e-commerce platforms charge hefty monthly subscription fees just to unlock subscription features, learning how to create a membership site on Payhip gives you a feature-rich, cost-effective way to host paid communities, deliver exclusive content, and collect recurring payments.
Whether you want to sell recurring digital downloads, run an exclusive blog, or offer tiered community perks, here is a complete step-by-step guide to launching your membership with Payhip.
Why Choose Payhip for Your Membership?
Before diving into setup, it helps to understand why creators choose Payhip over complex website builders:
-
Zero Monthly Upfront Costs: You can sign up via Payhip and build your full store on the free-forever plan without paying fixed platform fees upfront.
-
Flexible Pricing Tiers: Set up monthly, annual, one-time, or free recurring plans.
-
Content Variety: Publish exclusive text, video streams, image galleries, audio files, download links, or polls directly to members.
-
Built-In Customer Portal: Members receive their own dedicated portal to access posts, manage billing, or download files.
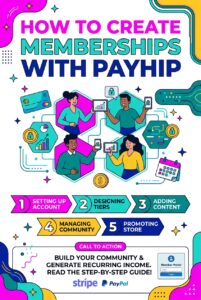
Step 1: Set Up Your Free Payhip Account
To get started:
-
Head over to Payhip and click Get Started Free.
-
Enter your email address and password to register.
-
Set your store name and currency settings.
-
Connect your payment provider (Stripe and PayPal) under Account Settings so you can process recurring credit card and PayPal payments automatically.
Step 2: Create a New Membership Product
Once your account is active:
-
Navigate to the Products tab on your main dashboard.
-
Click Add New Product and select Membership.
-
Name your membership (e.g., VIP Creator Circle or Exclusive Coaching Vault).
-
Click Add Membership to create your product framework.
Step 3: Configure Your Membership Tiers & Pricing
Payhip lets you build single or multi-tiered membership levels.
-
On your product management page, click the Pricing tab.
-
Click Add Price Plan.
-
Choose your billing cadence:
-
Recurring (Monthly / Yearly)
-
One-time payment (Lifetime access)
-
Free plan (Great for lead generation)
-
-
Set your price point, select optional free trial periods, and define tier names.
Step 4: Add Posts & Exclusive Content
Your members access content via dedicated posts within their portal.
-
Go to the Posts tab inside your membership product.
-
Click Create New Post.
-
Choose your post format: Text, Video, Image, Link, Poll, or Embed.
-
Attach downloadable files (PDFs, ZIPs, audio) up to 2GB if needed.
-
Select which membership tiers can view the post.
-
Decide whether to publish immediately, schedule for a future date, or save as a draft.
Step 5: Customize Your Sales Page & Branding
To convert visitors into subscribers, design an engaging landing page:
-
Click the Pages tab and edit your Sales Page using Payhip’s visual store builder.
-
Highlight key member benefits, list featured content, and add customer testimonials.
-
Match the page design to your brand using custom banner images, fonts, and brand colors under Settings > Membership Area Settings.
Step 6: Publish & Launch
When your content is loaded and your store page looks sharp:
-
Head to the Publish tab.
-
Switch the status from Draft to Published.
-
Grab your shareable checkout URL and place it in your social media bios, email newsletters, or website.
Creating a sustainable online business is seamless when you use Payhip to host your recurring membership products. With low friction and full control over your content, you can focus on serving your community while automated billing handles the rest.