This post may contain affiliate links. This means if you click a link and purchase an item that I recommend, I will receive an affiliate commission at no extra cost to you. All opinions are my own.
The Encanto movie came onto the scene with a bang and has everyone singing “We don’t talk about Bruno”. This movie is absolutely amazing and one that even adults can enjoy.
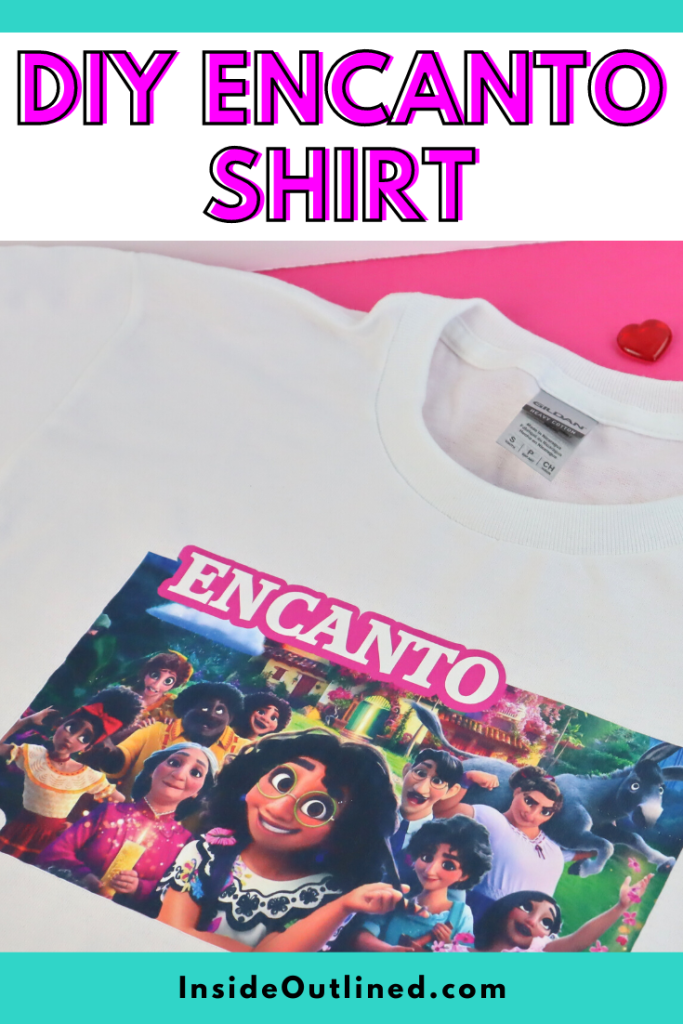
In this super easy tutorial, I will show you how to make a DIY Encanto shirt that can be worn for a birthday party or as an everyday shirt.
Supplies you’ll need:
- Cricut machine
- Printer (I have an Epson EcoTank 2850 and I absolutely love it)
- Inkjet Printable Heat Transfer Paper
- Heat press or Cricut EasyPress
- Teflon sheet and parchment paper
- Tshirt
Jump to Sections in this Post
- Find the Encanto image for your shirt
- Upload the Encanto image to Cricut Design Space
- Edit the Encanto image for your shirt
- Print your Encanto design for your shirt
- Cut your Encanto design for your shirt
- Prep your shirt for the Encanto design
- Apply the DIY Encanto design to your shirt
- How to care for your DIY Encanto shirt
Find the Encanto image for your shirt
Go to Google and type in Encanto and find an image that you would like to use for your shirt.
The image that I chose had a majority of the characters from Encanto.

Once you have the image that you want to use, right-click the image and then click “Save image as”.
Find the location on your device where you want to save your image and then click “Save”.
Make sure your image is a picture file such as a JPEG or PNG file. Check out the video instructions.
Upload the Encanto image to Cricut Design Space
Go over to Cricut Design Space, click the “Upload” button, click “Upload image” click “Browse” then click on that image that you downloaded, and then click “Open”.
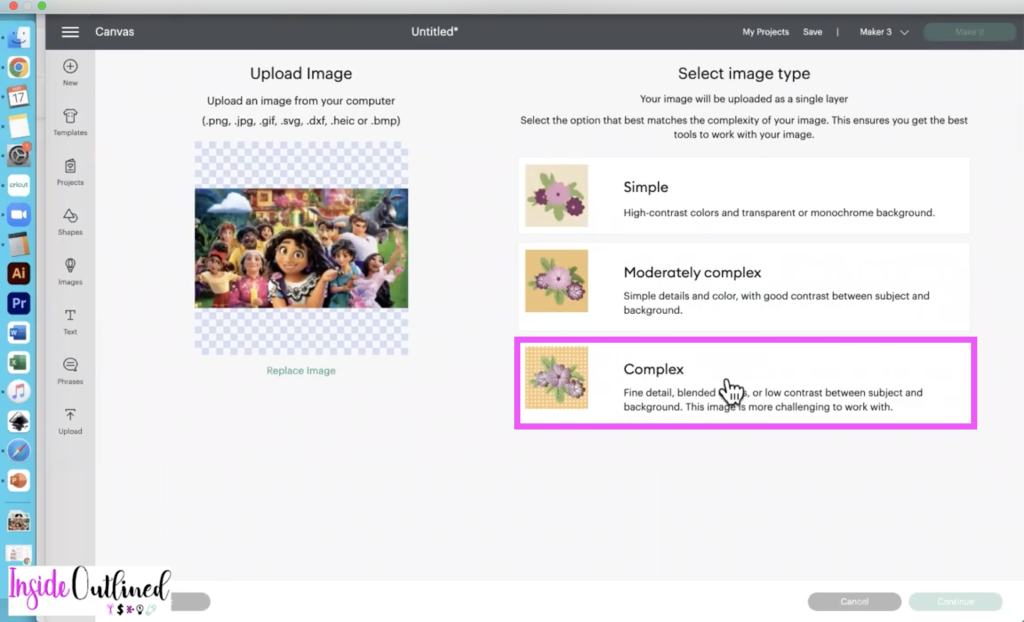
On the next screen, I just clicked “Complex” and then click “Continue”.
I didn’t erase anything from my image, but if your image has a background that needs to be erased, feel free to do that here.
Next click the “Apply” button and then the “Continue” button.
On the next screen click on “Print then cut” and then click “Upload”.
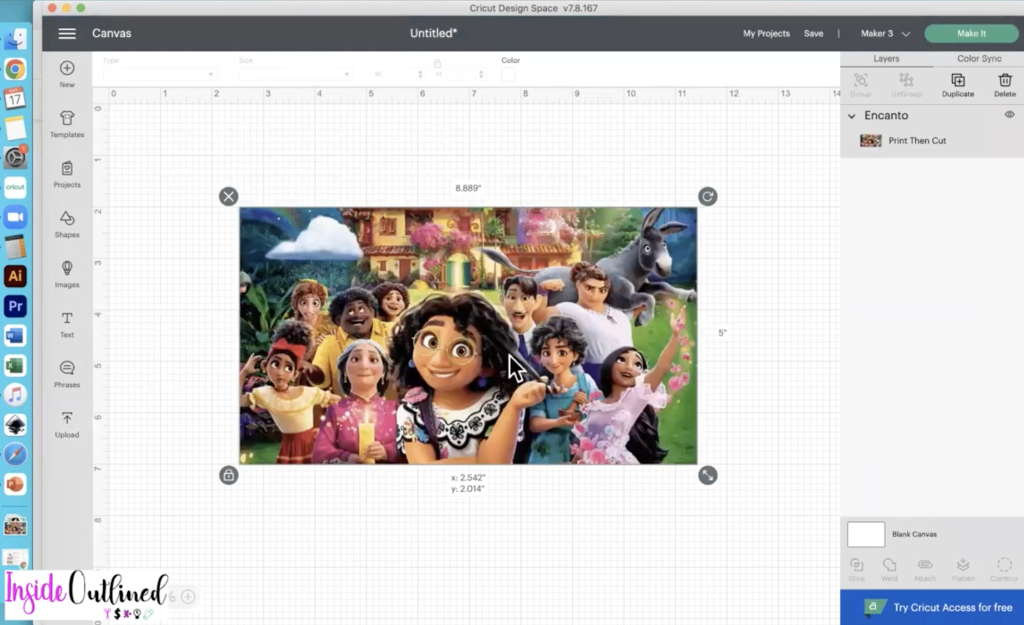
Click on the image that you just uploaded and then click “Add to canvas”.
Edit the Encanto image for your shirt
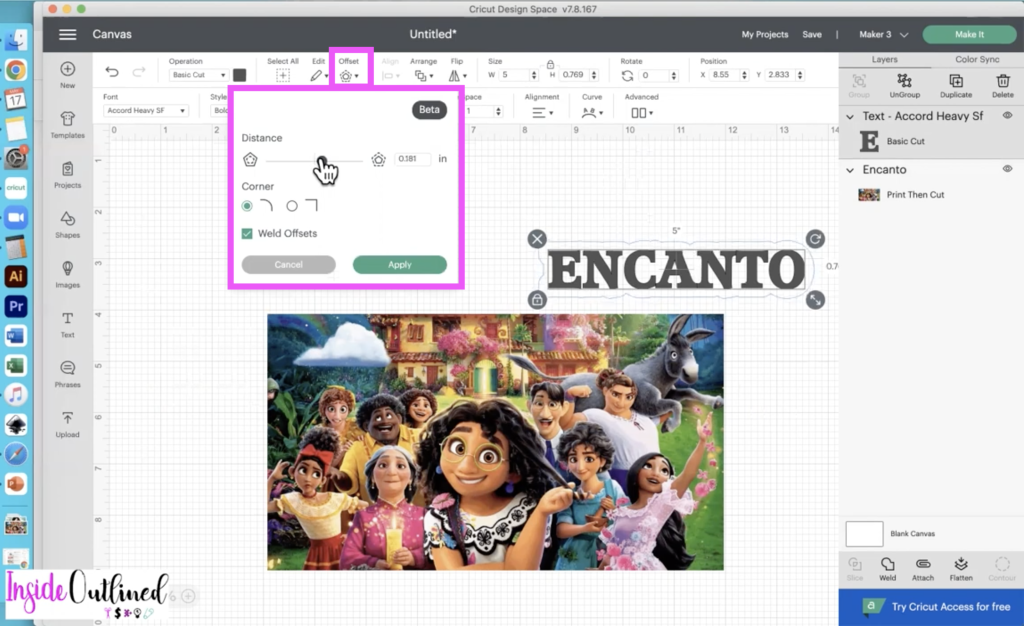
Click the “Text” tool and type your text. I typed the word “Encanto”.
The font that I used is the Accord Heavy SF font and that font was already programmed onto my computer.
Change the font size to be appropriate for your image. My font was 5 inches wide. Check out the video instructions.
Now add an offset to your text by clicking the “Offset” button and moving the dial to the right to get your offset how you want it. My offset was 0.181.
Click the “Apply” button.
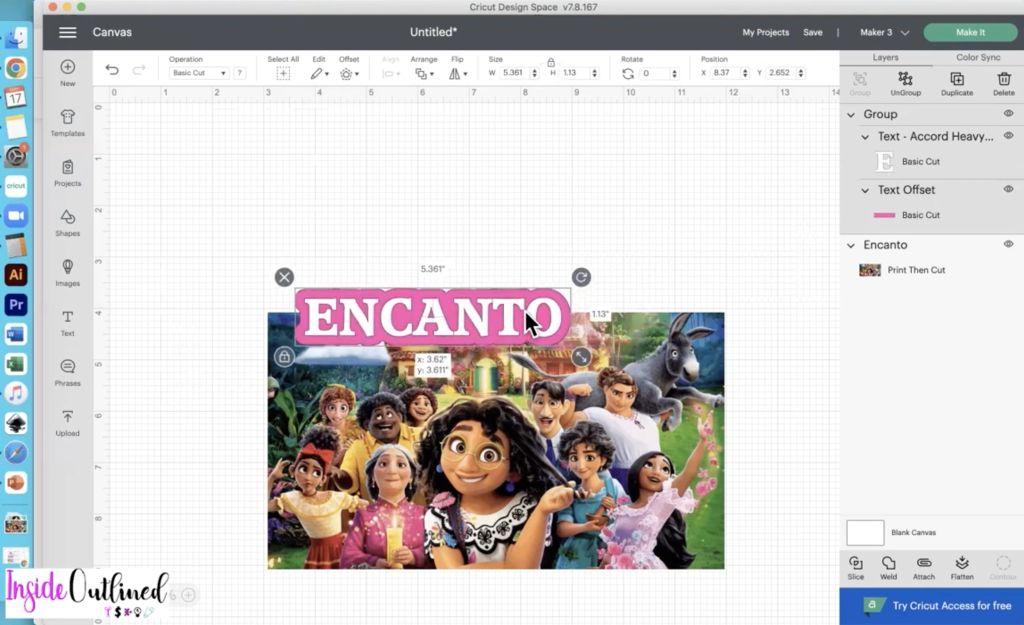
Click the offset and change the color to dark pink.
Click the word Encanto and change the color to white.
Select the text and the offset and click the “Group” button.
The next step is completely optional. Click on “Shapes” and click the heart.
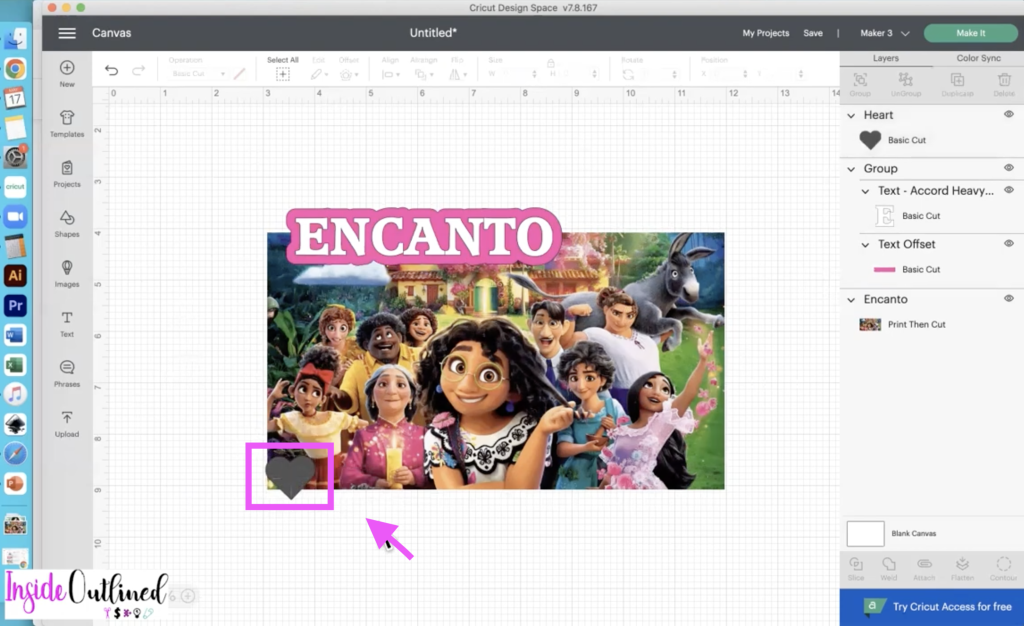
Minimize the heat a little and rotate it some. Put it at the bottom of the image and select the image and the heart and click “Slice”.
Delete the pieces you don’t need.
Next click on “Images” and search for flower. Be sure to turn the ownership to Free so that you will only see the free designs.
Once you see a flower that you like, click on it and then click “Add to canvas”.
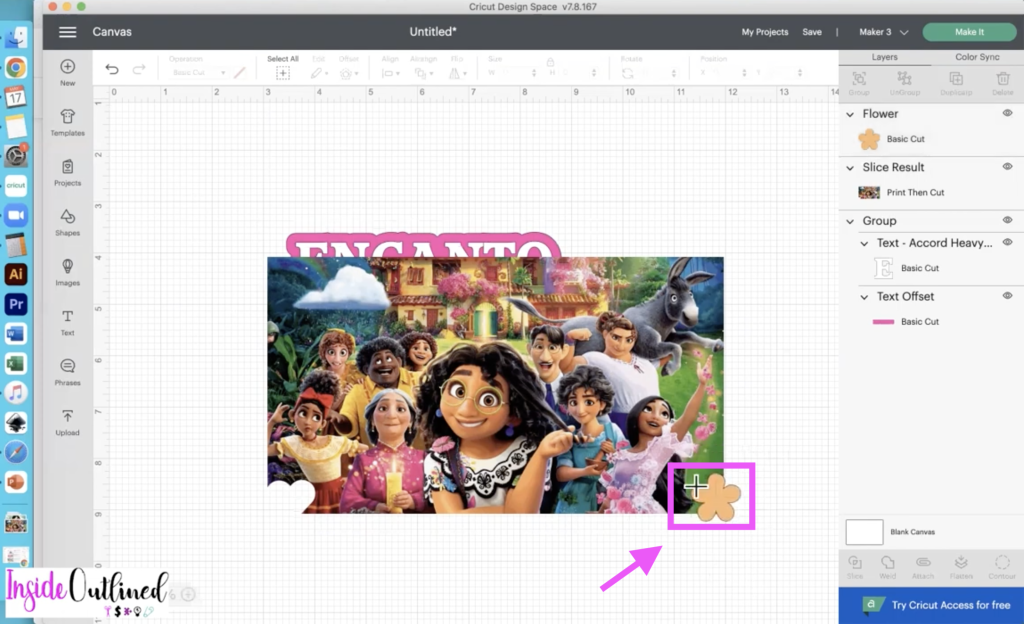
Resize your flower to your liking and select the flower and the image and then click “Slice”.
Delete the pieces you don’t need.
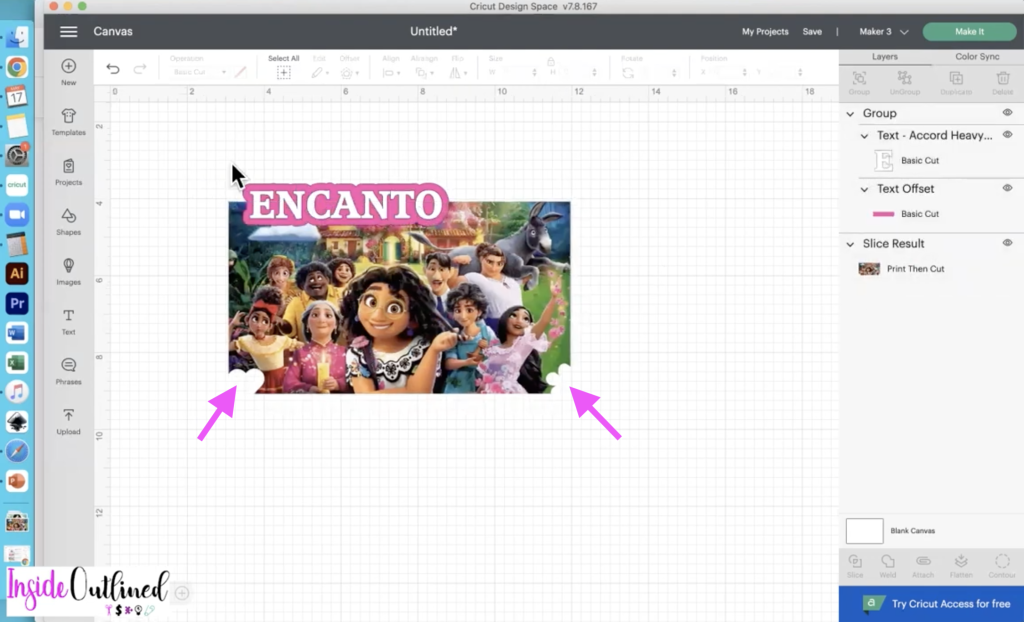
Once your overall design looks the way you want it to, select everything and then click “Flatten”.
Change the size of your image to be the print then cut size which is 6.75 in x 9.25 in or 9.25 in by 6.75 in. Check out the video instructions.
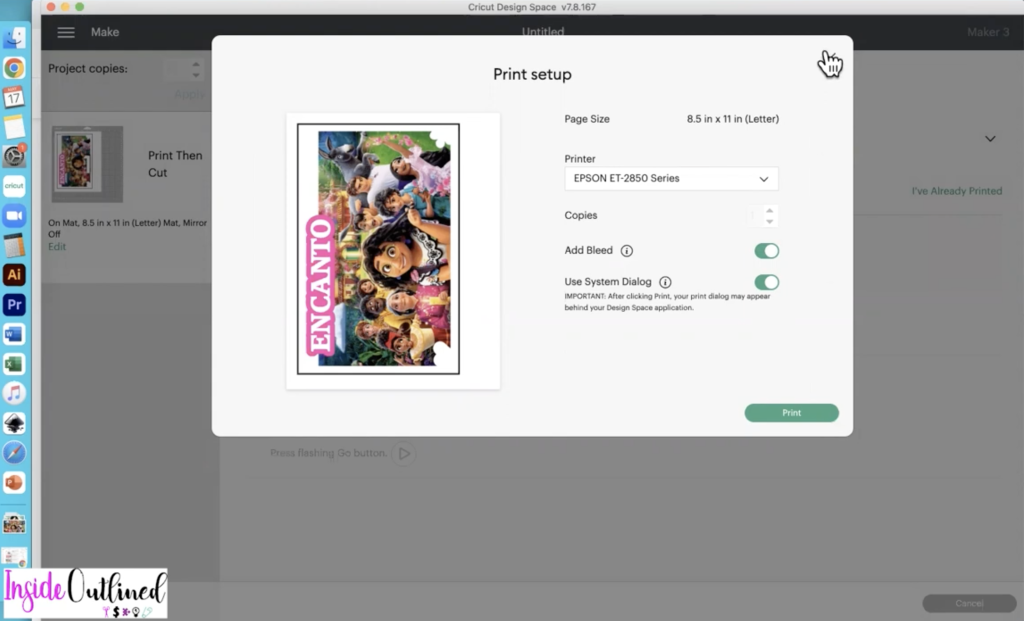
Print your Encanto design for your shirt
Click the “Make it” button.
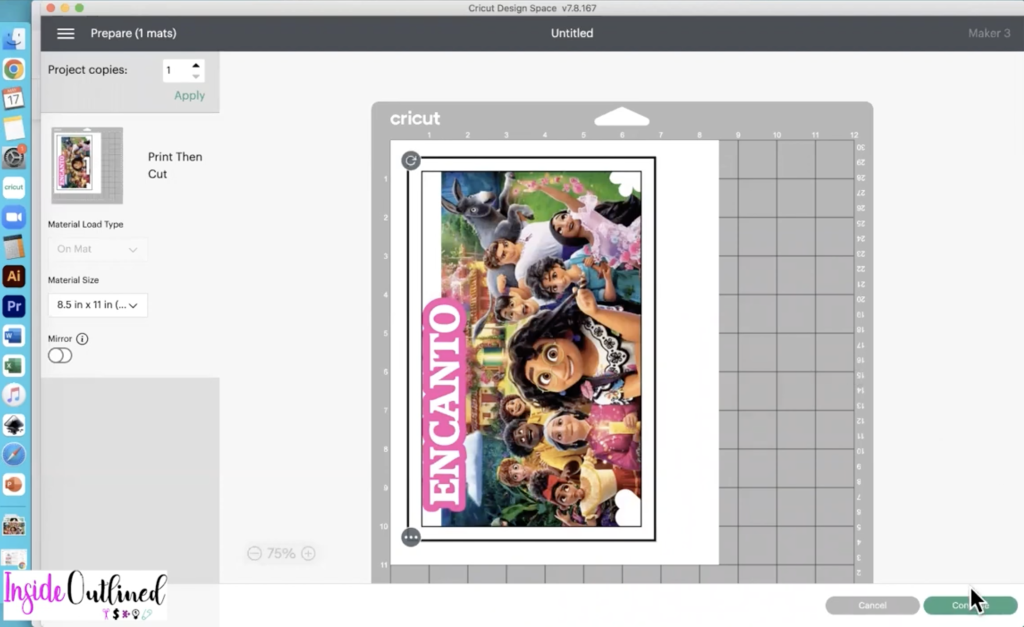
Click the “Continue” button.
Click the “Send to printer” button leave the bleed on and then turn on the dial for “use system dialog”.
Get your Starcraft Inkjet Printable Heat Transfer Paper and load it into your printer. The Printable Heat Transfer Paper that I had was for dark materials because that’s all I had on hand, but there is also a version for light materials.
I also have the June Taylor brand of printable heat transfer paper and you can get it from most craft stores.

Minimize the Cricut Design Space screen and your print dialog setting should pop up. Choose the appropriate settings for your Cricut machine and make sure the quality is set to best.
Click the “Print” button.
Once your Encanto design has been printed onto your paper go back to Cricut Design Space Space and click “Browse all materials” and search for “printable heat transfer” and click on “Printable Iron-On, Dark”.

Cut your Encanto design for your shirt
Put the printable heat transfer paper on your mat and load it into your Cricut machine and press the “Go” button on your machine.
Once your design has been cut, peel it off the mat and take your weeder to help you pull the cut design away from the rest of the printable heat transfer paper.
Prep your shirt for the Encanto design
Lay your shirt down on a hard surface and if you have a Cricut EasyPress mat, you can add that underneath your shirt.
Take a lint roller and get off any lint from the shirt. Check out the video instructions.
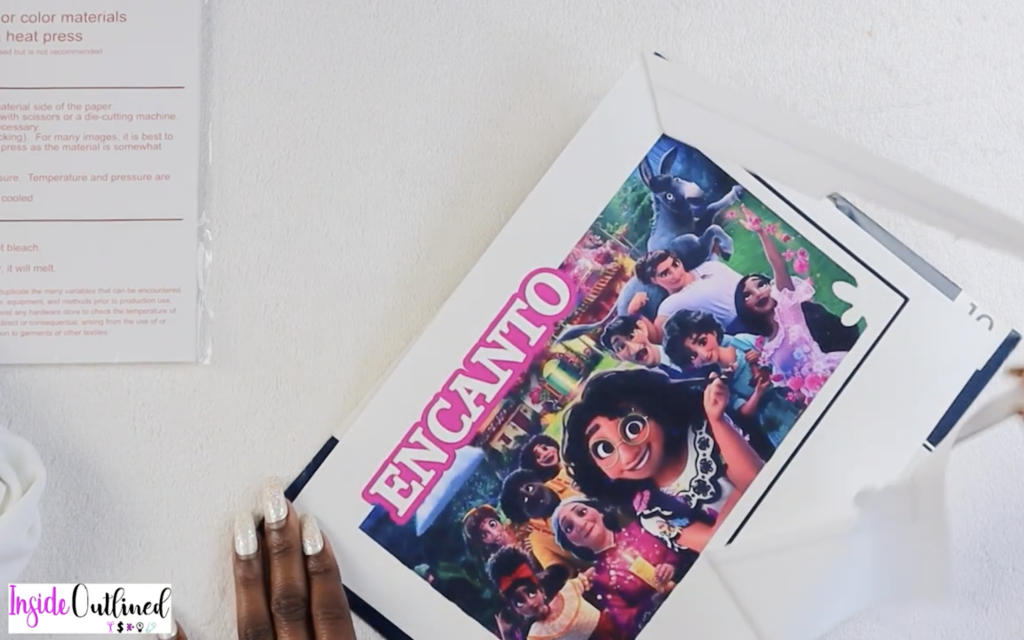
Take your heat press or Cricut EasyPress and press your shirt for about 5 seconds.
(If you are using a Cricut EasyPress for this project, I set my machine to 350 degrees for 30 seconds.)
Let the shirt cool down a bit before adding the printable heat transfer paper to it.
Apply the DIY Encanto design to your shirt
Once the shirt is cool, place your Encanto design where you want it and lay the parchment paper on top of it. Use your heat press or Cricut EasyPress and press for 30 seconds.

Peel the parchment paper off of your design and that is all.

Just like that, you have created your very own DIY Encanto shirt that can be used for birthday parties or just because. Check out the video instructions.
How to care for your DIY Encanto shirt
Instructions for the Starcraft Inkjet Printable Heat Transfer Paper say to wash the shirt inside out and to use cold water when washing the shirt.
The instructions also say to NOT use bleach when washing your shirt and to dry on low or to hang dry your shirt.
Finally, you should not iron directly onto your design so that it will not melt.
If you have any questions or comments about how to print then cut your own DIY Encanto shirt, leave them down below.