This post may contain affiliate links. This means if you click a link and purchase an item that I recommend, I will receive an affiliate commission at no extra cost to you. All opinions are my own.
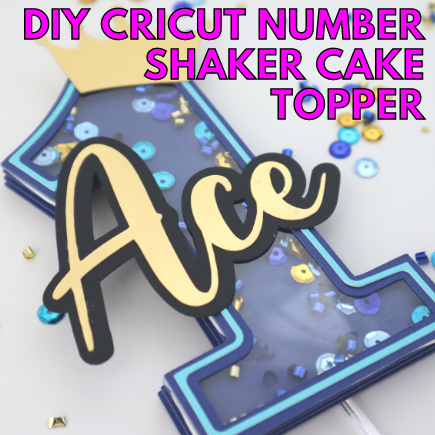
In this tutorial, I will be showing you how to make this Cricut Number Shaker Cake Topper. This DIY Shaker Cake Topper Tutorial is very easy to follow along with and is perfect for any birthday or other celebration.
You will definitely want to save this 3D shaker cake topper tutorial for future reference. Watch the full video below.
Supplies you’ll need:
- Cricut machine
- Cardstock
- Bearly Art Glue
- Sequins
- Clear acetate
- Double-sided foam tape
- Double-sided tape
Jump to Sections in this Post
Creating Your Cricut Number Shaker Cake Topper Design
Open Cricut Design Space and start a new project.
Click on the Text button and type the name that you want.
Make the name about 3 inches wide or whatever your preference is.
The font I used for this Cricut Number Shaker Cake Topper is the Amelya font that I got from Dafont.com.
Next, click the Weld button to weld your text together.
Go up top and use the Offset tool to create an offset around your name.
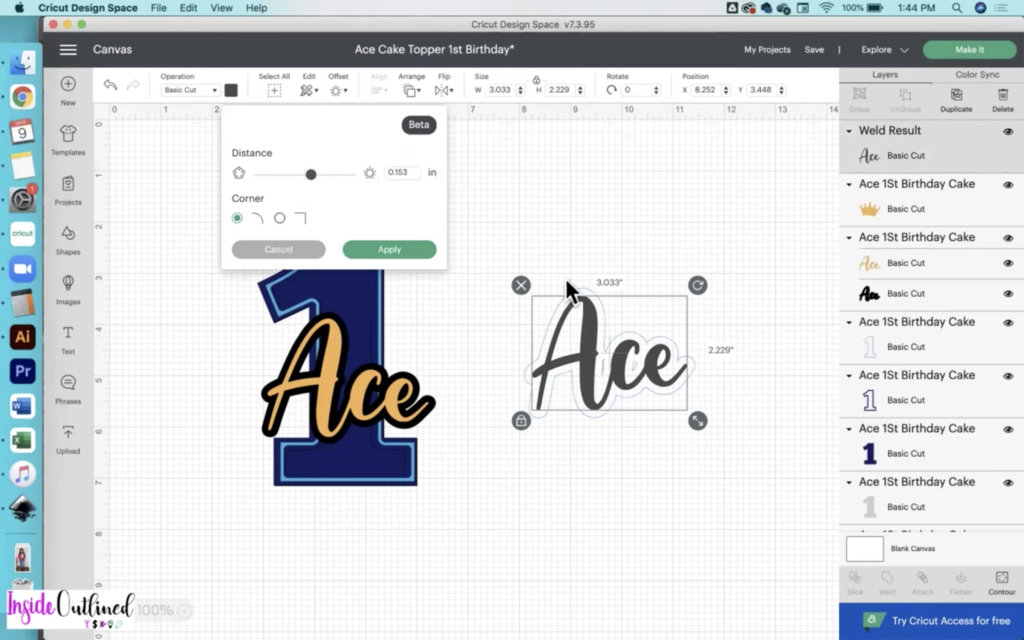
Click the Apply button when your offset looks the way you want.
Find a crown clipart online and bring it into Cricut Design Space or if you already have a crown uploaded to Design Space, add it to this project.
You can also search within Cricut Design Space to see if there are any paid or free crowns to use for your project.
Click the Text button and type the number 1.
Change the font of your number 1 to Chunk Five and I also got this font from Dafont.com.
Change the size of your number 1 to be 5 inches in height.
Use the Duplicate button to make 5 duplicates of your number 1.
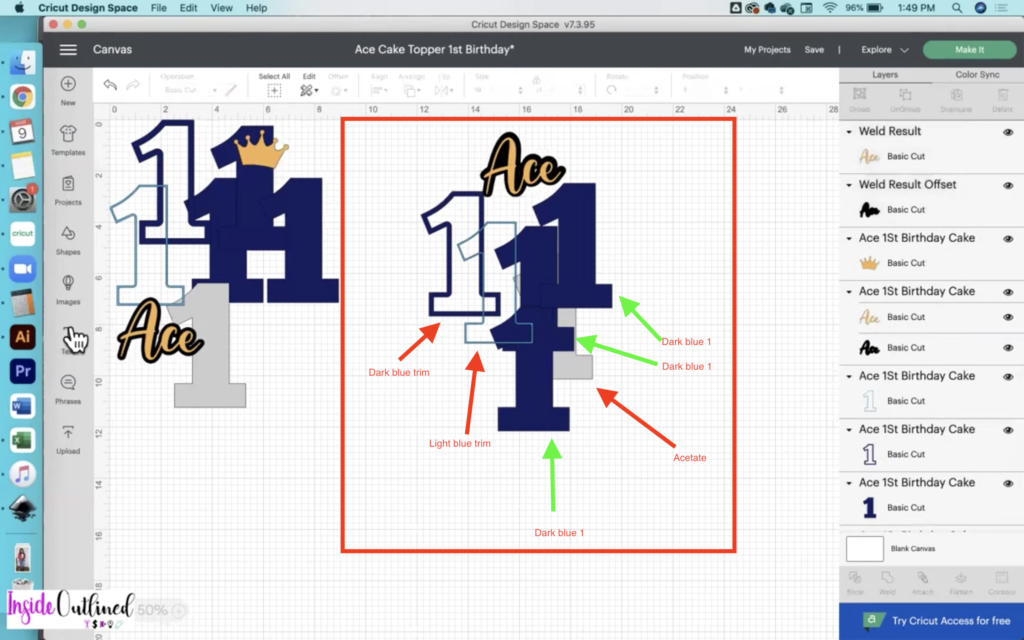
All the pieces you need are shown in the image above in the red box.
3 of your duplicates should be dark blue and 1 of the duplicates should be light grey which will be your acetate layer.
The last duplicate will be used to create the trim for your number.
Use the Offset tool and slide the dial to the left to create a negative offset. My offset was -0.181.
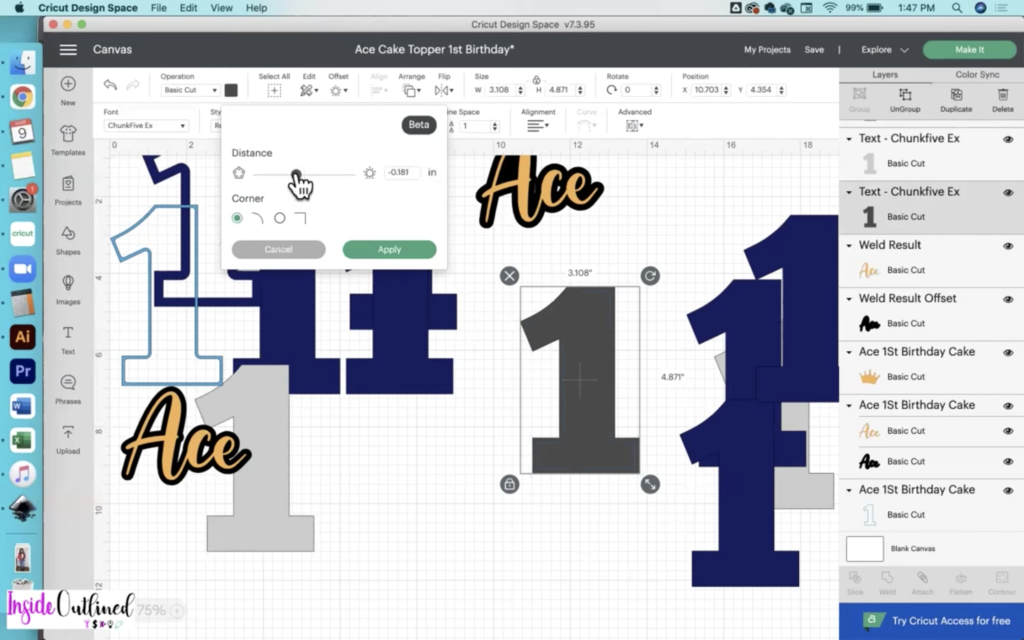
Click the Apply button.
Select the number 1 and the new offset and then click Slice.
Keep the new layer that’s the trim and delete the other piece.
Now take your trim layer, click the Offset tool and then make your offset -0.063.
Click the Apply button.
Change your colors to your liking.
Cutting Your Cricut Number Shaker Cake Topper
Now take your cardstock and acetate and load it onto your Cricut mat and use your Cricut machine cut out the various pieces for your Cricut number shaker cake topper.
Assembling Your Cricut Number Shaker Cake Topper
Take your 3 dark blue number 1s and add some double-sided foam tape squares to them.

For the number 1 that’s on top, add the double-sided foam tape all the way around the outer edge.
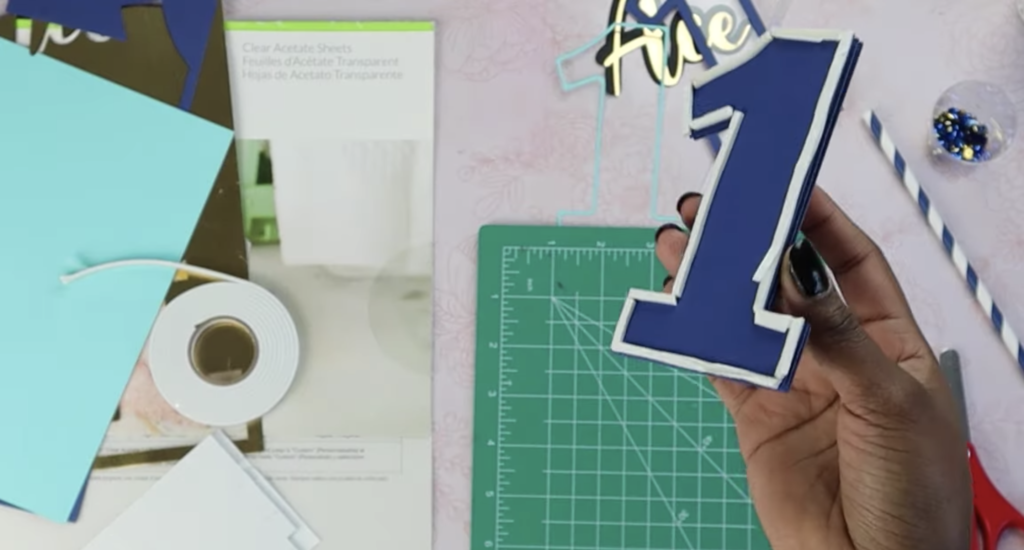
Next, add your confetti and sequin inside of the cake topper within the double-sided foam tape layer.

Once you have all of your confetti and sequin inside of the cake topper, peel the paper away from your double-sided foam tape and add your acetate layer on top.
Add your dark blue trim layer to the top of the acetate using the Bearly Art Glue.

If any of your double-sided foam tape is sticking out, use your weeder to just push the tape over a little bit.
Take your light blue trim layer and use the Bearly Art Glue to glue it on top of the dark blue trim.
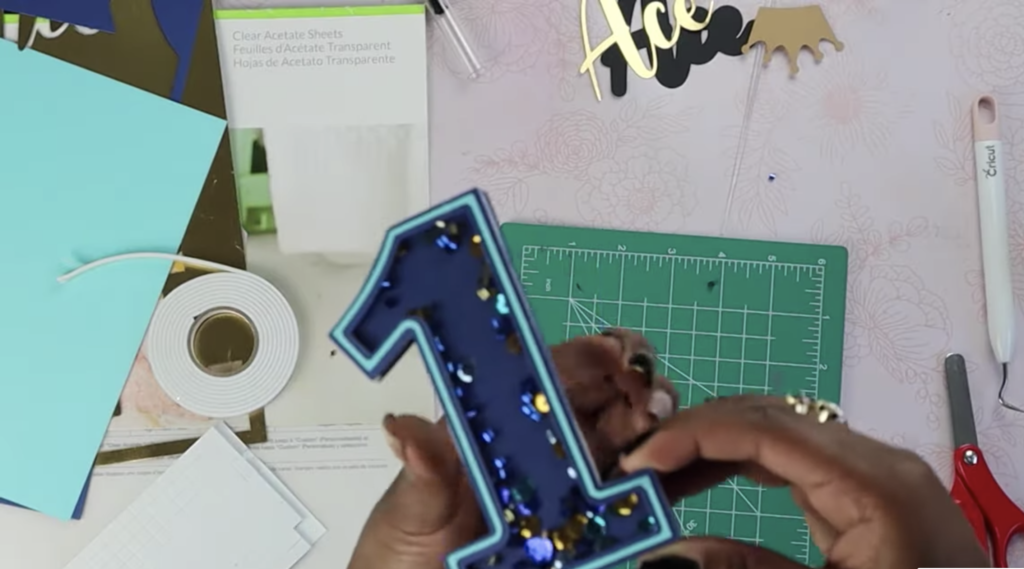
Take your glue and glue your name to the offset of the name.
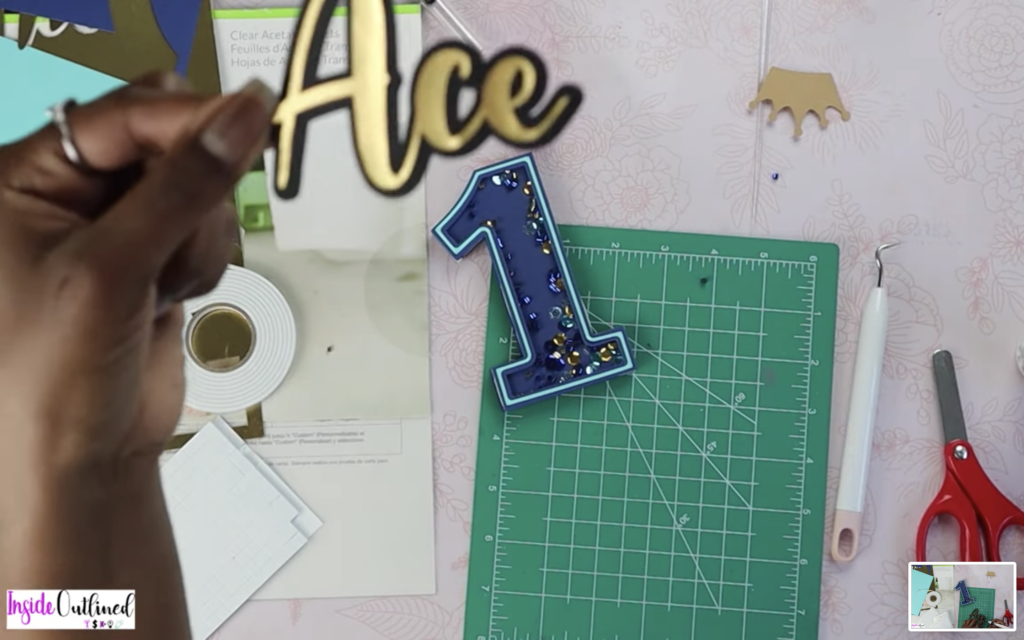
Take your hot glue gun and glue the name to the center of the cake topper.
Take the hot glue gun and glue the crown to the top of your cake topper.
Flip your cake topper over and then add the plastic stick to the backside.

And that’s all for creating your Cricut Number Shaker Cake Topper. I hope you enjoyed this diy cake topper tutorial. If you have any questions, please leave them in the comments below.


