This post may contain affiliate links. This means if you click a link and purchase an item that I recommend, I will receive an affiliate commission at no extra cost to you. All opinions are my own.
Making Cricut stickers is one of my favorite projects. I love planners and love being able to make my own planner stickers. I also love making stickers for holidays to give to my nieces and the little ones in my life. That’s why I’ve put together this post on Cricut Stickers, the Valentine’s Day edition.
Before we jump into the tutorial I want to answer some frequently asked questions.
FAQs
Jump to Sections in this Post
- Can you make stickers using a Cricut machine?
- Which Cricut is best for stickers?
- How does making stickers with your Cricut work?
- What’s the maximum size of print then cut for stickers?
- What type of printable sticker paper is best for Cricut stickers?
- What’s the best printer to make Cricut stickers?
- What material should I choose for making Cricut stickers?
- What is the black line around my Cricut stickers?
- What color paper can I use to make stickers?
- Should I turn the bleed on or off?
- How do I make my Cricut stickers round?
- Don’t forget
- Step 1: Download then Upload the SVG Files
- Step 2: Resize your Cricut stickers
- Step 3: Add a guideline to your canvas
- Step 4: Duplicate your Cricut stickers
- Step 5: Attach your Cricut stickers
- Step 6: Print your Cricut stickers
- Step 7: Cut your Cricut stickers
Can you make stickers using a Cricut machine?
Yes, you can make stickers with your Cricut machine. This blog post will outline how you can do that.
Which Cricut is best for stickers?
The Cricut Explore machines and the Cricut Maker can print then cut; the Cricut Joy cannot print then cut, it can only cut and draw.
How does making stickers with your Cricut work?
You make stickers with your Cricut machine using the print then cut function. There are 3 ways to tell your Cricut to print then cut. You can select multiple svg files on your canvas and then click the Flatten button, you can change the fill to pattern and then change the print type to whatever color or pattern you want or you can upload a jpg or png file and save it as a “Save as a Print Then Cut image” file.
What’s the maximum size of print then cut for stickers?
With your Cricut machine, you can only print then cut for the following sizes: 9.25 in × 6.75 in or 6.75 in x 9.25 in. A standard letter size sheet of paper is 8.5 in x 11 in.
What type of printable sticker paper is best for Cricut stickers?
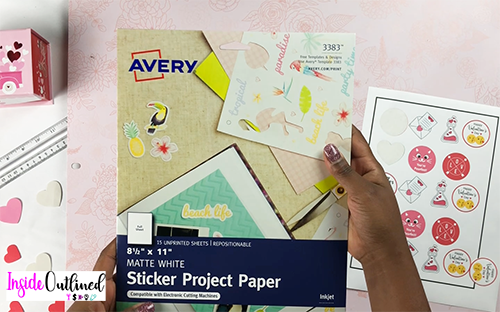
I like to use the Avery Printable Sticker Paper to make my Cricut stickers because I can find it at my local Walmart and it’s typically cheaper than other printable sticker paper. However, you can use whatever type of printable sticker paper you can find. You may have to adjust your Cricut material accordingly to cut out your stickers. Also, with the Cricut Explore machines, you can only print and cut on matte paper. With a Cricut Maker, you can print on glossy and matte paper.
What’s the best printer to make Cricut stickers?
To be honest, I’m not sure if there is a “best printer” that you can use to make your Cricut stickers. I have a Brother inkjet printer that is discontinued and it works ok for my print then cut needs. I would suggest you do some research to determine which printer works best for your stickers. If you don’t have a printer at home, you can save your project and take it to FedEx Office, Office Depot or Staples. To save your stickers to have them printed for you, keep reading to the “Print your stickers” section.
What material should I choose for making Cricut stickers?
With the Avery Printable Sticker Paper that I use to make my Cricut stickers, I use the “Sticky Note” material to cut my stickers. Depending on the printable sticker paper that you use, you may have to use some other material. Every time I’ve used the “Printable Sticker Paper White” material, Cricut would always cut my stickers all the way out of my paper so I would have individual stickers and not peel them from one sheet.
What is the black line around my Cricut stickers?
The black line that will be printed around your design is called the registration marks or box and tells the Cricut where to cut.
What color paper can I use to make stickers?
When it comes to print then cut, you can only use white paper if you’re using Cricut Explore machines. If you have a Cricut Maker, you can print then cut on any color paper.
Should I turn the bleed on or off?
It’s best that you turn the bleed on when printing and cutting with your Cricut machine so that you will get a nice clean cut around your design. If you don’t, the circle may slightly cut into your design a bit. You can test making stickers with and without the bleed on to see which you like best.
How do I make my Cricut stickers round?
To make your stickers round, add a circle to your canvas, right click to send it behind your design and then select your design and the circle and click the “Flatten” button.
Don’t forget
- You have to print from Design Space. You cannot print from some other software and expect the Cricut machine to cut the stickers.
- Save your project as you are working in Design Space. Sometimes Design Space gets crazy and you can potentially lose all of your hard work.
- If you are making stickers from scratch, you must flatten your design so it cuts as one piece
You can watch the full video here:
Supplies you’ll need:
Step 1: Download then Upload the SVG Files
First you want to download the svg files from my Free Resource Library and then you want to upload it to Cricut Design Space. You can search for the file in my Free Resource Library by searching for “IO Valentine’s Day Stickers”. There are 12 individual sticker PNG files that you can use and I have also put all stickers into 1 PNG file that you can upload to Design Space.
For a more detailed post on how to upload svg files check out How To Upload SVG Files To Cricut Design Space.
Click the upload button

Click “Browse”
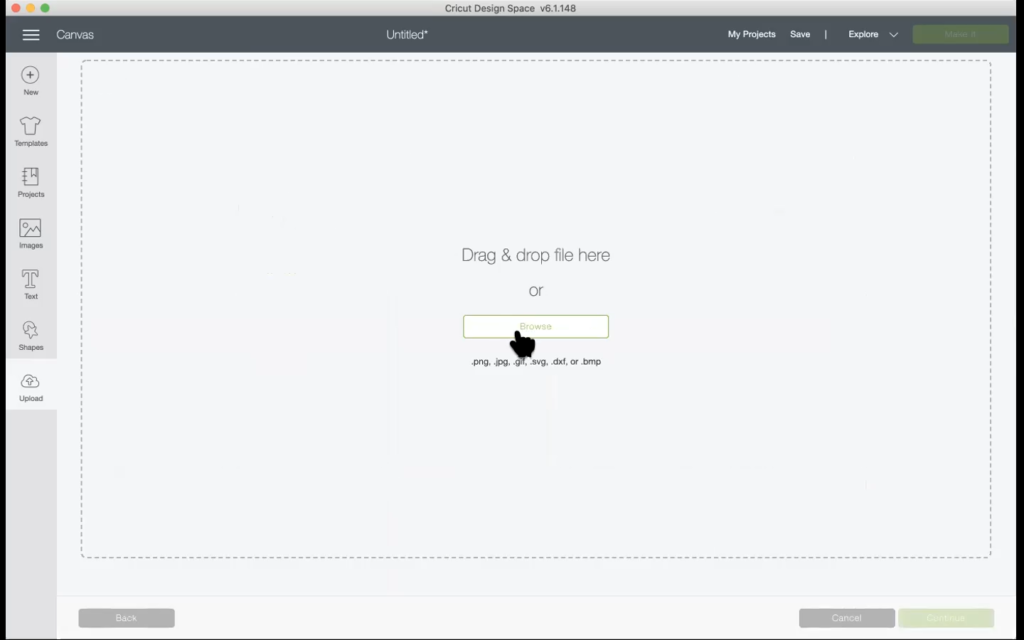
Select your image and then click “Open”

Click “Complex” and then click “Continue”

Erase the white background and then click “Continue”
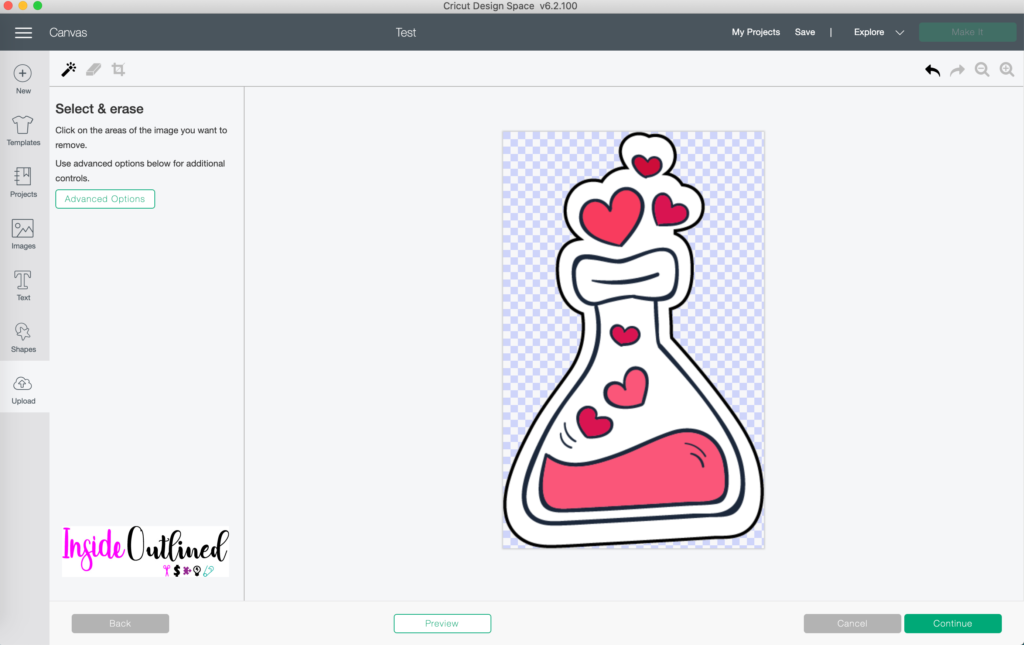
Click “Save as a Print Then Cut image” and then click “Save”

Select all of the images you want to upload and click “Insert Images”

Step 2: Resize your Cricut stickers
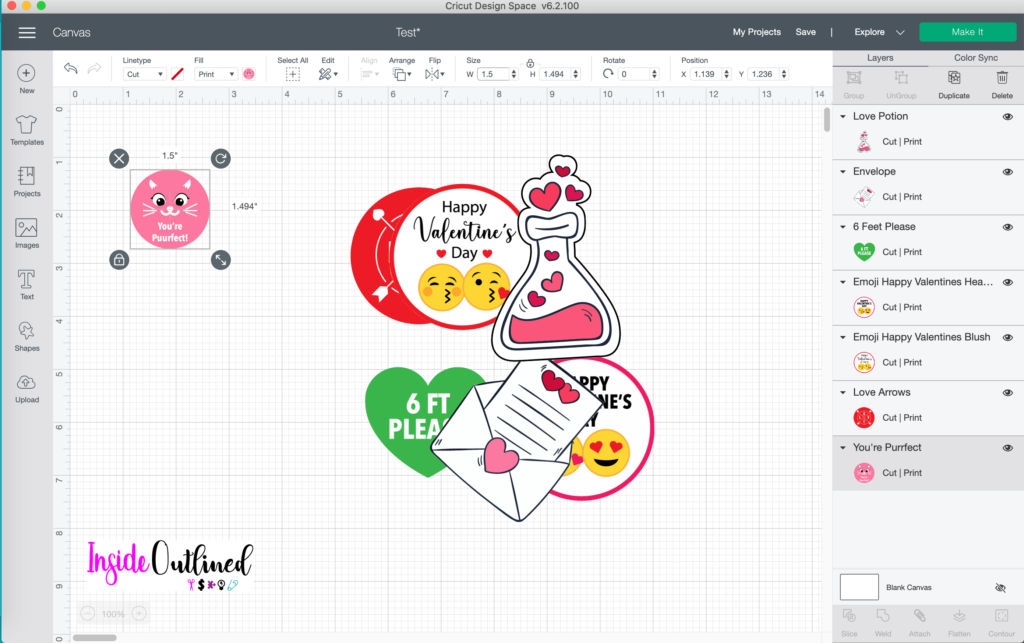
If you uploaded all the stickers as one file you will need to slice them individually. To learn how to slice check out this tutorial Cricut Tutorial: How To Slice. If you uploaded the images individually, you will need to resize them to be about 1.5 inches wide which is the typical width for stickers. For the love potion sticker, you can make the height 1.5 inches.
Resize your images to be 1.5 inches wide and 1.5 inches in height for the love potion bottle
Step 3: Add a guideline to your canvas
Cricut only allows you to print and cut a specific size which is 9.25 in x 6.75 in or 6.75 in x 9.25 in. So you can add a square to your canvas, unlock the size of the square, and input the width and length as indicated above. If you want your stickers to print landscape or horizontal, add the dimensions 9.25 in x 6.75 in. If you want your stickers to print portrait or vertical, add the dimensions 6.75 in x 9.25 in. If your guideline is on top of your stickers, right click on your guideline and send it to the back.
Send guideline to the back

Step 4: Duplicate your Cricut stickers
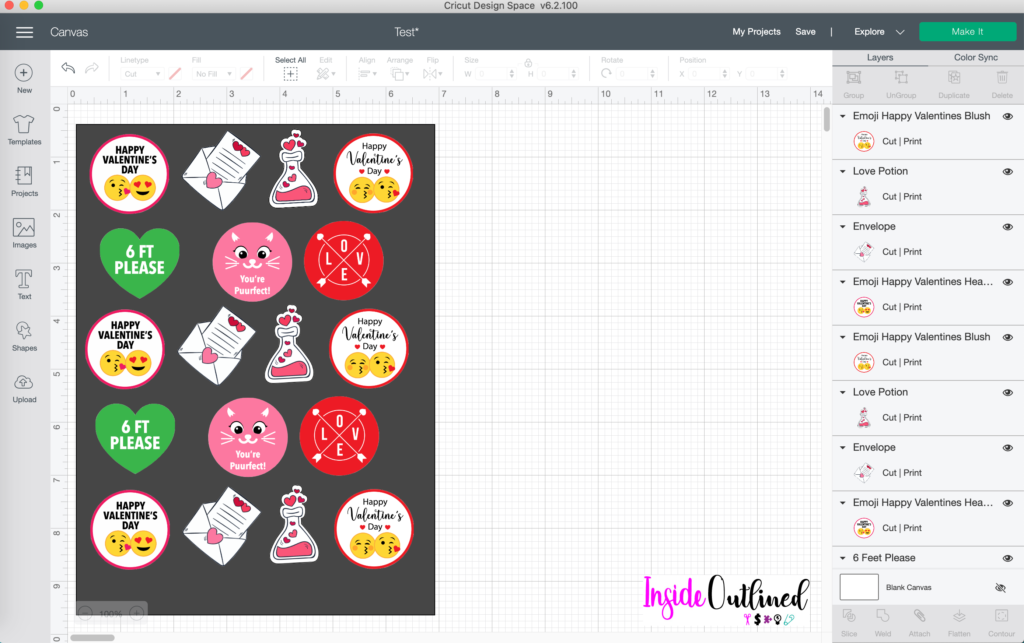
With your guide on your canvas, you will duplicate your stickers and place them on your guideline so you can make the appropriate amount of stickers.
Select all stickers and right click and then “Duplicate”
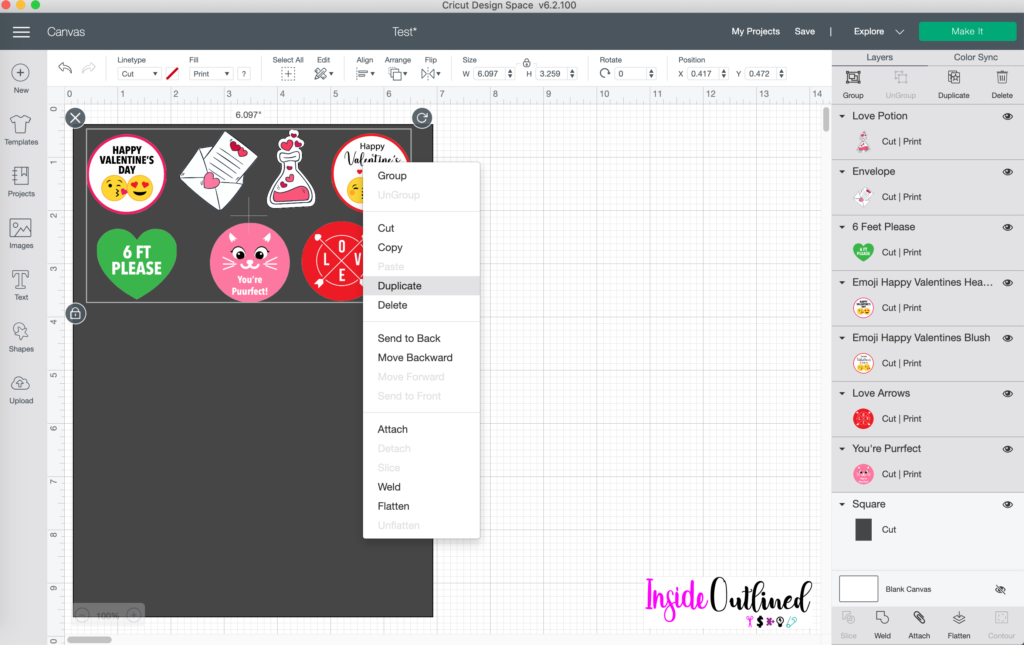
All of your stickers
Step 5: Attach your Cricut stickers
Once you have all of your stickers where you want them, delete or hide your guideline. To make sure that all of your stickers print and cut the way they appear on your screen, select all of your stickers and then click the “Attach” button. Make sure you save your stickers because sometimes Cricut acts a little slow and you can lose your whole project if you have to restart Design Space.
Attach your stickers

Step 6: Print your Cricut stickers
Click the “Make it” button. You will notice a black square or rectangle around your design. This black box is called the registration marks and tells the Cricut where your design is located. Click the “Continue” button and then put your printable sticker paper into your printer.
Preview of your stickers

You will now see a screen where you can choose “Send to Printer” or “I’ve Already Printed”. If you choose “Send to Printer”, a print Setup screen will pop up and you can choose your printer, the number of copies you want to print, whether you want the bleed on or off, and if you want to Use System Dialog. I recommend turning on the bleed and using your System Dialog.
Send to Printer

Turn bleed on and “Use System Dialog” and click “Print”
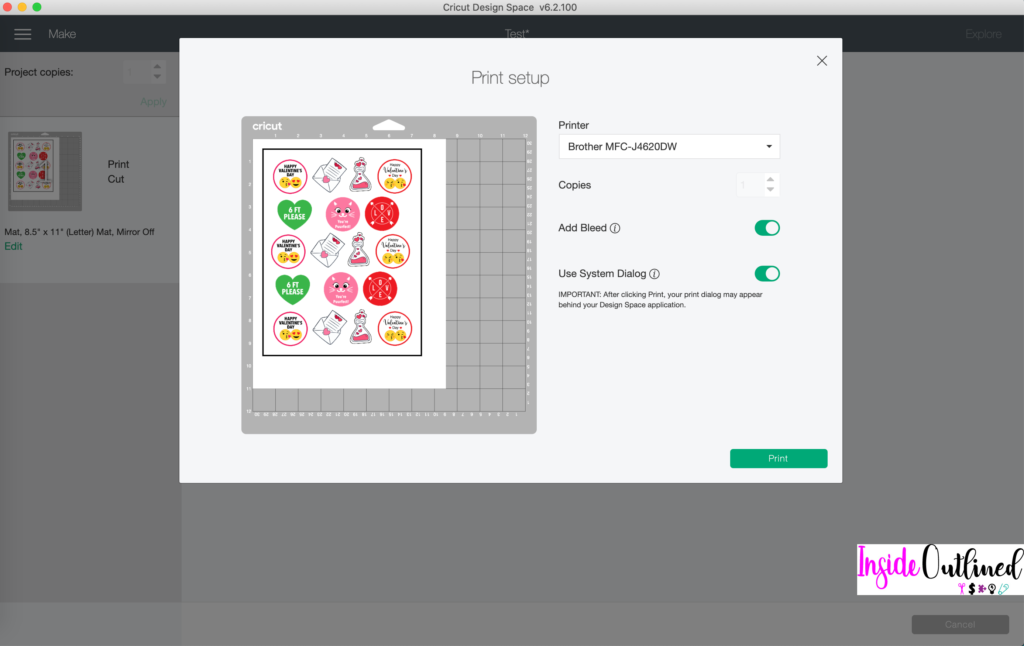
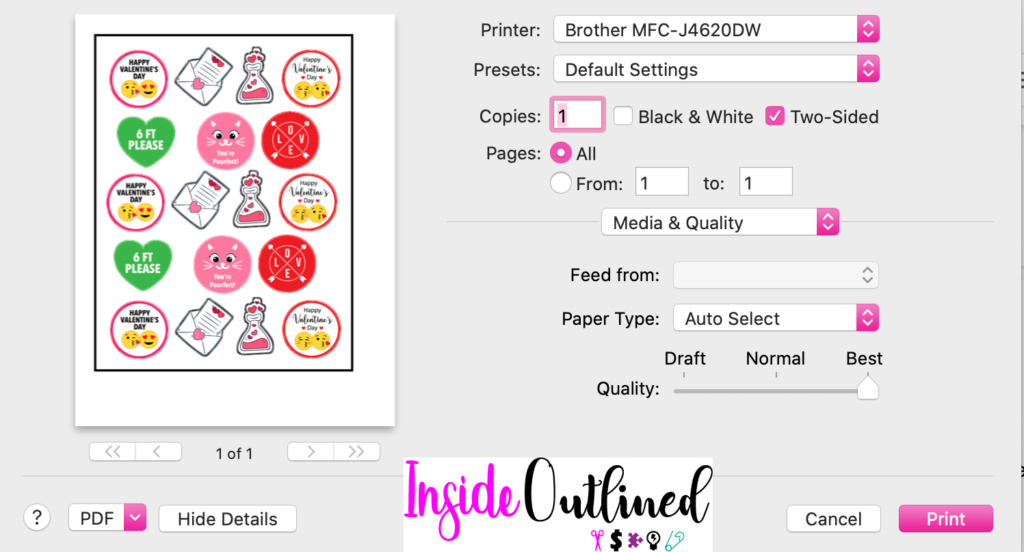
Click the Print button, minimize your Cricut Design Space screen to see your printer settings. Make sure your printer is chosen at the top and then change the quality to “Best” and then click print.
Change Quality to Best
If you’ve already printed your stickers, you will then choose a material. If you’re using the Avery Printable Sticker Paper you will need to choose “Sticky Note” from the materials.
The Avery printable sticker paper
If you don’t have a printer at home and you want to take your design to FedEx Office, Office Depot or Staples to have them print your stickers, when your printer settings come up, choose “Save as PDF” this may be in the bottom left corner of your screen and then give the file a name. The black registration box will be printed on your sticker paper and you can load the sticker paper into your Cricut machine and cut out your design using the instructions above.
Step 7: Cut your Cricut stickers
After your stickers have been printed, you will be instructed to choose a material. If you’re using the Avery Printable Sticker Paper you will need to choose “Sticky Note” from the materials. Next put your sticker paper on your Cricut mat, load it into your Cricut machine and press Go.
Make sure the dial on your machine is set to custom and type and select “Sticky Note”

Load your paper on your mat and cut
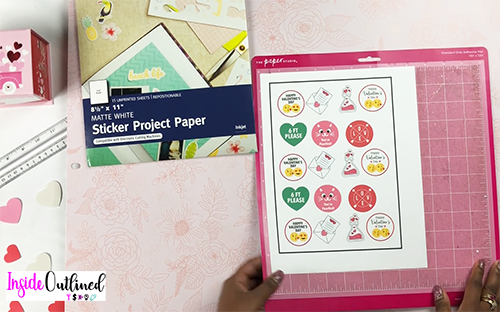
Use your stickers
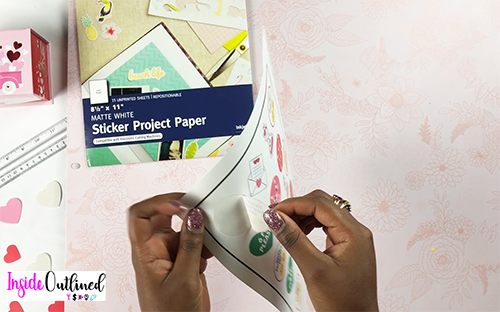
I hope you’ve enjoyed this post on Cricut Stickers, the Valentine’s Day edition. If you have any questions, just leave them down below and I’ll get back to you ASAP. Happy Valentine’s Day!

