This post may contain affiliate links. This means if you click a link and purchase an item that I recommend, I will receive an affiliate commission at no extra cost to you. All opinions are my own.
When you first get your Cricut machine, it can be a bit intimidating. I didn’t use my Cricut for the first 2-3 months after I bought it. I was afraid of messing up a design or forgetting to mirror when cutting HTV (although I still forget to do that from time to time).

This post is part of a series that I will be unveiling over the next few months. The series is designed to help you use your Cricut machine and answer the most researched “How to” questions. Sign up to my email list to find out more about this Cricut series.
Curving text in Cricut Design Space is very easy as you will see. Watch the video below or scroll down to see the written instructions.
Jump to Sections in this Post
Curving Text In Cricut Design Space
In this post I will be showing you how to curve text in Cricut Design Space.
1.Type some Text
First you want to type some text. I typed up my blog name “InsideOutlined”.
2. Click the Curve Button
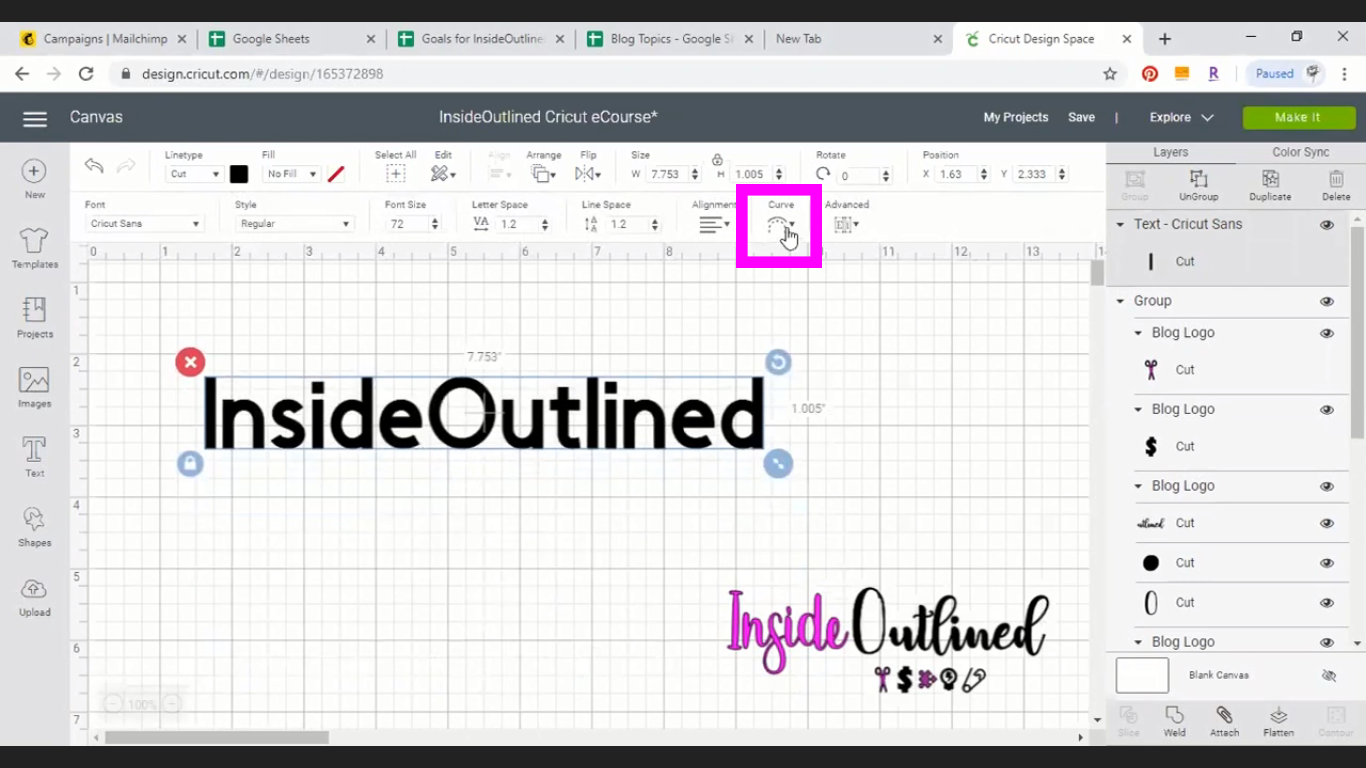
Click the curve button and slide the dial to the right to curve text downward or slide the dial to the left to curve text upwards.
And just like that you learn how to curve text in Cricut Design Space.
