This post may contain affiliate links. This means if you click a link and purchase an item that I recommend, I will receive an affiliate commission at no extra cost to you. All opinions are my own.
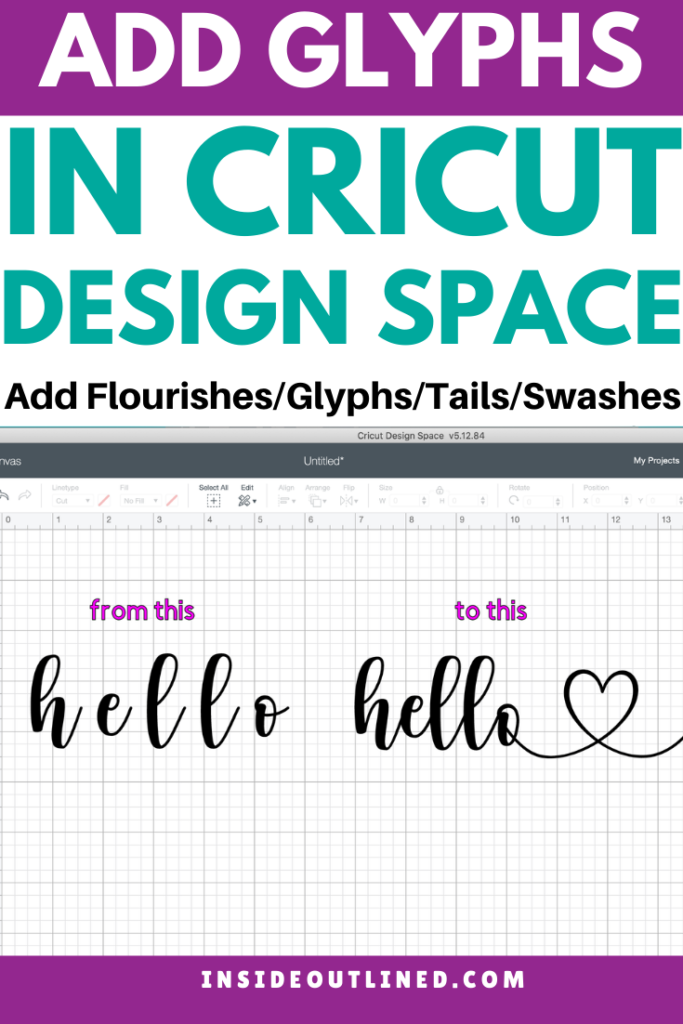
Hi guys so today I will be showing you how to add glyphs in Cricut Design Space so you can spruce up all of your Cricut projects. Glyphs are sometimes called flourishes, tails, and swooshes as well. Glyphs or flourishes add a touch of elegance and fanciness to any design.
The font I used in this tutorial is the Hello Honey font from Dafont.com.
Jump to Sections in this Post
A few of your glyph questions answered:
What are glyphs?
Glyphs are flourishes, tails, swirls, swashes, or curls that you can add to your fonts. These additions to your fonts add elegance and creativity to your SVG designs.
How do you find glyphs?
You can find fonts with glyphs on Dafont.com or you can purchase fonts that have glyphs from Etsy, Creative Market, or other places.
How do I access glyphs on a Mac computer?
To access glyphs on a Mac, go to the Finder, Click Applications and then scroll to find the Font Book. Open the Font Book and click on the Font that you want to use. Then scroll and find the glyph you want to use.
How do I access fonts on a Windows computer?
To access glyphs on a Windows, go to the Start button and scroll until you find the Character map.
I will be showing you three different ways to add glyphs and flourishes to you fonts – the first way I will show you is using Adobe Illustrator and then I will also show you using Cricut Design Space and finally I will show you using Inkscape which is a free software that is very similar to Adobe Illustrator.
In this tutorial I used my Mac computer to show you how to add glyphs in Cricut Design Space, but I also provide instructions on how to do it with your Windows computer.
Install the Hello Honey Font
Before you can add glyphs to your text, you need to install a font that has glyphs.
My favorite font and the font I’ll be using in this tutorial is the Hello Honey font from Dafont.com.
Step 1 Click the “Download” button to download the Hello Honey font from Dafont.com. Save the font where you want it on your computer/laptop.
Step 2 Unzip the Hello Honey folder by referring to the Mac or Windows PC instructions below.
MAC
To unzip a folder on a Mac, double-click on the folder, and a new folder will appear.
Double-click on the OTF or TTF file and when the font pops up, click on “Install” or “Install Font“. It doesn’t matter if you choose the OTF or TTF file.
WINDOWS PC
A. To unzip a folder on a Windows PC, right-click on the folder and click “Extract All”
B. A popup window will open. Make sure the font file is saved where you want it and then click “Extract.”
C. A new window will pop up showing the files within the folder. You will focus on the OTF or TTF file. It doesn’t matter which one you choose.
D. Open the Control Panel and type “font” in the search bar.
E. Click “View installed fonts.” With the folder open that contains your OTF or TTF file and the installed fonts window open, drag the OTF or TTF over to the installed fonts window.
How to Use Glyphs in Cricut Design Space Using Adobe Illustrator
Step 1 Open Adobe Illustrator and open a new document.
Step 2 Go over to the Advanced Toolbar on the left side and click the “T” which is the Type tool.

Step 3 Drag the cursor on your artboard and type the word “hello”.
Step 4 Go back to the Advanced toolbar and click on the “Selection tool” (The arrow in the top left corner of the Advanced toolbar) and
Step 5 Go over to the Properties panel on the right side and under Character, click the dropdown menu and change your font to the Hello Honey font – again this font is from Dafont.com.

Step 6 Increase the size of your font.
Step 7 Now go up to the “Type” window at the top of the screen and then click “Glyphs“.
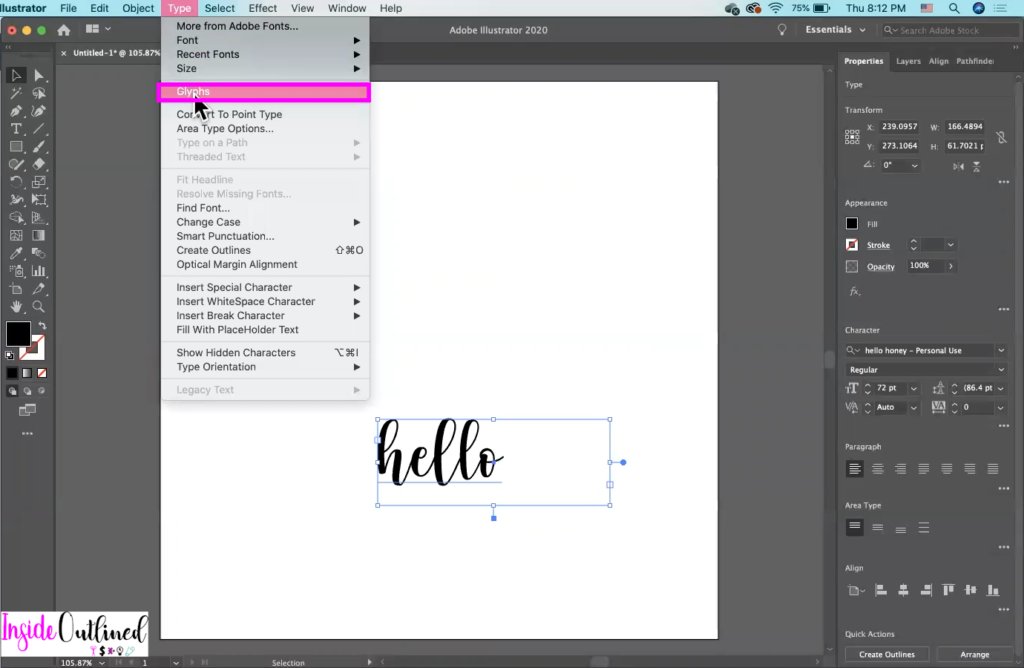
Step 7 Change the “O” to use one of the glyphs that has a heart on the end.
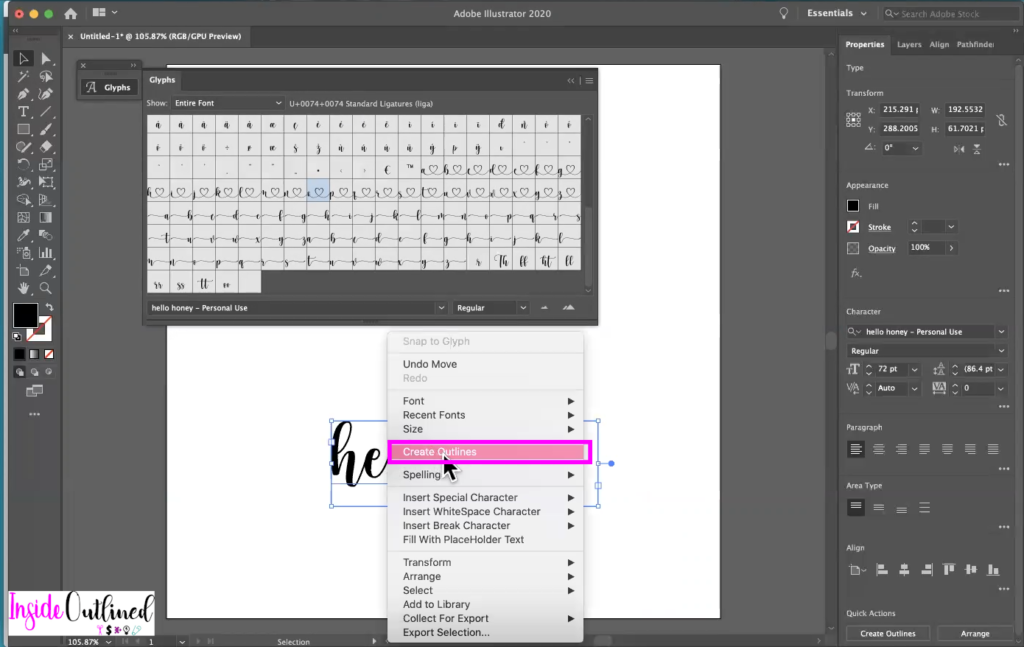
Step 8 Double-click and remove the first “O” and then find the “O” with the heart on the end and just double-click on that.

Step 9 Right-click and then click “Create outlines”. This changes your text to an object or shape.
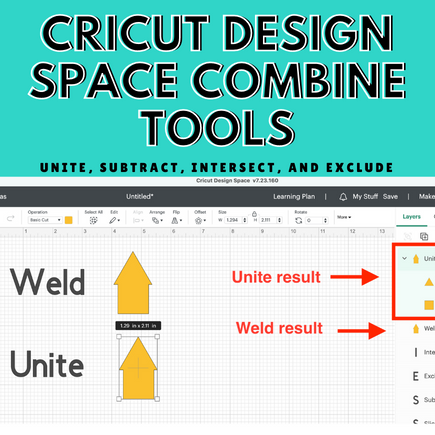
Step 10 Go over to “Pathfinder” on the right side and then click the “Unite” icon and what that does is basically weld all of the letters together and now when you bring this SVG into Cricut Design Space, it will cut as one layer.
So that’s how you add glyphs in Adobe Illustrator.
How to Use Glyphs in Cricut Design Space
Next we will be moving over to Cricut Design Space.
Step 1 Click the Text tool on the left panel and type the word “hello”.
The default font will be “Cricut Sans”
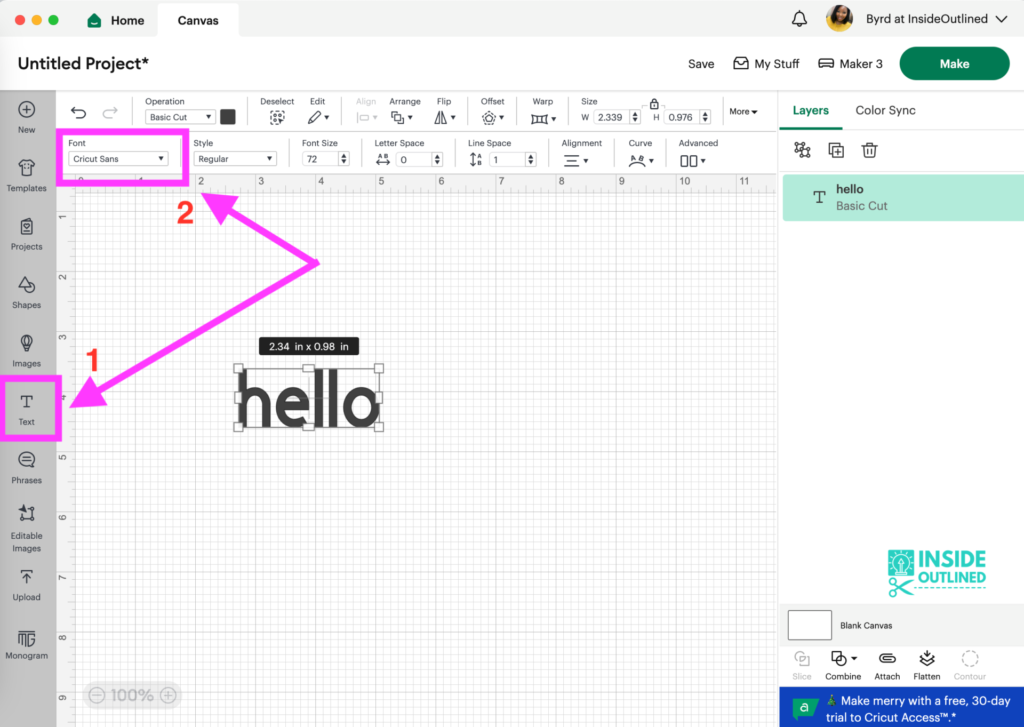
Step 2 Click the dropdown for the Font and click the “Hello Honey” font.
Step 3 Right-click on your text and click “Ungroup” to separate your letters.
Step 4 Open the Finder winder and click Applications and up the Font Book and I am using a Mac computer so all of my fonts are stored in the Font Book. To get to the Font Book, click on the Finder and then click Applications and then scroll down to Font Book.

Step 5 If you’re using a Windows computer you will have a Character Map and the process will be the same as using a Mac and Font Book. To find the Character Map, click on the start button and then search for Character Map.
Step 6 Going over to your Font Book, you want to use the “Hello Honey font. So just scroll through until you find the “O” with the heart on the end that’s a glyph.
Step 7 Now click on that “O” with the heart at the end and then click the Command key and hold down the “C” at the same time to copy the “O” with the glyph.
Step 8 If you’re using a Windows computer you will hold down the Control key and “C” at the same time to copy the “O” with the glyph.
You can also go to the top of the window and click the “Edit” button and then click “Copy”.

Step 9 Then you want to go back over to Cricut Design Space and then click the text box again and paste the “O” with the heart or glyph into that text box. You can paste by holding down Command “V” or Control “V”. You can also go to the top of the window and choose Edit and then paste.
Step 10 In the text box it looks like a little square but you can see the “O” with the glyph at the end.
Check out my Amazon Storefront where I list my favorite Cricut products in 1 place: https://www.amazon.com/shop/insideoutlined

Step 11 Now make the “O” with the glyph a bit bigger and pull it up and then delete the first “O” and drag the “O” with the heart up with the other letters.
Step 12 Then select all the letters except the “H” and move them over until they’re overlapping, repeat the process of selecting the other letters and moving them over.
I used the left arrow key on my keyboard to do this but you can use your mouse to pull it over, but I just prefer to do it this way.
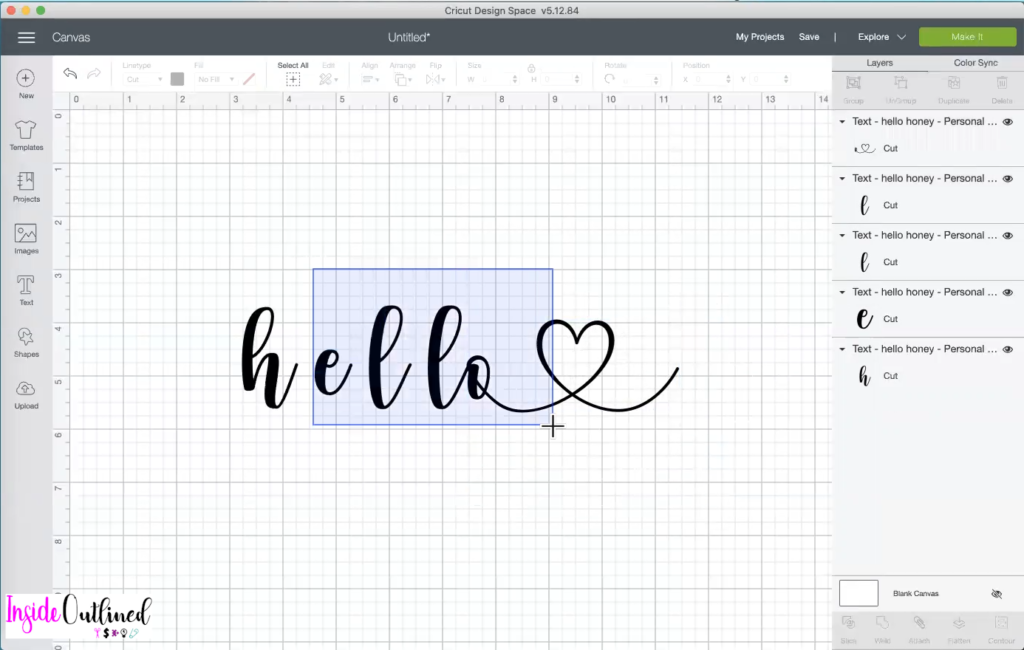
Step 13 Now that everything is touching, select everything and click the “Weld” button and that’s it.

How to Use Glyphs in Cricut Design Space Using Inkscape
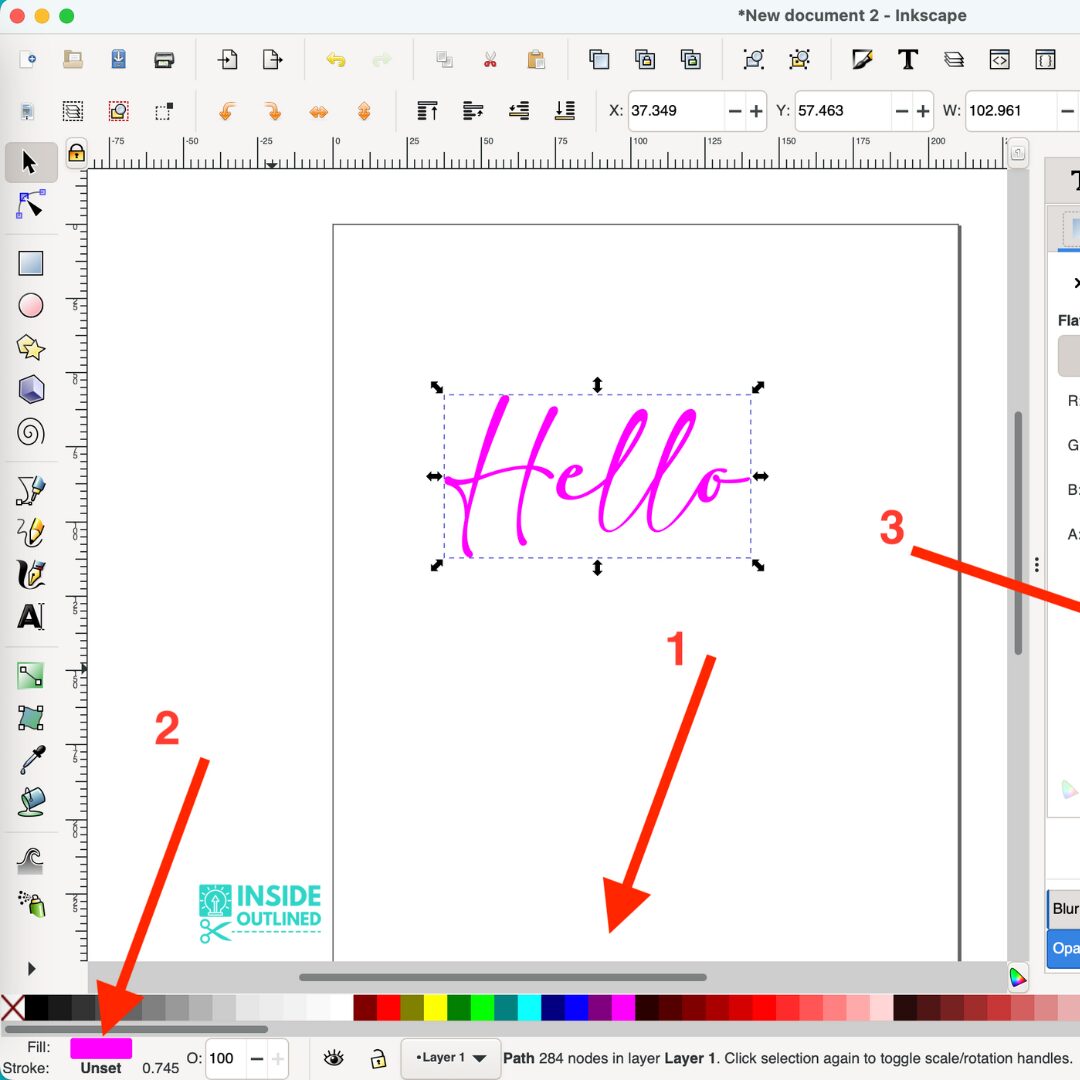
The last way I want to show you how to add glyphs in Cricut Design Space is in Inkscape; this software looks somewhat similar to Illustrator.
Step 1 First, go to the left panel and click the “A” which is the text tool and then drag it on your screen and then type “hello”.

Step 2 Then go up and choose the “Selection tool” and make your font a little bit bigger on your screen so that you can see it.
Check out my Amazon Storefront where I list my favorite Cricut products in 1 place: https://www.amazon.com/shop/insideoutlined
Step 3 Next, double click your text and select all of it and change the font to “Hello Honey”.


Step 4 So with Inkscape you have to use the Unicode Characters and so over on the right you will see where it says Unicode Characters and you will scroll down to “Hello Honey” and click it.
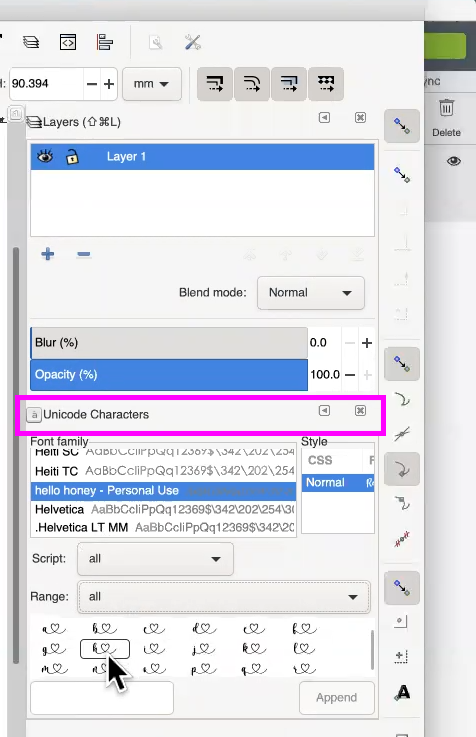
Step 5 Now you want to scroll again to find the “O” with the heart on it but what you need to do is to change the range to “All” and then you should be able to find that “O” with the heart.

Step 6 Select the “O” and then double click it and you will see a little box pop up. Copy that box using Command “C” if you have a Mac computer or you can use Control “C” if you have a Windows computer.
Step 7 Then double click in your font and remove the first “O” and then paste in the other “O” with the heart. You can paste by holding down Command “V” or Control “V”.

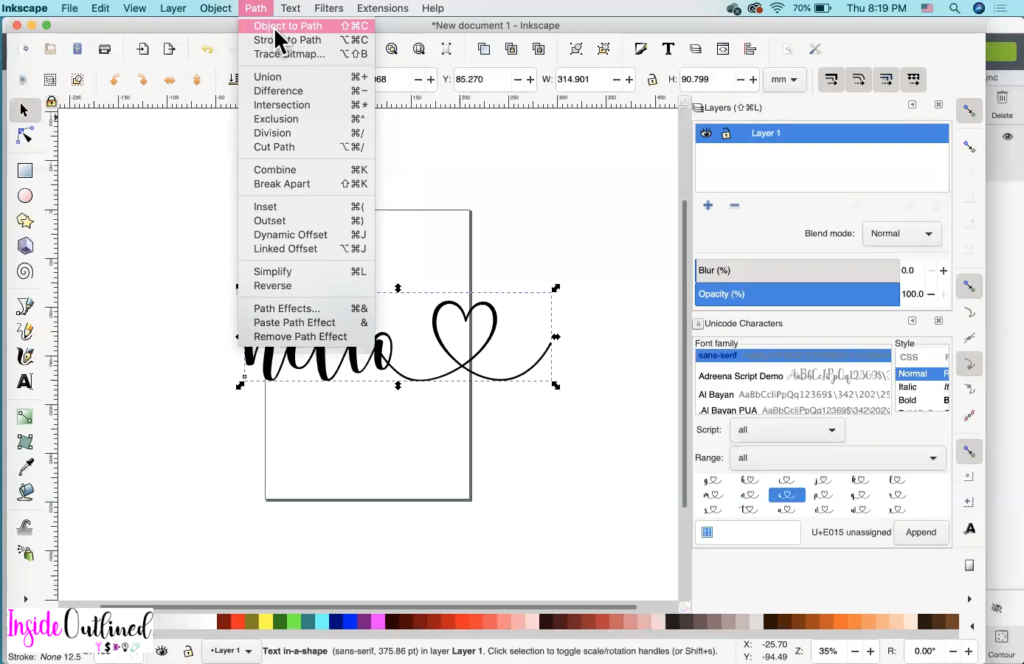
Step 8 Now you want to make sure your text is welded together so that when you bring it into Cricut Design Space it cuts as one layer. Go up top and click the “Path” button and then click “Object to path”.
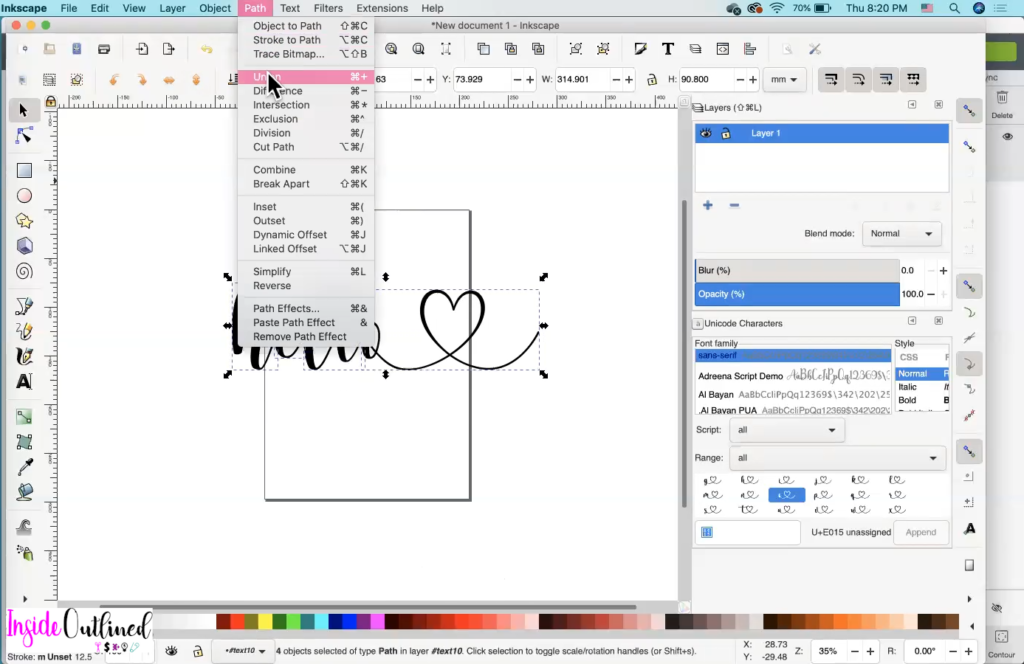
Step 9 Click the “Path” button again and then click “Union” and now your text should be one object.
Once a year I open enrollment to my Simplifying SVG Designs Inkscape course to teach you everything you need to know about using Inkscape to make SVG files.
Click here to read more about the Simplifying SVG Designs Inkscape course and join the waitlist.
So I have shown you three different ways to add glyphs to your fonts in Cricut Design Space to use for all of your different Cricut projects.
Check out my Amazon Storefront where I list my favorite Cricut products in 1 place: https://www.amazon.com/shop/insideoutlined
I hope this tutorial was helpful. Comment below and let me know what your favorite fonts are that have glyphs.
- Uploading Free Fonts to Cricut Design Space
- How To Curve Text In Cricut Design Space
- Free Cricut Fonts + Free Cheat Sheet
