This post may contain affiliate links. This means if you click a link and purchase an item that I recommend, I will receive an affiliate commission at no extra cost to you. All opinions are my own.
“Be strong and courageous, because you will lead these people to inherit the land I swore to their ancestors to give them.” Joshua 1:6 NIV
Who doesn’t love a good mug with a sassy/clever quote? Mugs are great gifts for yourself, and for family, friends, coworkers, etc.
Personally, I think mugs make people look like they’re productive and are about their business. Now while I know that’s not true and subjective, it’s just the way my mind works. Lol.
Here are some of my favorite mug sayings that I’ve seen:
- The struggle is real but so is Jesus
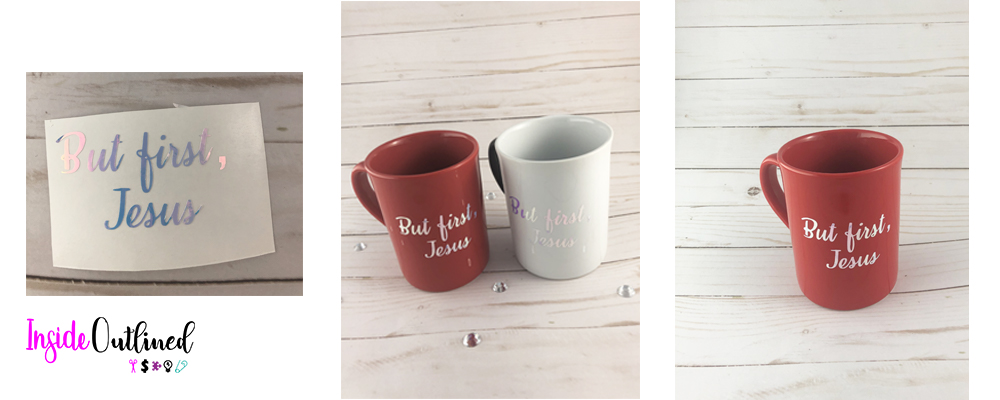
- But first Jesus
- I can’t adult today
- I love you a latte
- Not today satan
Here are some funny sayings that I’ve seen:
- It’s too early for you to say things
- Breakfast wine
- Super wife, super mom, super tired
- Starter fluid
Today I’m going to help you slash the price tag on those expensive mugs you see in the store and create your own cute mugs with your favorite sayings.
Jump to Sections in this Post
Best mugs to use
Ceramic mugs are the best mugs to apply vinyl to. These mugs have a smooth surface and aren’t porous. You can find ceramic mugs on Amazon as well as at stores like Walmart, Target and Bed Bath and Beyond.
Depending on the mugs you use, there will be different techniques for applying the vinyl. There are some mugs that are more round and others that are more square or rectangular.
Overview of process
The process for making your Cricut mugs with quotes is very simple. Upload the svg file to Cricut Design Space, resize the design to fit your mug, cut the design and apply it to your mug.
Supplies you’ll need:
- Vinyl
- Svg file
- Cricut machine
- Alcohol/lint free cloth
- Mugs
Step 1: Prep your mug

First you want to prep your mug by taking a coffee filter or lint free cloth and alcohol and cleaning your mug. A coffee filter removes the oil on the jar that comes from your hand and doesn’t leave lint behind like a paper towel or towel would.
Step 2: Upload the svg file

Next you want to upload your svg file to Cricut Design Space. If you’re unsure how to do this, check out my blog post How To Upload SVG Files To Cricut Design Space.
This design is available in my Free Resource Library.
Step 3: Resize your design and cut your vinyl
Resize your design to fit the size of your mug. You can use a ruler to determine the width and height you want your design. Click the Attach button in the bottom right corner so that your design will cut as it is shown on the screen.
Click Make it at the top right and click Continue. Load your mat into your Cricut machine and cut your design.
Step 4: Weed and apply your design
Next you want to weed your vinyl using your weeding tool from the Cricut tool set. Place your design where you want it on your mug. Use your scraper (also from your Cricut tool set) to firmly adhere the design to your mug.


I hope you enjoyed this tutorial on Cricut mug ideas. Don’t forget to like, share or comment on this post.


